Paper Source?! And graduation-card making?! AND Studio 5?! *pinch me*


If you know me, you know I'm a Paper Source fanatic. Before we were finally lucky enough to get a store here in Utah, I made a point of visiting the Bellevue, WA and Chicago, IL shops on a semi-regular basis. So when my awesome Studio5 producer, Stephanie, suggested I contact them to see if they wanted to be involved with my Graduation-card segment, I was delighted.

And scared!

This would be like being asked to give Oprah a call for the normal person. *gulp*

But I put on my brave shirt and reached out. To my complete delight, they were not only on board to provide cards from their store for my segment, but they also offered to send me additional products to work with when creating my handmade projects. Whaaaa?!

Livin' the dream, my friends. Livin' the dream!

So, it is with happiness that I share that collaboration with you today on Studio 5 at 1:00 PM mst. You can either tune in to channel five if you're in UT, or you can watch it stream on their website at the same time (1:00 PM mst). I'm immediately following the first commercial break. :)

The results of that segment? Well, I have five handmade cards to share, as well as links to some pretty awesome store-bought options. Let's do it to it!

Feeling Zen
I'm in love with zentangling! Have been ever since i was first introduced to it around four years ago. So when I spotted this smiling card at Paper Source, I decided to carpe my own diem and do a little doodling of my own!


This is the result. A 2014 money holder with a little zentangle flava.


To create this card, I simply traced the awesome number stencils from The Crafter's Workshop onto vellum using a Vellum Writer by Zig. I then added my doodles using the same pen. They're not perfect. Nor should they be. That's part of the Zen-charm.


If you look closely, I sprinkled grad-related words throughout—Shine on, celebrate, innovate, You've got this, soar, dream big, etc.


Once my doodling was complete, I stitched 3/4 of it to white cardstock. I then paused the stitching to load up my $$ and confetti, and then stitched the fourth side shut. Shake, shake, shake señora!


As promised on my Studio 5 segment, here are a few links to different zentangle tutorials:

* Pattern A
* Pattern B
* Pattern C

Time to Fly
Inspired by this Dr. Seuss classic, available at Paper Source...


I created my own up, up & away version, using a circle punch and the Dear Lizzy Lucky Charm pack of patterned paper.


For the balloon, I simply punched three circles of the same size.


And stitched them together down the center, which also adhered them to the card front (a paper from the Lucky Charm pack).


For the balloon's basket, I simply snipped a bitty muslin bag in half and stitched the top half to the card. It works perfectly for holding a small iTunes gift card. Sweet!


Cap-tastic
Inspired by the traditional graduation getup, I turned a 6x6 card on its side to create a paper cap.


2014 = Your Time to Shine
It's your year, grads! All of that reading, writing and arithmetic has paid off. So you can finally put those old flashcards to new use—make a grad tag, complete with a gift card holder!


BTW, I did a quick Etsy.com search and found some flashcards like mine here. You're welcome. ;)

To create the taped numbers, I simply pleated my gold washi (from Paper Source) and then added some stitching for reinforcement.


I wanted the flashcard to act as a tag, so I added a hole and little reinforcer sticker.


I then added a second tag (also from Paper Source) to both hide the backside of my stitching (gotta hide that messy backside) ;) and also provide a place to write a note to the grad.


2-0-1-4
Back to those fab The Crafter's Workshop number stencils. This time, I used my VersaMark pen to trace the numbers on patterned paper. I then sprinkled them with embossing powder and set to heat embossing. A bitty tassel and Stickle-adorned cap completed this little number.


Okay, you can officially turn those tassels...on your hats. ;) The card-making class of '14 is complete. Thanks for attending! I hope you were inspired by my ideas. If you find you need to purchase your cards this year, you'll find a brilliant Paper Source assortment here.

Congrats, 2014! This is your time to shine. Live it up!

Cheers!

Sweet Easter Treat (and it's even zero calories!)


You might say I have a crush on this Easter goodie. Nope. It's not Rainblow Eggs, but I share almost as much love for these, which is odd, considering they're not even edible.


What's inside this carton, you ask? Well, let's pry it open and take a peek.


It's EOS lip balm! Betcha thought E.O.S. stood for Evolution of Smooth (or you didn't know what it stood for, like me). Nah. Not here. Now it stands for Easter O' Style!

Available in many flavors and colors, these little lip eggs look so pretty filling up a paper carton. Surprise your best friend, coworkers, or other special gal. Or give that special guy a less-than-subtle hint. *wink wink* 


Of course, I'm all for adding a personalized touch, so I put some paper on the lid and added a washi-tape bow by pleating the tape. The gold rub-ons are by Maggie Holmes for Crate Paper, and they're some of my favs. They even worked ON washi!

The cute carton? Why, it's from Shop Sweet Lulu, an adorable online store. No time to order? No worries. Just slice a regular carton in half. Or, if you're feeling egg-stra generous, give someone 12 balms. I assure you they will not be disappointed to have a lifetime collection. 


I'm sharing this and many more out-of-the-basket Easter giving ideas this Thursday on Studio 5. If you're local (UT), tune in to channel 5 at 1. Or you can watch it stream online at 1:00 MST right here! Hope you'll hop on over. 

I'm always seeking fun and unexpected gift ideas. What gift would YOU put in this bitty egg carton?

Cheers! 

4 Fresh Crafting Trends (and a groovy giveaway!)

What's hot in crafting at the moment? So many amazing delights! I was tickled gold when Studio 5 asked me to share a few of the freshest CHA trends to make a splash at CHA (the Craft & Hobby Association trade show) earlier this month. Here's a look at the trends we're discussing on today's show:

1. Go for the Gold
It's a gold letter year, my friends. Metallics have been on the uprise for quite some time now, but it's clear gold is the leader of this pretty pack. 


Here are just a few of the brand new gold goodies I spotted at the show:

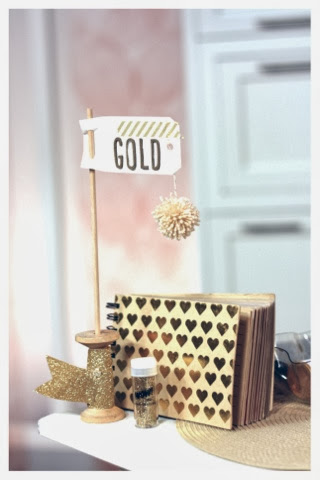
Gold washi tape, as part of the amazing DIY Shop release from American Crafts. This line includes many fun elements in a neutral palette, including a lovely assortment of metallic tapes.


Get your gold on in a glittered fashion using the Wow! Glitter from American Crafts. It's big on sparkle and comes in a pack of four metallic shades.


BasicGrey
Candy Dots... Mmmmm... They look good enough to eat. And they're self-adhesive, which makes adding a splash of gold easy as pie candy!
Image Credit: BasicGrey


Cosmo Cricket
I can't get over how cute these kraft treat bags are from Cosmo. Will you be my Valentine? Because I'd sure love to send you a little bit o' sweet in one of these beauties.


Crate Paper/Maggie Holmes
When it comes to gold, Maggie Holmes has been a trend leader in the crafting market. Since before my own Maggie was born, she's been singing its praises and incorporating it into her home decor and crafting projects. So it's so fun to see how she's also added this striking color to her product lines with Crate Paper, including Styleboard, her newest release.

Label-maker tape never looked so good! Thanks, Maggie and Crate Paper! Can't wait to play with these stickers.


Everything about these rub-ons wins a gold medal in my book. The horse-horse, the hearts, the camera, the sentiments...all of it is award-worthy!


I ADORE this bitty, heart-filled Brag Book! With Valentine's Day on the way, I seeing it getting much love in my life. 


Our friends in the fancy pantalones also offer a vibrant gold 12x12 cardstock that is sure to make a sparkling statement.


My Mind's Eye
Got your eye on gold? Mind this tidbit: MME makes a mean gold metallic print. They've put together these cards in 3" x 4" and 6" x 4"—perfect for pocket scrapbooking. Love!


Adding a lovely feeling to your surroundings has never been easier than it is with these sweet cards. I so want to frame this one and put it in my sweet girl's room.


Or you can make your own paper projects using the Charmed Record It! paper pad, which includes a lovely variety of 6" x 6" papers.


 Gold washi in a sturdy plastic tube? Doesn't get much better than this.


SC is known for their awesome assortment of font stickers, so it's an extra special treat to see that font flair combined with a vibrant gold glitz. Thickers have never shined so bright.

Image Credit: Studio Calico


2. Glampers
Pack your bags, friends! We're going on a retro ride in the cutes campers in town.


Glampers are an emerging trend on the crafting scene, and I'm delighted to share a few of those with you here today. 

Fancy Pants Designs
The little die cut glampers in this line make my heart happy. I have a million things I want to do with them. Decorate the front of a frame, make a card, create gift tags, add them to a page about my own glamper... and the list goes on!
Image Credit: Paper Crafter's Corner


My dear friends at Lawn Fawn were kind enough to surprise me with this special treat at CHA. They know I have a crush on glampers, and the Happy Trails stamp set and dies absolutely made my day. Thank you, Kelly Marie and Mike!

Image Credit: Lawn Fawn blog


My Mind's Eye
Glampers AND chalkboard? Get outta town! I can't get enough of these two trends, and seeing them together is the ultimate!

Image Credit: Paper Crafter's Corner

Webster's Pages
Party Time, indeed! Can it be anything but a party when this bright line from Webster's Pages is involved? It also includes 12" x 12" glamper paper AND vellum. Hooray!

Image Credit: Webster's Page


3. Sequins
Tune into the sequincy frequency! This bit of glitz & glam makes my glitter-loving heart happy. 


Inspired by the confetti trend, sequins are quickly rising to the top in the brilliant Bling category. And the colors are A-MAY-ZING! Here are just a few of my favs:

Chic Tags
How's this for a treat—wood sequins! Isn't that a grand idea? Just imagine the creative possibilities attached to these cuties, from topping them with glitter to spritzing them with spray ink. *swoon*


Doodlebug
Doodlebug? More like Drool-dlebug. I mean, bitty bottles of sequins in a rainbow of colors? How can we do anything but drool?

Image Credit: Doodlebug Design


Hazel & Ruby
I stopped in my tracks the moment I laid eye on these beautiful bottles of sequins. Yes, they are sold in these tiny tubes! Isn't that divine. Hazel & Ruby is where it's at, my friends!

Image Credit: Hazel & Ruby blog


Image Credit: Hazel & Ruby blog


Studio Calico
Monochromatic color packs are oh, so perfect for creating an ombre look or just adding a splash of color to your creations!


If you know Teresa Collins, you know she knows her colors and always adds a sophistication to her creations. We're so lucky to enjoy that in sequin form with the release of several different sequin packs. And each includes sequins in four unique sizes, adding all the more variety to life.


4. Vellum
Yes, you read that right. Vellum is back, baby! But it's not limited to the basic vellum of yesteryear. You'll also find it in fun patterns, colors and textures. 

Here are a few if the voluptuous vellum pieces making their way on the crafting scene:


Crate Paper: The Maggie Holmes Styleboard Collection


Win It Before You Can Buy It
Want to win a sampling of BRAND NEW delights before you'll even see them on store shelves? Good news: I'm giving away a sampling from each of today's trendy categories. The prize pack includes items from the following generous companies: American Crafts, Chic Tags, Crate Paper, Doodlebug, Fancy Pants, Hazel & Ruby, My Mind's Eye, Studio Calico, and Teresa Collins Design. Wowee! That's a bundle! 

Entering is easy. Simply leave a comment here, letting me know what your favorite trend is crafting is at the moment (from this line-up or otherwise). You have until Friday, Jan. 31 to enter, at which time I'll randomly select a lucky name to take these awesome elements home. Please include your email address with the comment so I can reach you if you win.

TV Time
It's always more fun to see these sweet treats on the big screen...well, the screen that is. So I invite you to watch my Studio 5 television segment covering these trends here. Thanks for your incredible support!

Bonus
The trend fun isn't over yet. Head on over to the Scrapbook & Cards Today blog for a look at five more CHA trends I can't get enough of. I think you'll be happy you did. 

Cheers!


Making Over Maggie's Room

I have had SO much fun putting my sweet girl's room together. And now, more than a year after her arrival, I'm finally ready to share a few pics of her space with you. If you can believe it, the room still isn't complete. I have one final element to embroider, frame and hang, but it's pretty close.

Before we get to the pretty, let's take a look at the way it once was.

It started as a beige guest room. Beige walls. Beige carpets. Beige energy. Not what I wanted for baby girl.


I knew color was in order, so I started by selecting a color  scheme. This was BY FAR the hardest part of the whole process for me. So many amazing colors to choose from. I finally landed on gray, yellow, teal, light pink, and deep pink. 

Room Colors
Once my colors were finally decided, I went to the paint store and selected paint swatches in those hues, which I then punched (in the shape of a bird for kicks and giggles) and added to a jump ring, which I carried with me so I could make sure I was color-matching correctly.

Punched paint swatches to carry with me as I shopped for room goodies.

I also put together a few swatch-type samples in my Smashbook, including a lovely shot of a room Maggie Holmes created in her home, which exactly matched the colors I was seeking!

A page from my pregnancy Smash Book. 


Above all else, I knew I wanted to take out the old carpet. It was bland, and it had doggie peep on it, which definitely wasn't going to work for my little love. After much research and trips to many flooring stores, it was determined a vinyl "wood" was best for dogs who peed. So we went with that and my AMAZING Pop and hubby went to work installing it. We got enough for our entire upstairs. But the rest of the house will have to wait for more funds to come in.

Pop and Cor worked like crazy to get the flooring in before baby arrived.


I had pinned a cool idea for DIY wainscoting, so Cory and I got to work on that by making trips to the hardware store for lumber and paint.

First, we measured the wall and marked where the boards would go.

Cory marking where the boards would go for the faux wainscoting. 

Naturally, Biff came out to help!

Biff steps up to lend a hand.

We then taped off at about 2/3 of the way up the wall to indicate where the white paint would end and the gray would begin.

The wall is taped at the 2/3 mark, with the bottom 2/3's to be white and the top 1/3 to be gray.

Time for paint. Cory channeled his inner Bob Ross (he's a big fan) and painted a happy little tree.
Just a happy little tree to get things started.


Wanting to mark this room as Maggie's, I started by painting her name across the wall. (That's an M.)

M for Maggie!


When the paint was dry, we removed the tape and grabbed the lumber so Cory could begin installing the wainscoting, only to find out I had mis measured on the center tape line and all of our white paint was too high. D'oh! We had to repaint. Not fun. :(

Take it from me--measure twice, paint once!

Several coats and a second paint job later (because I mis-measured), the walls were finally ready.


At last, the room was ready for the faux wainscoting. Cory added the lumber, and he and Pop added the additional white paint to create the effect.

On go the boards, the ledging along the top, and an additional layer of white paint.

Pop stopped in often to help. Together, he and Cory transformed the room from pooper to super!

Wow! This is really starting to look like a room. 


Once the base of the room was ready, we went to work on filling it with all things baby. It started with much reading on Consumer Reports. We finally landed on a Pottery Barn Kids crib that ranked well and fit with the look we were going for. Cory put it together in no time.

The first thing we brought in after the foundation of the room was complete was Maggie's crib. It originally had a net bumper, which is supposed to help with SIDS prevention.


For the bedding, I looked and looked and looked. There were so many I loved. Sadly, I had it in my head that I had to have everything by the time she arrived, and she was due in a couple of weeks at this point, so I went with one I liked that I could get in time instead of the one on Etsy that I really wanted. Lessoned learned for next time, I suppose. I like the bedding, which is from Carousel Designs, but it's too short for the length of the mattress, which has always bugged me.

Love the chevron print and the soft, cozy inside lining of the bumper.

Pretty bedding, but what you can't see is that it cuts off about 6" before the edge of the mattress. Probably a mistake on my part with the ordering. 

Fortunately for me, I received a few lovely handmade quilts as gifts, and they actually fit the crib. This one was made by our talented family friend, Edna.

Handmade details like this quilt are the best!


And this one was made by my awesome quilting cousin, Cynthia!

Another handmade quilt. And, my cousin even made a big one for me, which matches this one. LOVE!

Another area where I researched and researched was rugs. So many amazing options! I finally landed on this cutie from Pottery Barn Teen. Alas, when I opened it upon its arrival, it had grease (I think) stains on it, which I've never fully gotten out. Not sure what that was about, but I still love the pattern. But I may not order a rug there again.

Love the look of this rug; I only wish I would have come without the stains.

Naturally, the pups thought this meant a new bed for them.

Jack (Biff) trying out the rug.

Not wanting to be left out, Kisses also gives the rug a go. In fact, this is often where you can still find him. He likes to stay close to Mags!


Furtniture. Another area that required a great deal of research and shopping. I wanted something that would look lovely, stand the test of time, and fit within my budget. I must have been to every furniture shop in town. Multiple times. I found myself returning to Ashley Furniture over and over again over the course of several months. It was a bit out of my price range, but I knew I would regret it if I didn't take the plunge. So I... gulp ... bought it on credit with zero interest for 12 months, and I'm pleased to say I managed to get it paid off in time. Hooray!

The changing table is actually a media center, but I'm so tall (5'11") that it was just the right height for the changing table.
Love this media stand turned changing table. 


I found gray baskets at Jo-Ann that fit just right in the slots where the DVD player and/or gaming system would normally go. I keep diapers in three of the baskets and basic supplies (lotion, diaper cream, brush, etc.) in the fourth basket. This has worked out SO well for us.

The baskets are so helpful and right at arm's reach.


Each of the three drawers are perfect for holding other basic supplies. The bottom drawer contains parenting books, bath supplies, pacifiers (that she never used), etc. The middle drawer holds basic medical and cleansing stuff (extra shampoo, medicine, thermometer, etc.). The top drawer holds additional daily used supplies (wipes, Q-tips, her medicine, extra Diaper Genie cartridges, etc.).

I keep the drawers organized with different bins, baskets and tubs. 


I found the cutest little glass butter dish at Target (similar to this) that I use to hold Q-tips.

This glass butter dish is just the ticket when it comes to keeping the Q-tips clean and accessible. 

The lamp is one of the very first things I bought for the room after I finally decided on a color scheme. It's also from Target. And the little pink drawer unit is an antique that my cousin Teri found at a flea market in LA. She spray painted it pink and sent it to me for her room. It now holds Maggie's smaller hair accessories.
Thanks to my cousin for this lovely set of bitty drawers, which she painted pink. 


This piece is what made me fall in love with this set. I simply couldn't get enough of the shallow, pull-out drawers. As soon as I saw them the first time, I knew her bitty shoes, socks and other accessories were meant to go in them, and it has worked like a gem.

Oh, these little drawers! They're my favorite. They're why I couldn't let this piece go. As soon as I saw them, I knew they were meant to hold bitty shoes, socks, and hats!


See what I mean? Just right!


I keep clothes in the drawers on the left side, including pajamas, onesies, pants, and t-shirts. And I store bibs, burp cloths, extra crib bedding, blankets, and other linens in the shelves above the shallow pull-out drawers.

And all of the drawers in this piece are so nice to have.

Next item on my list of musts was a rocking chair. Cory and I had one, but it was in desperate need of a makeover. Paula, an amazingly talented friend of mine, offered to create new covers for the chair, which was no easy task. So we stripped the cushions off it, bought some fabric using the awesome 40% off coupon at Jo-Ann, and sent it her way.

Plain faux leather cushions once sat atop this chair frame, but they were in desperate need of a makeover.  


I love, love, love the way the chair turned out. Paula is a miracle worker. You can find her awesomeness in her Etsy shop. Yum!

Paula to the rescue with this a-freaking-mazing updo. The pockets look a little off, but that's because that's where I now keep the story books I read to Mags at night, so they get much use. 

Bitty baby in a big chair!

Paula also made the pillows that sit on the chair. Isn't she awesome? I use this chair every. single. day. It's our favorite place to sit and read stories. Speaking of stories, Maggie can't get enough of Bubbles, Bubbles, which was a Dollar Spot score at Target. She has so many fab books, but this is her go-to. Gotta love a deal!
Maggie's FAVORITE book.


You may have noticed the awesome clock above the rocking chair. That is another one of the handmade gifts that fills Maggie's nursery with such love. The incredible Holly Jones, a dear friend of mine, made it and gave it to me at my shower. She sells cut-outs in numerous styles and finishes, including wonderful wood designs. You should check her cute Say Hello Shop when you have a minute!

Love this lovely clock my friend Holly made for Miss Mags.

Before I get to all of the sugar on top (aka the decorations), I'll talk windows. This was hands down the most difficult thing to find for this space. In fact, it's still not complete. I'm waiting for a good deal on plantation shutters. If you hear of one, please let me know. Until then, I've at least finally found the curtains I adore. The sheer, lattice-print lining and the darker drapes are both from Z Gallerie. I searched high and low, and finally knew these were the ones when I stumbled upon them.

At last, the long journey to new window treatments was over. Z Gallerie to the rescue with this perfect pair. 

Here's a backlit shot so you can see the pattern better.

Isn't the pattern on the sheer liner cool?

The tie-backs are from Pottery Barn Kids. Love the big bulb on the end!

Take off, knob! This is just the tie-back this window needed!

That's it for the big stuff. Now, on to the finishing touches. I feel the star of this show are my frames that sit atop the little ledge shelf created by the faux wainscoting.

Love the frame-lined wall. The large prints and photos make such a statement.

The 12x12 frames are from IKEA. I filled them with photos, like this one taken by the talented Maggie Holmes...

This darling photo was taken by Maggie Holmes.

 ...and the ones visible in this image (on either side of the the "hello" printable), which were taken by another talented photo friend of mine, Elisha Snow.
The adorable image in this frame was taken by Elisha Snow.

I use the Epson Artisan 1430 printer to print my 12x12 images, and it rocks my socks. Best ever!

An incredible printer for adding 12x12 images to any space!


I filled one of the IKEA frames with a piece of scrapbook paper that I dressed up using the Fiskars flag punch and a few embellishments.

Scrapbook paper is sometimes the perfect piece of artwork.

Tiny details are just enough.


And I filled one of them with the sweet "hello" printable, which I purchased from this Etsy shop.

This "Hello" print was one of the very first things I bought for Maggie's room. I adore it.

On the opposite wall sits the BasicGrey frames spelling Maggie. For more on these, including a tutorial on putting them together, see this post.

Let's play the name game with these fabric-filled frames. 

From there, I mixed in smaller fames, like this one, which houses the info on Maggie's incredible arrival. I used paper from Pink Paislee and stickers from BasicGrey. I also painted a paper mache M from Jo-Ann and lined it with washi as part of my Washi Workshop for Studio Calico.

A few of the things I made for Maggie's space. The washi-covered M was part of my Washi Workshop for Studio Calico. So fun! 


For this frame, I glued scrapbook paper to the photo mat that came with the frame to complement the space.

Framed photo taken by Elisha Snow.

And on this one, I simply lined the mat with washi tape for a quick makeover.

Framed photo by Elisha Snow.

I wrapped a second, larger paper mache M with yarn.

Yarn-wrapped M, which was also featured in the Scrapbooking for Babies & Toddlers special issue by Creating Keepsakes magazine.


Using fat quarters of fabric, I cut triangles with my pinking sheers and strung them up on a strand of pom pom yarn. I made a second banner using lace as the topper in place of the pom yarn to mix up the look a bit.

A little banner bidnaz makes any room happier. 

I lined her light switch plate with washi, which was quick and made a big impact. Loved the outcome so much that I later added washi-covered plates to many of the rooms in our home.

Washi-covered light switch plate cover. So simple. So great.

For Mags many hair bows, I use a necklace holder and cute plastic basket (purchased at Target's Dollar Spot).

Hair bows, don't cha knows?

And I keep her toys in a set of barrels I received from the fine folks at BasicGrey.

BasicGrey barrels, just right for holding Mags' toys.


The closet isn't much to look at (beyond all of the darling outfits it contains), but I do like the little clothes dividers that I received as a shower gift.

Cool closet dividers.

And while this isn't anything decorative, my video monitor that my best friend Kirston and her mom gave me is one of the very best parts of this space. I HIGHLY recommend a video monitor to any new mom.


Love this video baby monitor. It allows me to be a peeping tom and look in on wonderful moments like this.


Also on my list of recommendations is a Diaper Genie. This little guy keeps the stank out, which is all right by me!

Not the cutest, but a definite necessity. 

Finally, the part of the nursery I love the most, besides the little lady living here, is this mirror, which once belonged to my dear Grandma Margaret. Maggie was named after her, making this addition all the more special and heartfelt.

This brilliant mirror once belonged to my incredible grandma. I love having it in Maggie's room now. Seems like the perfect spot. 

I think that about does it. Thanks for taking this looong room tour with me. I have a few final touches that are still coming together. As soon as they're ready, I'll be sure to share. In the meantime, you can check out a Studio 5 segment I did on Maggie's space here.

Cheers!
A peek inside.


A look inside and a chance to win!

It’s no secret that I love creating with cupcake liners. If you follow my creative endeavors at all, you know that I use these treat cups in all sorts of ways, including the way shown here—I put them on a layout. I love the way the liners fill the space and add some movement to this page.

As seen in the May/June 2012 issue of Creating Keepsakes magazine. Copyright Creative Crafts Group. Posted with prior permission from the publisher.


Creating this look is simple. All you have to do is:

1. Spray white cupcake liners with spray ink (or buy ones that are already colored). Note: I used extra large treat cups for this particular project.

2. Remove the centers from the liners, and cut two of the liners down to get three varying sizes.

3. Adhere the liners to you layout by hand stitching around the centers using baker’s twine. Note: I first backed the liners with patterned paper so that it would pop through the centers of the cut liners. 

This page was created for the “Kitchen-Inspired Scrapbooking” article, found in the brand spankin’ new May/June 2012 issue of Creating Keepsakes magazine. Visit creatingkeepsakes.com to see more of what this issue has to offer, including free downloads, videos, and other delights!


Win
Don’t have the May/June issue? No worries. I’m giving away a copy. Simply leave me a comment on this post between now and Friday, April 20 for a chance to win. Good luck!
 
I hope this layout has inspired your creativity. For additional looks inside the magazine, please join us (CK) in today’s blog hop. You’ll find more chances to win a magazine, and you’ll see lots more layout ideas that you can pin, scraplift… you name it! 

Hop On!
Next on the list:
The lovely Erika Hayes
My friends over at The Scrap Review
The talented Laura Vegas

Cheers!

P.S. If you’re in Utah, check out Studio 5 today at 11:00 AM. I’ll be announcing the winner of our big The Amazing Space contest and showing fresh organization ideas with a kitchen twist. Hope you can tune in.

My Studio 5 Storage Segment and a Free Download

On set at Studio 5. 

Recently I had the pleasure of sharing a few crafty storage solutions on Studio 5, a local lifestyle program. As promised, I’m back with a link to that segment. A big thanks to those outside of Utah who’ve expressed interest in viewing it. Your support makes me happy. You can watch more of my segments on the Creating Keepsakes website


Also, I’d like to mention that Creating Keepsakes, the awesome scrapbook mag I work for, designed a free label download just for YOU. It’s the cutest -- a sheet of “Sweet Shoppe” stickers that you can print on a basic sheet of 1" x 2.63" Avery labels. Simply open the file in Microsoft Word to print. It doesn’t get much easier than that. 

Free label download! 
Download your labels here and use them on anything and everything you can think of. In the October 2011 issue of Creating Keepsakes, we shared this idea from Whisker Graphics. LOVE! If you like it too, run to your dollar store, buy some sugar jars (Yes, they’re only a buck), print your free labels, and store your twine in style!


Idea published in the Oct. 2011 issue of Creating Keepsakes.  Copyright Creative Crafts Group, posted with permission from publisher. 
And, this post wouldn’t be complete without a shoutout to my BasicGrey Sampler winner. Congrats, Cynthia! The Sampler is on its way to you (dog not included). I hope you love it as much as I do. Thanks to all who entered!


Don't let that sad pup face fool you; Kisses is thrilled to send this canvas to a lucky blog winner.

Cheers! 

Oilcloth Projects: Part 1

Oilcloth! It’s hip, it’s durable, it’s fun to work with, and it’s loaded with nostalgia! What’s not to love about this versatile fabric? 


What is Oilcloth?
If you aren't familiar, oilcloth is a laminated fabric that's been fused to a durable vinyl backing. Cotton laminate has a similar smooth finish, but it's lighter weight and a little less durable than oilcloth. Vinyl is another fabric option with a similar consistency. You can find these fabrics online and at some fabric shops. 


What's it Used For?
With it's smooth finish, oilcloth is great for outdoor decor, tablecloths, lunch bags...anything that runs the risk of getting wet or messy.


I used both oilcloth and cotton laminate to create today! Most of my supplies were purchased at Material Girls Quilts in South Jordan, UT. 


It totally reminds me of my grandma, as she used to have oilcloth tablecloths on her kitchen table. Believe it or not, this was the affordable option for her low-income family, at only $0.05-$0.15 a yard. Now adays, oilcloth averages about $15-$20 a yard. It’s worth every penny, if you ask me. Just look at all you can do with this sassy crafting supply!


Create a Cloth Banner
I’m super excited at how this one turned out. You see, the black pieces of the banner are actually made from chalkboard vinyl, which has similar durable properties to oilcloth.   I purchased this fantastic fabric at Bolt, an amazing fabric shop in Portland, OR. I love it, because it allows me to personalize my banner over and over again for different ocassions. Since I’m sharing this on Studio 5 this morning at 11:00 MT, I thought I’d dress it up accordingly using a bistro marker (chalkboard marker). 
Make your own banner in 4 easy steps:
  1. Cut fabric pieces to desired size.
  2. Sew two pieces of fabric back to back to create a double-sided banner. 
  3. Cut out around banner pieces with pinking shears or a decorative blade.
  4. Punch holes in top of each banner piece and thread onto twine. 


Banner Supplies
  1. Oilcloth and/or cotton laminate
  2. Chalkboard vinyl 
  3. Sewing machine
  4. Pinking shears
  5. Hole punch
  6. Twine
  7. Bistro marker or chalk
Try a Table Runner
Inspired by my sweet grandma’s tablecloths of yesteryear, I decided to create a modern take on an oilcloth table covering. To make this runner, simply measuer and cut the fabric to the length of your table, only covering a portion of the table’s width. Dress up the edges by sewing on some jumbo poms. Simple and cute!


Supplies
  1. Oilcloth or cotton laminate
  2. Jumbo pom pom trim
  3. Sewing machine


Cover a Tray
Transform a basic tray into a durable serving/storage piece by inserting a piece of oilcloth or laminate in the bottom. You can either glue it in place with a sturdy fabric glue (such as Fabritac by Beacon’s) or hot glue. Or, for a more finished look, try sealing the edges with book binding tape, as I’ve done here.
Supplies
  1. Oilcloth or cotton laminate
  2. Tray
  3. Book binding tape (mine is from Paper Source)
Cut Coasters
Oilcloth is water resistant, making it an excellent coaster option. Simply cut squares from fabric, and sew two squares back to back. Note: I used two different fabrics, making my coasters double-sided. Hey, you can also skip the sewing and use a single square for a slightly thinner coaster option. 
Supplies
  1. Oilcloth or cotton laminate
  2. Sewing machine
Add Oilcloth Details
Finish your party decor with oilcloth-wrapped bottles. It’s as easy as cutting your cloth to fit a bottle or vase (I used coke bottles that I’ve been saving for such a fun project), and secure it in place with fabric glue or hot glue. Wrap an oilcloth bow around in a different pattern to finish your design.
Supplies
  1. Oilcloth or cotton laminate
  2. Recycled bottles or vases
  3. Fabric glue (I used Fabric-tac by Beacon’s)
Play with Posies
In place of traditional flowers, try oilcloth creations. I made pinwheels following these instructions and cut a butterfly using my Slice Fabrique tool. For the stems, I simply punched the top of spoon strawes, and tied the buttons on my shapes through the holes. I added some glue to keep things extra secure. 
Supplies
  1. Oilcloth or cotton laminate
  2. Buttons and twine
  3. Hole punch
  4. Spoon strawes (snowcone straws)
For more oilcloth ideas, check out the baby bibs I made from this happy fabric here


And check my blog again later this week for part 2 of working with oilcloth, as well as my Studio 5 segment. Thanks for your visit! I hope these projects inspire you to create with oilcloth. You’ll make your grandma proud, and add a cool vintage vibe to your next celebration. 
Cheers!
Megan

Vintage Ribbon and Fabric Storage, and a Fabric Giveaway!

One of my favorite columns to write at work is “Stash It.” Or, as we like to call it around the office, Must Stash It...get it? Mustache It? LOL Good times!


Anyway, this column appears in every Scrapbooking Tips & Tricks special issue, and it’s all about scrapbook organization. The current issue, Scrapbooking Tips & Tricks: Texture, was extra fun to write, because it’s about organizing your textured treats (ribbon, fabric, floss, etc.). These are some of my favorite scrapbooking supplies, both to use and to organize. 


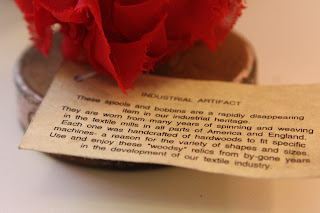
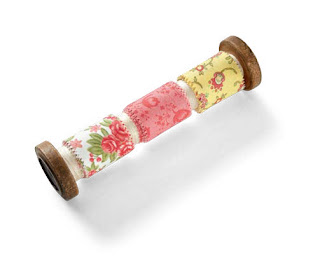
One of the ideas featured in my column was using vintage textile spools to organize your trims. I’ve picked these classic pieces up here and there at consignment and antique shops. They’re surprisingly easy to find. You can even search online at Esty.com and/or eBay.com and find several results. 
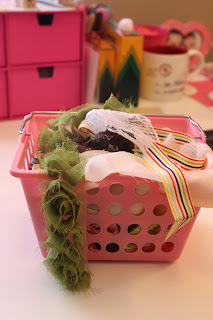
Take your trim stash from this...


To this!

Image used with prior consent from Creating Keepsakes magazine.

Simply wrap the trim around the spool and use a small straight pin to hold it in place. Once the spool is full, put it on display to enjoy. 
When it comes to how you approach your spool storage, you have options.
  1. Wrap a bunch of various trims on one spool 
  2. Wrap your spools by trim type, keeping like types together 
  3. Wrap and divide the spools by trim color 

You can also take your fabric scraps from this...
To this, using the same method!

Image used with prior consent from Creating Keepsakes magazine.
For more on organizing your textured stash, including a cool fabric-covered suitcase, I hope you’ll tune into Studio 5 this morning at 11:00 on channel 5 (if you’re in Utah). For those of you out of state, I’ll post a link to the segment soon.
Also, I have a complete step-by-step tutorial for creating the train case on the Creating Keepsakes blog today. Check it out and, while you’re there, enter to win some stunning new Anna Griffin fabric! “Yum” is the best word I can find to describe the awesome assortment we’re giving away. 


I’ll leave you with a question. How do you organize and contain your fabric? I’m getting more and more into this beautiful crafting supply, and I’m always looking for storage solutions. Any ideas you have to share would be much appreciated. :)
Cheers!

Lovely Wrapped Wreaths


Wrap a little wreath love using different trims. I'm sharing these projects on Studio 5 today, and they're are so much fun to put together. All you need are the following supplies:


* Wreath Form: (available at your local store) Note: Floral wreaths can sometimes be found at the dollar store. 
* Rosette Trim: Search local fabric, trim, craft, or scrapbook stores for this trim. A few scrapbooking companies that sell this style of trim include: American Crafts, BoBunny, Maya Road, and Webster's Pages
* Straight Pins
* Yarn
* Toppings: Ideas include: beaded trim, pom pom trim, and tulle. 


Rosette Wreath
Inspired by this post on the amazing Maya Road blog, I started by making a few rosette-trim wreath (like the one above)s. Here’s how:
1. Pin your trim in place on the wreath. I used this stunning trim from Maya Road


2. Wrap the rosette trim around the wreath base. Note: For a fluffier wreath, wrap the wreath with two layers of trim.


3. Once your wreath is wrapped, you can top it with a second trim (beaded trim, pom poms, tulle, etc.) and/or other accents (rosette flowers, hearts, etc.)


    4. If you want to, you can also add a light misting of sparkle and/or color with spray ink. If you look closely you'll see pink ink has been applied to the creme rosettes. 


    Yarn Wreath
    Lately, I’ve seen several yarn-wrapped wreaths in the creative world, like this cute example. Yarn-wrapped wreaths take more time to create than the rosette variety, but they sure look cute. The steps are similar.
    1. Pin yarn in place.


    2. Wrap yarn around base. Note: You may want to start with a thicker or fuzzy yarn, which is easier to wrap as you’re practicing. 


    3. Dress up your yarn wrapped wreath. For this project, I used the Valentine’s Day garland I made here


    These are happy projects to try for any holiday or season. Do you hang wreaths for seasons beyond Christmas? If so, I’d love to know what holidays or seasons you find yourself all wrapped up in wreath fun. 


    I leave you with a few more wreath creations I've put together. Enjoy! 


    I topped this one with a smaller Rosette trim and some layered rose flowers, both from Maya Road. 


    You'll find some beaded trim and a large silk flower finishing this wrapped wreath, both of which I purchased at JoAnn crafts. 


    And this spring variation was created with colored rosette trim from Webster's Pages.


    Cheers!


    P.S. To see more of my Studio 5 crafting segments, please check out the Creating Keepsakes website, where we have a complete archive. Thanks so much! 

    2010 in iPhone Photos

    It's no secret that I like to snap pictures with my camera phone. In fact, this year alone I did a couple of Studio 5 segments on this topic and wrote about using camera phones in Creating Keepsakes magazine.

    What's the deal with this obsession? Well, a phone is one thing we almost always have on us. If you're lucky enough to have a camera built into yours, and so many do anymore, this means you always have a camera at the ready. Perfect for those everyday shots!

    Inspired by an idea Margie Romney-Aslett posted on Facebook, I decided to post a few of my 2010 phone-photo highlights. I have close to 1,000 images on my phone at the moment, so I really had to narrow. Here are a few. I love the glimpse it gives into my year. You bet I'll be keeping that camera busy in 2011.

    Note: I'm breaking all the blog/online rules with this lengthy post. Please accept my apologies for all of the scrolling. If you want to opt out now, I'll completely understand. 

    JANUARY

    Jan. 1: Cory and I try our hand at homemade marshmallows. Aren't they cute? They were tasty, too!


    Jan. 7: Jewels and I catch a flick. I can't remember what we saw, but I know we enjoyed pausing to play with the jumbo chipmunks.


    Jan. 12: I do my first of many Studio 5 segments for 2010. I was really stressed about what to wear, so I posted this pic for my personal team of fashion consultants. In other words, I posted it to Facebook. ;)


    Jan 23: My cute coworker, Kim, and I join friends for a fun-filled day at Disneyland before the CHA craze begins. I can't go to D-land without stopping for some Dole Whip. It's delicious!


    Jan 27: CHA (the Craft & Hobby Association trade show) is in full swing. Love the opportunity it provides me to see amazing new crafting products and beautiful friends. Speaking of friends, I adore these two gals, Jill (Jillibean Soup) and Stephanie (Bella Blvd.). We go way back to the new exhibitor days when they were patient enough to put up with my amateur film making skills. You can watch the outcome of those visits here and here.


    Another sweet CHA friend. I don't think they get more passionate than Maggie. Check out her Cuttlebug Challenge blog for bunches of projects to make with your die-cuts.


    Jan. 30: On my way home from Cali, I stop to enjoy a little Viva Las Vegas with these pretty people (my DH and parents). Here, we're waiting in line to go up in the Eiffel Tower at the Paris (where we stayed), something I had never done before. Very cool, BTW!


    Part of my Vegas experience includes my first frozen hot chocolate at Serendipity. Super num!


    FEBRUARY

    Feb. 4: The stunning Lori and I fly to Portland, OR to teach at the first CKC event of 2010.


    Of course, a trip to Portland meant a stop at the legendary Voodoo Donuts. Oh. My. Gosh. SO good! It was in a semi-ghetto part of town, but the risk to our lives was totally worth it. ;) 


    MARCH

    March 14: I spot the March issue of Creating Keepsakes on newsstands. I happened to make the layout on the cover of this issue, which makes this moment even more exciting than it usually is for me. Naturally, I move it and its sister pub, Card Creations by Paper Crafts, to the front of the display.


    March 15: I make one of my first posie bracelets, snap a picture, and send it to my friend for feedback.


    March 17: Edward and I show up for work in our glorious green.


    March 23: A HUGE day. Mom has her last cancer treatment. Our family goes out to dinner to celebrate.


    APRIL

    April 1: I show up for work extra early to pull a series of office pranks, including kidnapping this doll and holding it for ransom. This is the picture I sent to the doll's owner when asking for my payment.


    April 8: I fly first class for the first (and probably only) time. Look at all of that legroom. My legs actually fit without squishing up against the seat in front of me. I was so thrilled by this that I grabbed my camera and obtained some photographic evidence.


    April 10: Kelly and I take a break from teaching at CKC St. Louis to visit "the arches." Some 20 pictures later, we finally got a shot with both of us and the arch. (BTW, "the arches" is what cute Kelly called them. I still LOL every time I think of that. I later told the CKC St. Louis crowd to ask Kelly about "the arches" whenever they saw her. Yeah, she was thrilled. Hahahahahahaha! Good times!


    April 25: Cory wins big on a penny slot in Wendover, NV. Way to go, baby. Dinner's on you!


    April 30: At last, after nearly two years of growing, my hair is cut for Locks of Love.


    MAY

    May 8: Schmom, Pop, Cory, and I participate in the Race for the Cure. Mom's lookin' extra good in her pink survivor's shirt!


    May 15: Cory and I take Cory's parents to see one of our favorite comedians, Brian Regan. If you haven't heard of him, I highly recommend you check him out here. He's heeeeelarious!


    May 17: I make my way to NYC for the Nat'l Stationery Show. I couldn't go that far without making a trip to Tinsel Trading. It was just as incredible as Martha promised me it would be. ;)


    May 23: I take a break from teaching at CKC Buffalo to visit Niagara Falls.


    JUNE

    June 14: My cousins visit from Denver. We go to a family-favorite destination--Lagoon. I rode these same boats when I was their ages.


    June 27: Jewels and I visit the Utah Arts Festival, where we purchase darling handmade purses.


    JULY

    July 24: Cory and I take in a ballgame as part of our family's July 24 celebration (UT holiday).


    July 29: Time for CHA Summer in Chicago, which means meeting up with more delightful friends, including these two sassy ladies, Kerri and Liz. Love these girls! Ummmm...yeah...Liz is standing on a stool in this shot. She's actually quite bitty, but she wanted to appear taller than me and the step stool did the trick. LOL


    AUGUST

    Aug. 21: After teaching at CKC Charlotte, Cory joins me for a little summer vacation, which included a stop in Denver, CO, where I bought this M-A-zing card catalog.


    Aug. 27: I take a Creative Escape in Phoenix, AZ, where I get to play with paper and see a bunch of sweet friends, including Miss Maggie, who was teaching at the event.


    SEPTEMBER

    Sept. 5: Cor and I join Curt and Gina for some of the best pizza in Utah. If you're going to have The Pie pizza, Curt (my brother) insists you go to this location at the University of Utah. It's worth the drive.


    Sept. 11: I visit the flag fields in Sandy, UT to remember those lost on Sept. 11. The many flags on display, each representing somebody lost, were both beautiful and sobering.


    Sept. 25: I take many of my phone photos at the mall. This is one example. I was totally inspired by this Fossil display at Dillards. Wanting to remember the colors, the font, the patterns...basically everything about it, I took a pic.


    OCTOBER

    Oct. 8: The Creating Keepsakes team takes Joannie (associate editor) to Texas Roadhouse for her 40th birthday celebration. Yippee ki yi yay!


    Oct. 25: Mom and I head to Denver, where I film a few scrapbooking/paper crafting videos for work. After a long day of filming, Mom and I crawl into bed with Aunt Ruby to watch the nightly news. Yeah, we're a wild bunch like that. Look out, D Town!


    Oct. 29: The Creating Keepsakes editorial and events teams get together for a frightfully fun Halloween celebration. Our magazine team came as Cackling Keepsakes, a coven of crazy witches.


    NOVEMBER

    Nov. 5: Time for the holiday craft fairs to commence. I was selling my posie bracelets at my friend Holly's boutique. Here they are, all set up and ready to go home with happy shoppers.


    Nov. 22: I puppysit for PK. This pic was to let mama know that Lex Pup was doing just fine. Well, she was a little chilly, but we got along okay.


    Nov. 28: Bobby comes home from Iraq. We (he, Jewels and I) spent the day crafting and went to a movie that night. After the cinema, we went for this, the best yogurt in town. I'm sure I'll never hear the end of the fact that I thought it would be regular yogurt and not frozen. This also happened to be the day of a major snow storm here in UT. Why on earth would I knowingly go for FROZEN yogurt when it was a blizzard outside? Oh well. My puffy coat kept me warm and this tasty treat was totally worth the chill.


    DECEMBER

    Dec. 4: Another favorite phone use: creating a shopping list. If I see something I want, I snap a photo and send it to Cory. It's a good way for both of us to remember wishes.


    Dec. 14: The Creating Keepsakes team takes a break from writing and editing to enjoy a holiday breakfast and Secret Santa gift exchange. Isn't my present pretty? I couldn't resist the photo op.


    Whew! What a year it's been. Thanks for taking a look back with me. I hope this inspires (and didn't bore or frighten) you to take more everyday photos with your camera phone.

    Cheese!