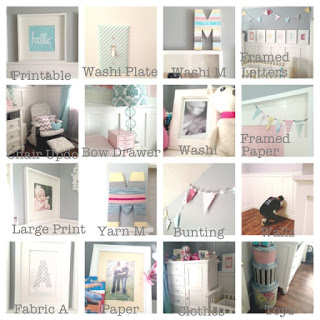
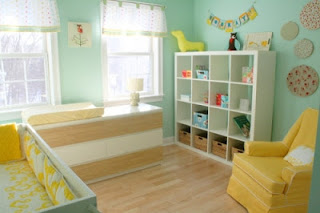
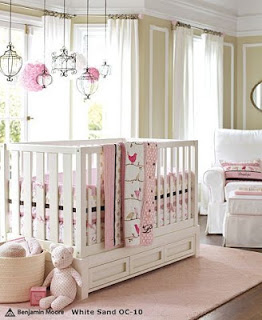
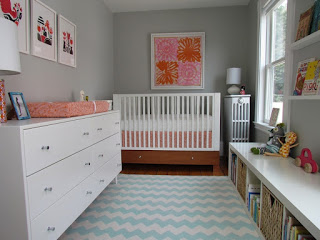
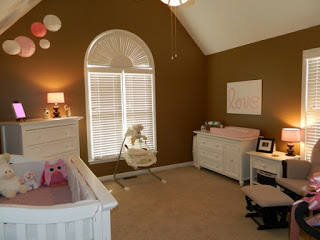
I have had SO much fun putting my sweet girl's room together. And now, more than a year after her arrival, I'm finally ready to share a few pics of her space with you. If you can believe it, the room still isn't complete. I have one final element to embroider, frame and hang, but it's pretty close.
Before we get to the pretty, let's take a look at the way it once was.
It started as a beige guest room. Beige walls. Beige carpets. Beige energy. Not what I wanted for baby girl.
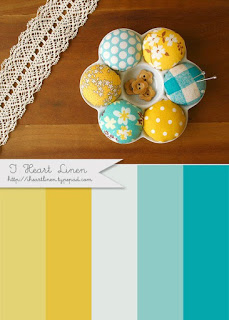
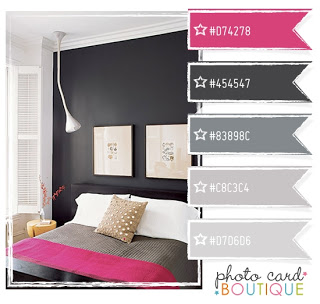
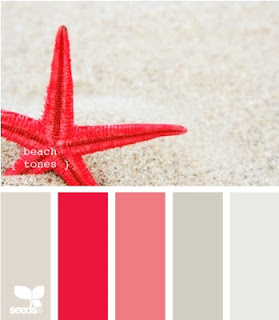
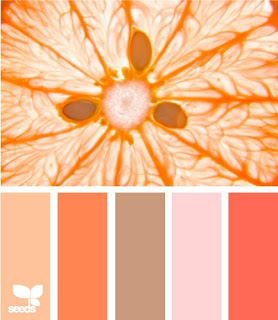
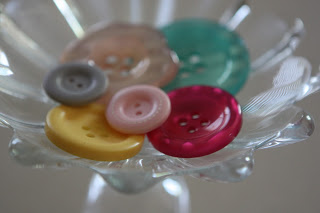
I knew color was in order, so I started by selecting a color scheme. This was BY FAR the hardest part of the whole process for me. So many amazing colors to choose from. I finally landed on gray, yellow, teal, light pink, and deep pink.
 |
| Room Colors |
Once my colors were finally decided, I went to the paint store and selected paint swatches in those hues, which I then punched (in the shape of a bird for kicks and giggles) and added to a jump ring, which I carried with me so I could make sure I was color-matching correctly.
 |
| Punched paint swatches to carry with me as I shopped for room goodies. |
I also put together a few swatch-type samples in my Smashbook, including a lovely shot of a room
Maggie Holmes created in her home, which exactly matched the colors I was seeking!
 |
| A page from my pregnancy Smash Book. |
Above all else, I knew I wanted to take out the old carpet. It was bland, and it had doggie peep on it, which definitely wasn't going to work for my little love. After much research and trips to many flooring stores, it was determined a vinyl "wood" was best for dogs who peed. So we went with that and my AMAZING Pop and hubby went to work installing it. We got enough for our entire upstairs. But the rest of the house will have to wait for more funds to come in.
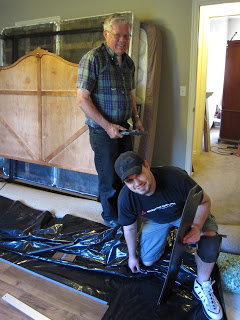 |
| Pop and Cor worked like crazy to get the flooring in before baby arrived. |
I had pinned a
cool idea for DIY wainscoting, so Cory and I got to work on that by making trips to the hardware store for lumber and paint.
First, we measured the wall and marked where the boards would go.
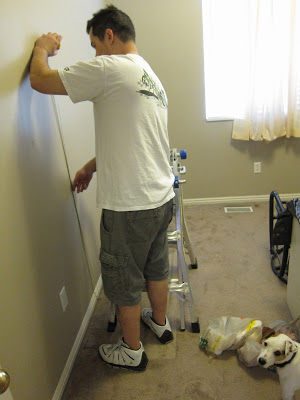 |
| Cory marking where the boards would go for the faux wainscoting. |
Naturally, Biff came out to help!
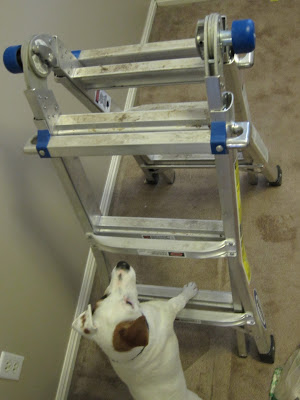 |
| Biff steps up to lend a hand. |
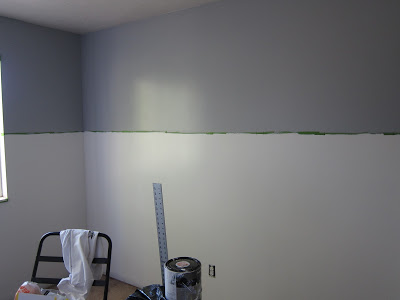
We then taped off at about 2/3 of the way up the wall to indicate where the white paint would end and the gray would begin.
 |
| The wall is taped at the 2/3 mark, with the bottom 2/3's to be white and the top 1/3 to be gray. |
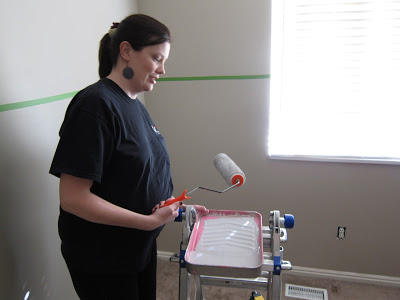
Time for paint. Cory channeled his inner Bob Ross (he's a big fan) and painted a happy little tree.
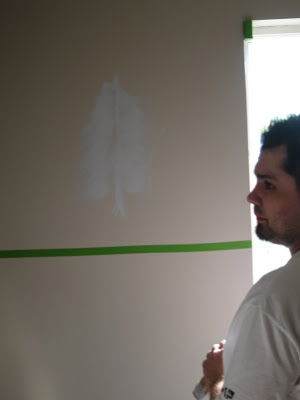 |
| Just a happy little tree to get things started. |
Wanting to mark this room as Maggie's, I started by painting her name across the wall. (That's an M.)
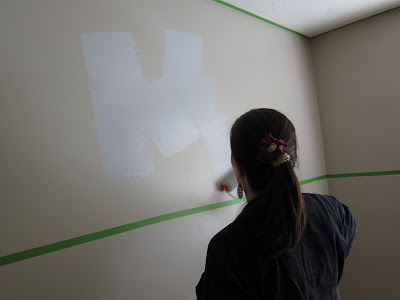 |
| M for Maggie! |
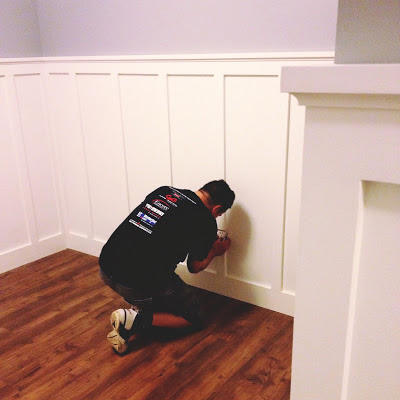
When the paint was dry, we removed the tape and grabbed the lumber so Cory could begin installing the wainscoting, only to find out I had mis measured on the center tape line and all of our white paint was too high. D'oh! We had to repaint. Not fun. :(
Take it from me--measure twice, paint once!
 |
| Several coats and a second paint job later (because I mis-measured), the walls were finally ready. |
At last, the room was ready for the faux wainscoting. Cory added the lumber, and he and Pop added the additional white paint to create the effect.
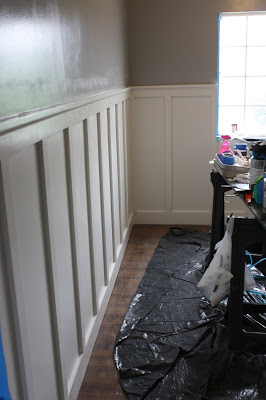 |
| On go the boards, the ledging along the top, and an additional layer of white paint. |
Pop stopped in often to help. Together, he and Cory transformed the room from pooper to super!
 |
| Wow! This is really starting to look like a room. |
Once the base of the room was ready, we went to work on filling it with all things baby. It started with much reading on Consumer Reports. We finally landed on a
Pottery Barn Kids crib that ranked well and fit with the look we were going for. Cory put it together in no time.
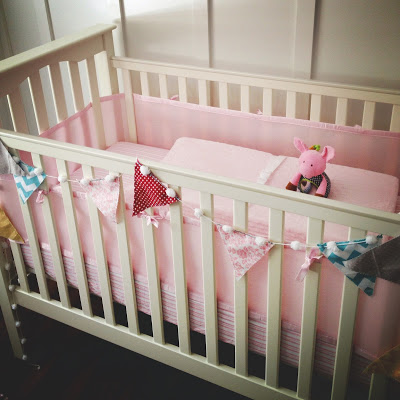 |
| The first thing we brought in after the foundation of the room was complete was Maggie's crib. It originally had a net bumper, which is supposed to help with SIDS prevention. |
For the bedding, I looked and looked and looked. There were so many I loved. Sadly, I had it in my head that I had to have everything by the time she arrived, and she was due in a couple of weeks at this point, so I went with one I liked that I could get in time instead of the one on Etsy that I really wanted. Lessoned learned for next time, I suppose. I like the bedding, which is from
Carousel Designs, but it's too short for the length of the mattress, which has always bugged me.
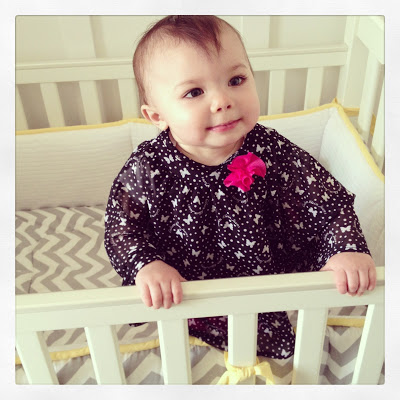 |
| Love the chevron print and the soft, cozy inside lining of the bumper. |
 |
| Pretty bedding, but what you can't see is that it cuts off about 6" before the edge of the mattress. Probably a mistake on my part with the ordering. |
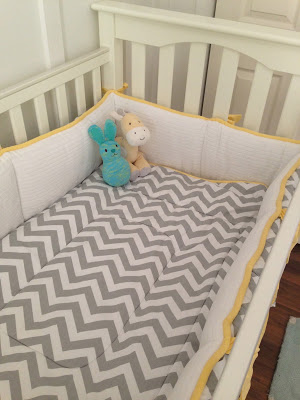
Fortunately for me, I received a few lovely handmade quilts as gifts, and they actually fit the crib. This one was made by our talented family friend, Edna.
 |
| Handmade details like this quilt are the best! |
And this one was made by my awesome quilting cousin, Cynthia!
 |
| Another handmade quilt. And, my cousin even made a big one for me, which matches this one. LOVE! |
Another area where I researched and researched was rugs. So many amazing options! I finally landed on this cutie from
Pottery Barn Teen. Alas, when I opened it upon its arrival, it had grease (I think) stains on it, which I've never fully gotten out. Not sure what that was about, but I still love the pattern. But I may not order a rug there again.
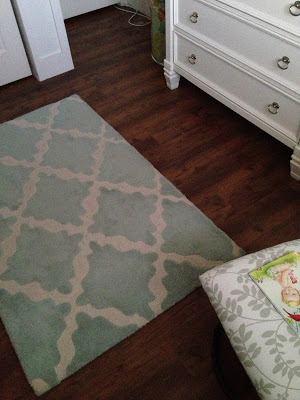 |
| Love the look of this rug; I only wish I would have come without the stains. |
Naturally, the pups thought this meant a new bed for them.
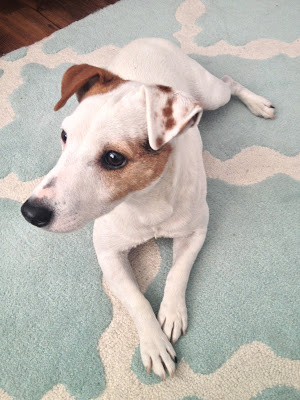 |
| Jack (Biff) trying out the rug. |
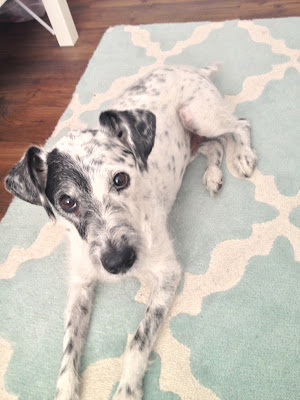 |
| Not wanting to be left out, Kisses also gives the rug a go. In fact, this is often where you can still find him. He likes to stay close to Mags! |
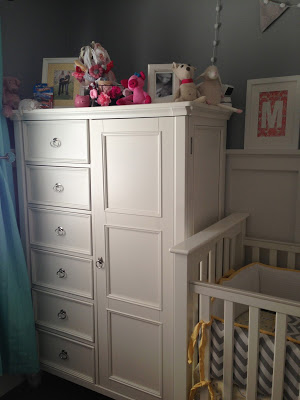
Furtniture. Another area that required a great deal of research and shopping. I wanted something that would look lovely, stand the test of time, and fit within my budget. I must have been to every furniture shop in town. Multiple times. I found myself returning to
Ashley Furniture over and over again over the course of several months. It was a bit out of my price range, but I knew I would regret it if I didn't take the plunge. So I... gulp ... bought it on credit with zero interest for 12 months, and I'm pleased to say I managed to get it paid off in time. Hooray!
The changing table is actually a media center, but I'm so tall (5'11") that it was just the right height for the changing table.
 |
| Love this media stand turned changing table. |
I found gray baskets at Jo-Ann that fit just right in the slots where the DVD player and/or gaming system would normally go. I keep diapers in three of the baskets and basic supplies (lotion, diaper cream, brush, etc.) in the fourth basket. This has worked out SO well for us.
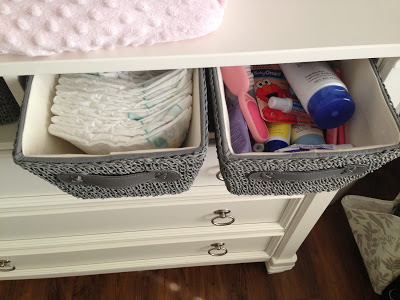 |
| The baskets are so helpful and right at arm's reach. |
Each of the three drawers are perfect for holding other basic supplies. The bottom drawer contains parenting books, bath supplies, pacifiers (that she never used), etc. The middle drawer holds basic medical and cleansing stuff (extra shampoo, medicine, thermometer, etc.). The top drawer holds additional daily used supplies (wipes, Q-tips, her medicine, extra Diaper Genie cartridges, etc.).
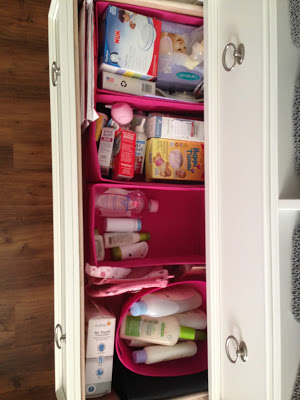 |
| I keep the drawers organized with different bins, baskets and tubs. |
I found the cutest little glass butter dish at Target (similar to
this) that I use to hold Q-tips.
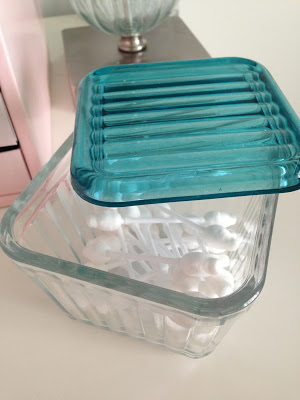 |
| This glass butter dish is just the ticket when it comes to keeping the Q-tips clean and accessible. |
The lamp is one of the very first things I bought for the room after I finally decided on a color scheme. It's also from Target. And the little pink drawer unit is an antique that my cousin Teri found at a flea market in LA. She spray painted it pink and sent it to me for her room. It now holds Maggie's smaller hair accessories.
 |
| Thanks to my cousin for this lovely set of bitty drawers, which she painted pink. |
This piece is what made me fall in love with this set. I simply couldn't get enough of the shallow, pull-out drawers. As soon as I saw them the first time, I knew her bitty shoes, socks and other accessories were meant to go in them, and it has worked like a gem.
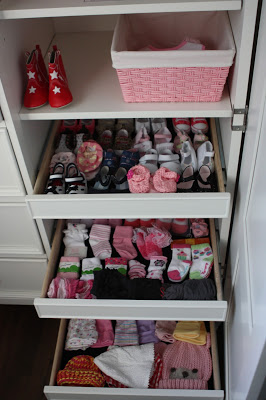 |
| Oh, these little drawers! They're my favorite. They're why I couldn't let this piece go. As soon as I saw them, I knew they were meant to hold bitty shoes, socks, and hats! |
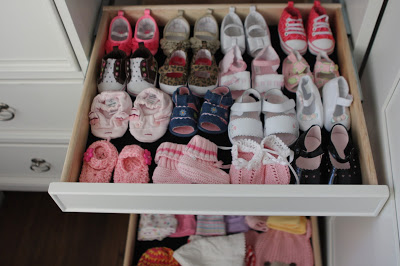 |
| See what I mean? Just right! |
I keep clothes in the drawers on the left side, including pajamas, onesies, pants, and t-shirts. And I store bibs, burp cloths, extra crib bedding, blankets, and other linens in the shelves above the shallow pull-out drawers.
 |
| And all of the drawers in this piece are so nice to have. |
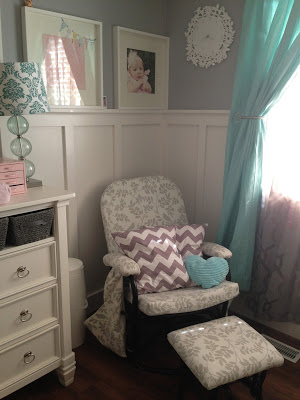
Next item on my list of musts was a rocking chair. Cory and I had one, but it was in desperate need of a makeover. Paula, an amazingly talented friend of mine, offered to create new covers for the chair, which was no easy task. So we stripped the cushions off it, bought some fabric using the awesome 40% off coupon at Jo-Ann, and sent it her way.
 |
| Plain faux leather cushions once sat atop this chair frame, but they were in desperate need of a makeover. |
I love, love, love the way the chair turned out. Paula is a miracle worker. You can find her awesomeness
in her Etsy shop. Yum!
 |
| Paula to the rescue with this a-freaking-mazing updo. The pockets look a little off, but that's because that's where I now keep the story books I read to Mags at night, so they get much use. |
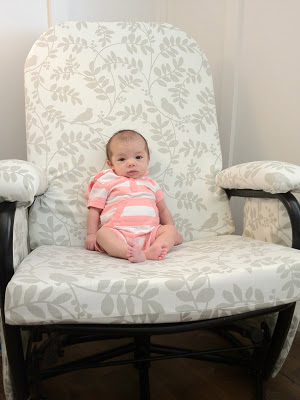 |
| Bitty baby in a big chair! |
Paula also made the pillows that sit on the chair. Isn't she awesome? I use this chair every. single. day. It's our favorite place to sit and read stories. Speaking of stories, Maggie can't get enough of Bubbles, Bubbles, which was a Dollar Spot score at Target. She has so many fab books, but this is her go-to. Gotta love a deal!
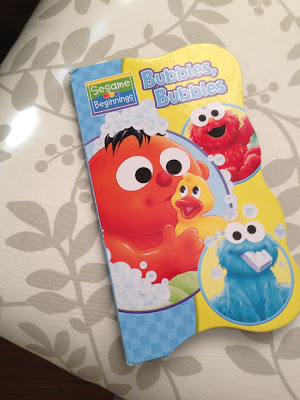 |
| Maggie's FAVORITE book. |
You may have noticed the awesome clock above the rocking chair. That is another one of the handmade gifts that fills Maggie's nursery with such love. The incredible Holly Jones, a dear friend of mine, made it and gave it to me at my shower. She sells cut-outs in numerous styles and finishes, including wonderful wood designs. You should check her cute
Say Hello Shop when you have a minute!
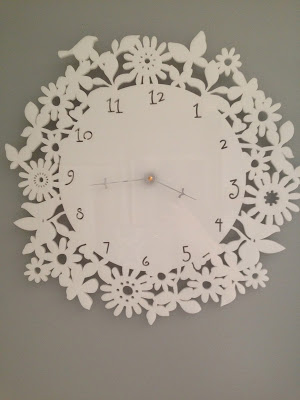 |
| Love this lovely clock my friend Holly made for Miss Mags. |
Before I get to all of the sugar on top (aka the decorations), I'll talk windows. This was hands down the most difficult thing to find for this space. In fact, it's still not complete. I'm waiting for a good deal on plantation shutters. If you hear of one, please let me know. Until then, I've at least finally found the curtains I adore. The sheer, lattice-print lining and the darker drapes are both from
Z Gallerie. I searched high and low, and finally knew these were the ones when I stumbled upon them.
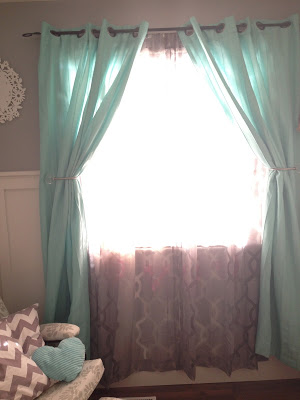 |
| At last, the long journey to new window treatments was over. Z Gallerie to the rescue with this perfect pair. |
Here's a backlit shot so you can see the pattern better.
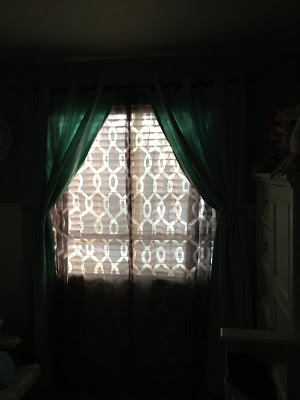 |
| Isn't the pattern on the sheer liner cool? |
The tie-backs are from
Pottery Barn Kids. Love the big bulb on the end!
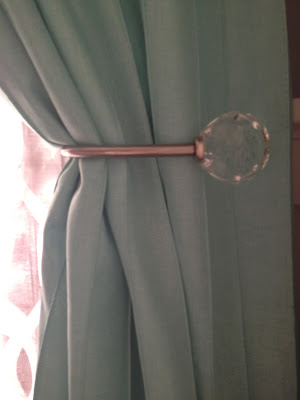 |
| Take off, knob! This is just the tie-back this window needed! |
That's it for the big stuff. Now, on to the finishing touches. I feel the star of this show are my frames that sit atop the little ledge shelf created by the faux wainscoting.
 |
| Love the frame-lined wall. The large prints and photos make such a statement. |
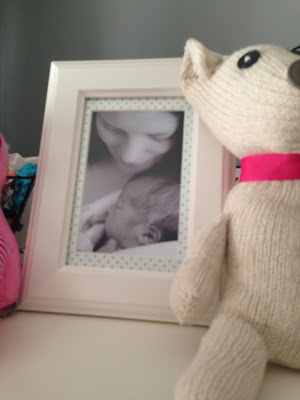
The 12x12 frames are from IKEA. I filled them with photos, like this one taken by the talented
Maggie Holmes...
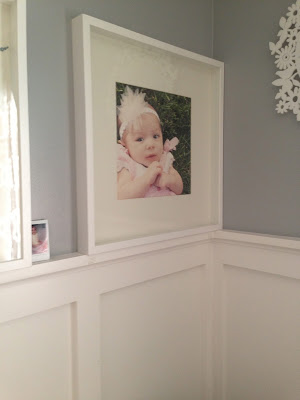 |
| This darling photo was taken by Maggie Holmes. |
...and the ones visible in this image (on either side of the the "hello" printable), which were taken by another talented photo friend of mine,
Elisha Snow.
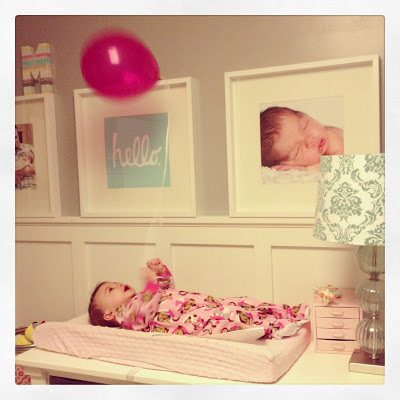 |
| The adorable image in this frame was taken by Elisha Snow. |
I use the
Epson Artisan 1430 printer to print my 12x12 images, and it rocks my socks. Best ever!
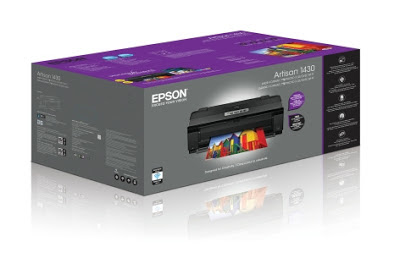 |
| An incredible printer for adding 12x12 images to any space! |
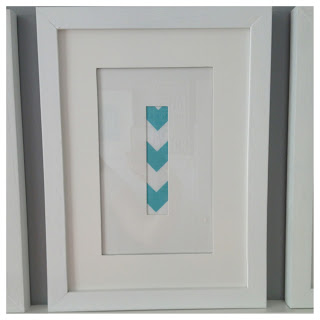
I filled one of the IKEA frames with a piece of scrapbook paper that I dressed up using the Fiskars flag punch and a few embellishments.
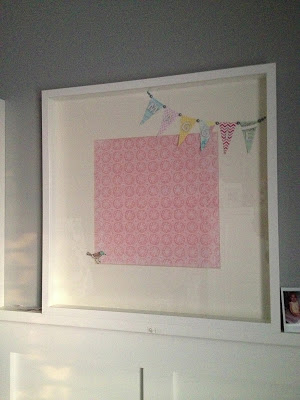 |
| Scrapbook paper is sometimes the perfect piece of artwork. |
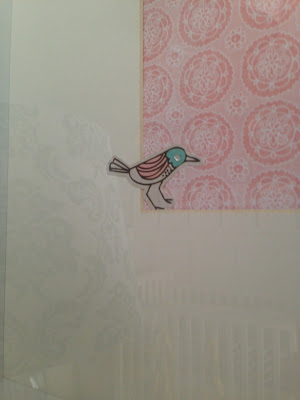 |
| Tiny details are just enough. |
And I filled one of them with the sweet "hello" printable, which I purchased from this
Etsy shop.
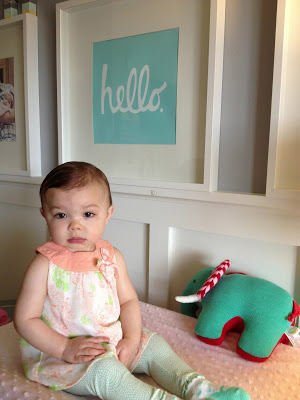 |
| This "Hello" print was one of the very first things I bought for Maggie's room. I adore it. |
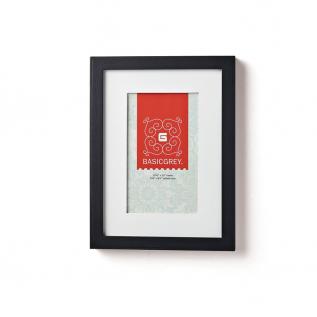
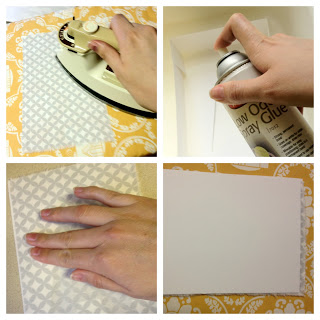
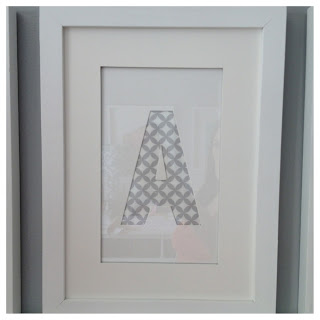
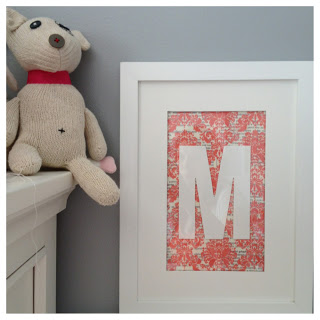
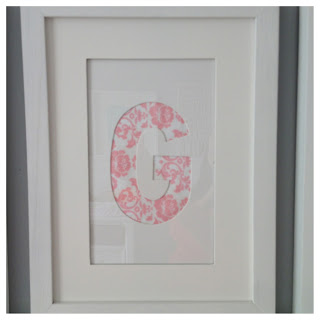
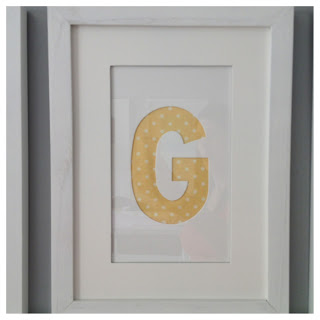
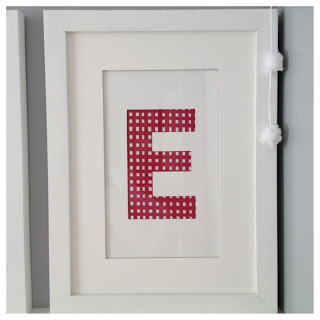
On the opposite wall sits the
BasicGrey frames spelling Maggie. For more on these, including a tutorial on putting them together,
see this post.
 |
| Let's play the name game with these fabric-filled frames. |
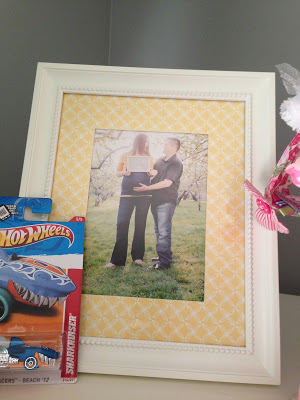
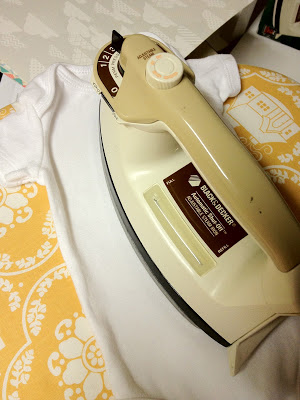
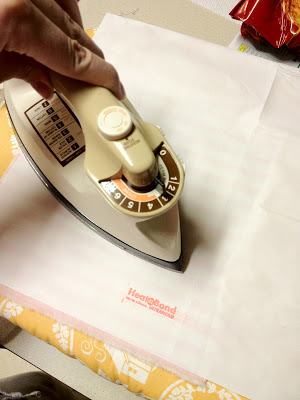
From there, I mixed in smaller fames, like this one, which houses the info on Maggie's incredible arrival. I used paper from Pink Paislee and stickers from BasicGrey. I also painted a paper mache M from Jo-Ann and lined it with washi as part of my Washi Workshop for Studio Calico.
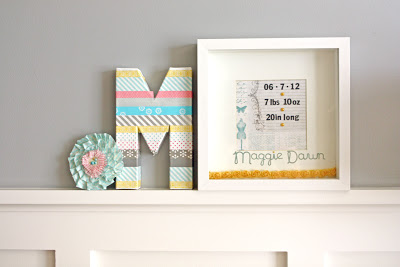 |
| A few of the things I made for Maggie's space. The washi-covered M was part of my Washi Workshop for Studio Calico. So fun! |
For this frame, I glued scrapbook paper to the photo mat that came with the frame to complement the space.
And on this one, I simply lined the mat with washi tape for a quick makeover.
 |
| Framed photo by Elisha Snow. |
I wrapped a second, larger paper mache M with yarn.
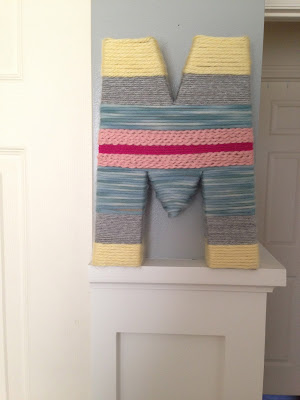 |
| Yarn-wrapped M, which was also featured in the Scrapbooking for Babies & Toddlers special issue by Creating Keepsakes magazine. |
Using fat quarters of fabric, I cut triangles with my pinking sheers and strung them up on a strand of pom pom yarn. I made a second banner using lace as the topper in place of the pom yarn to mix up the look a bit.
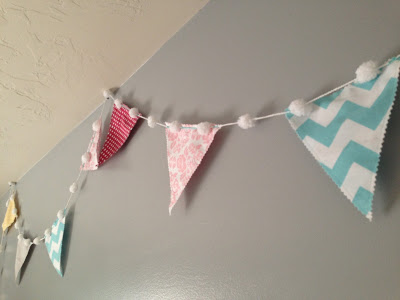 |
| A little banner bidnaz makes any room happier. |
I lined her light switch plate with washi, which was quick and made a big impact. Loved the outcome so much that I later added washi-covered plates to many of the rooms in our home.
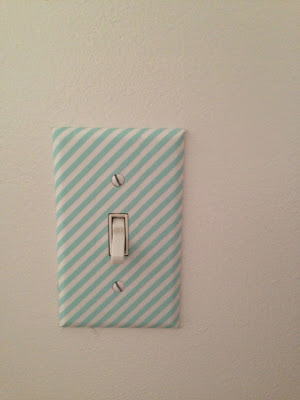 |
| Washi-covered light switch plate cover. So simple. So great. |
For Mags many hair bows, I use a necklace holder and cute plastic basket (purchased at Target's Dollar Spot).
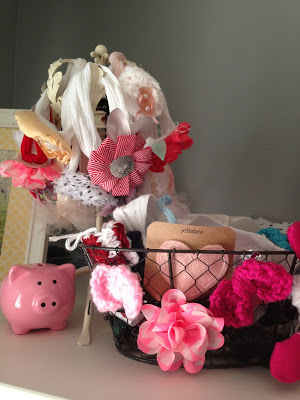 |
| Hair bows, don't cha knows? |
And I keep her toys in a set of barrels I received from the fine folks at BasicGrey.
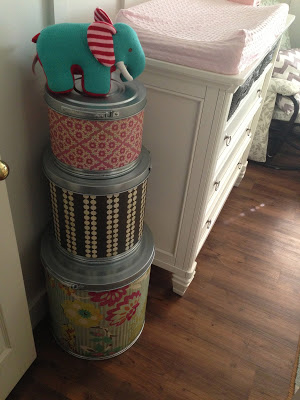 |
| BasicGrey barrels, just right for holding Mags' toys. |
The closet isn't much to look at (beyond all of the darling outfits it contains), but I do like the little clothes dividers that I received as a shower gift.
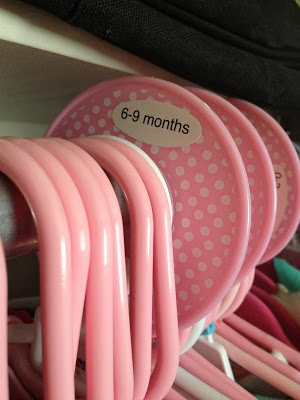 |
| Cool closet dividers. |
And while this isn't anything decorative, my video monitor that my best friend Kirston and her mom gave me is one of the very best parts of this space. I HIGHLY recommend a video monitor to any new mom.
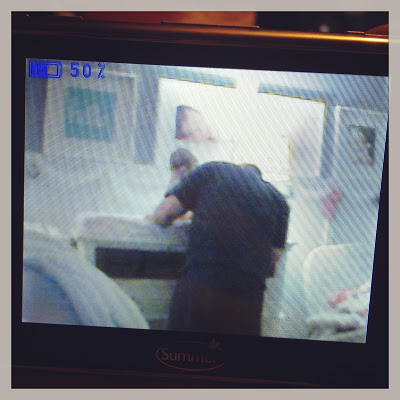 |
| Love this video baby monitor. It allows me to be a peeping tom and look in on wonderful moments like this. |
Also on my list of recommendations is a Diaper Genie. This little guy keeps the stank out, which is all right by me!
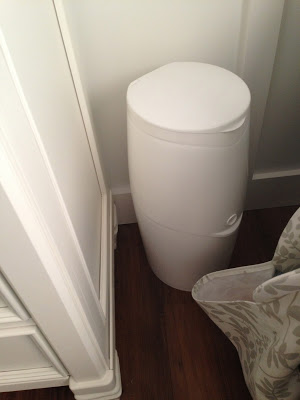 |
| Not the cutest, but a definite necessity. |
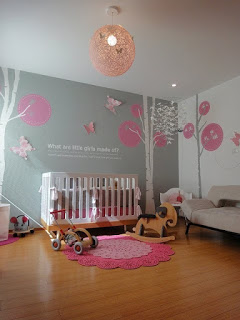
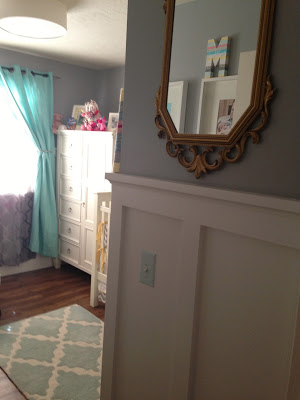
Finally, the part of the nursery I love the most, besides the little lady living here, is this mirror, which once belonged to my dear Grandma Margaret. Maggie was named after her, making this addition all the more special and heartfelt.
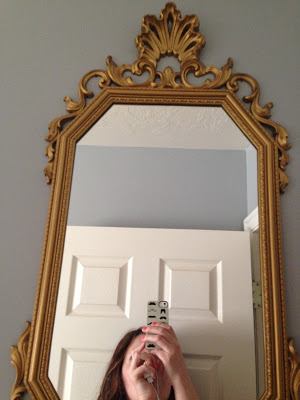 |
| This brilliant mirror once belonged to my incredible grandma. I love having it in Maggie's room now. Seems like the perfect spot. |
I think that about does it. Thanks for taking this looong room tour with me. I have a few final touches that are still coming together. As soon as they're ready, I'll be sure to share. In the meantime, you can check out a Studio 5 segment I did on Maggie's space
here.
Cheers!
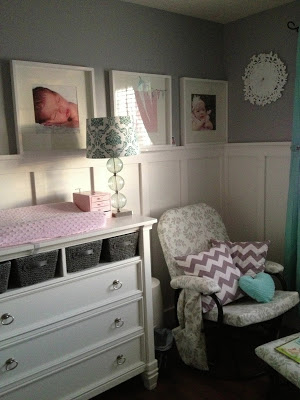
 |
| A peek inside. |