Sweet Easter Treat (and it's even zero calories!)


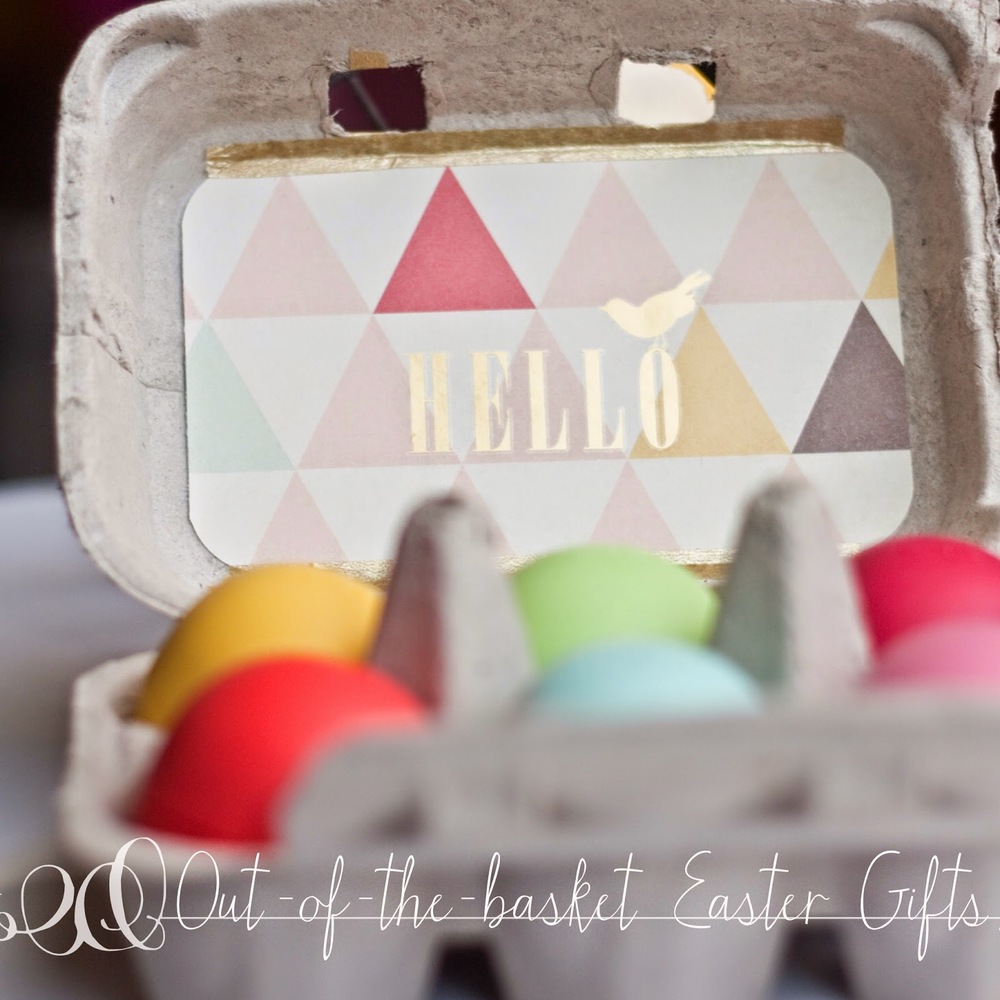
You might say I have a crush on this Easter goodie. Nope. It's not Rainblow Eggs, but I share almost as much love for these, which is odd, considering they're not even edible.


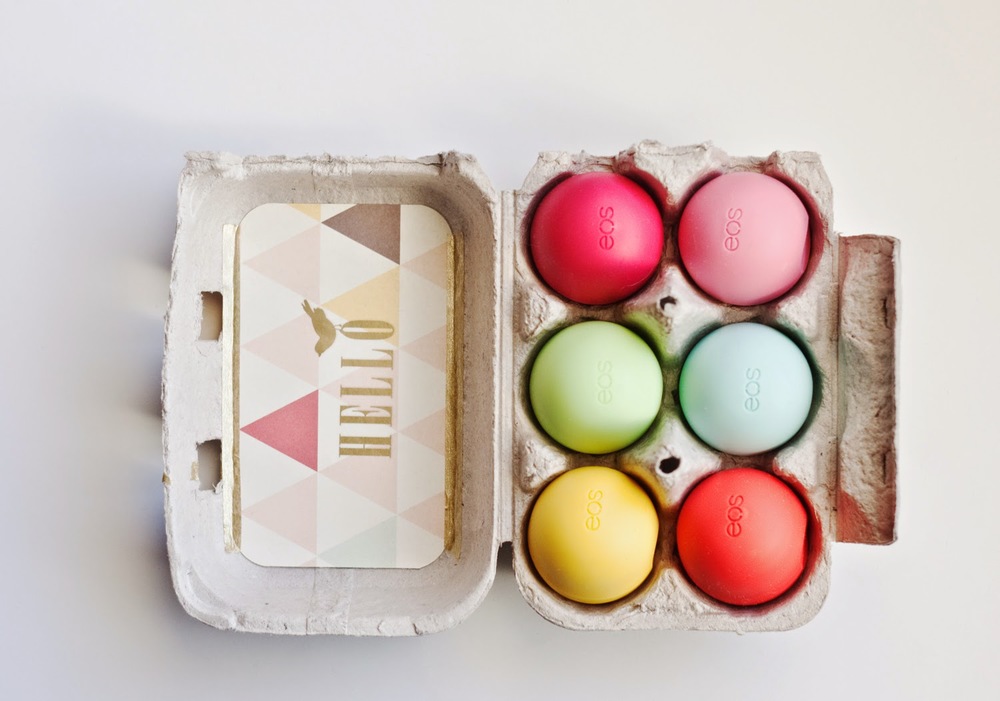
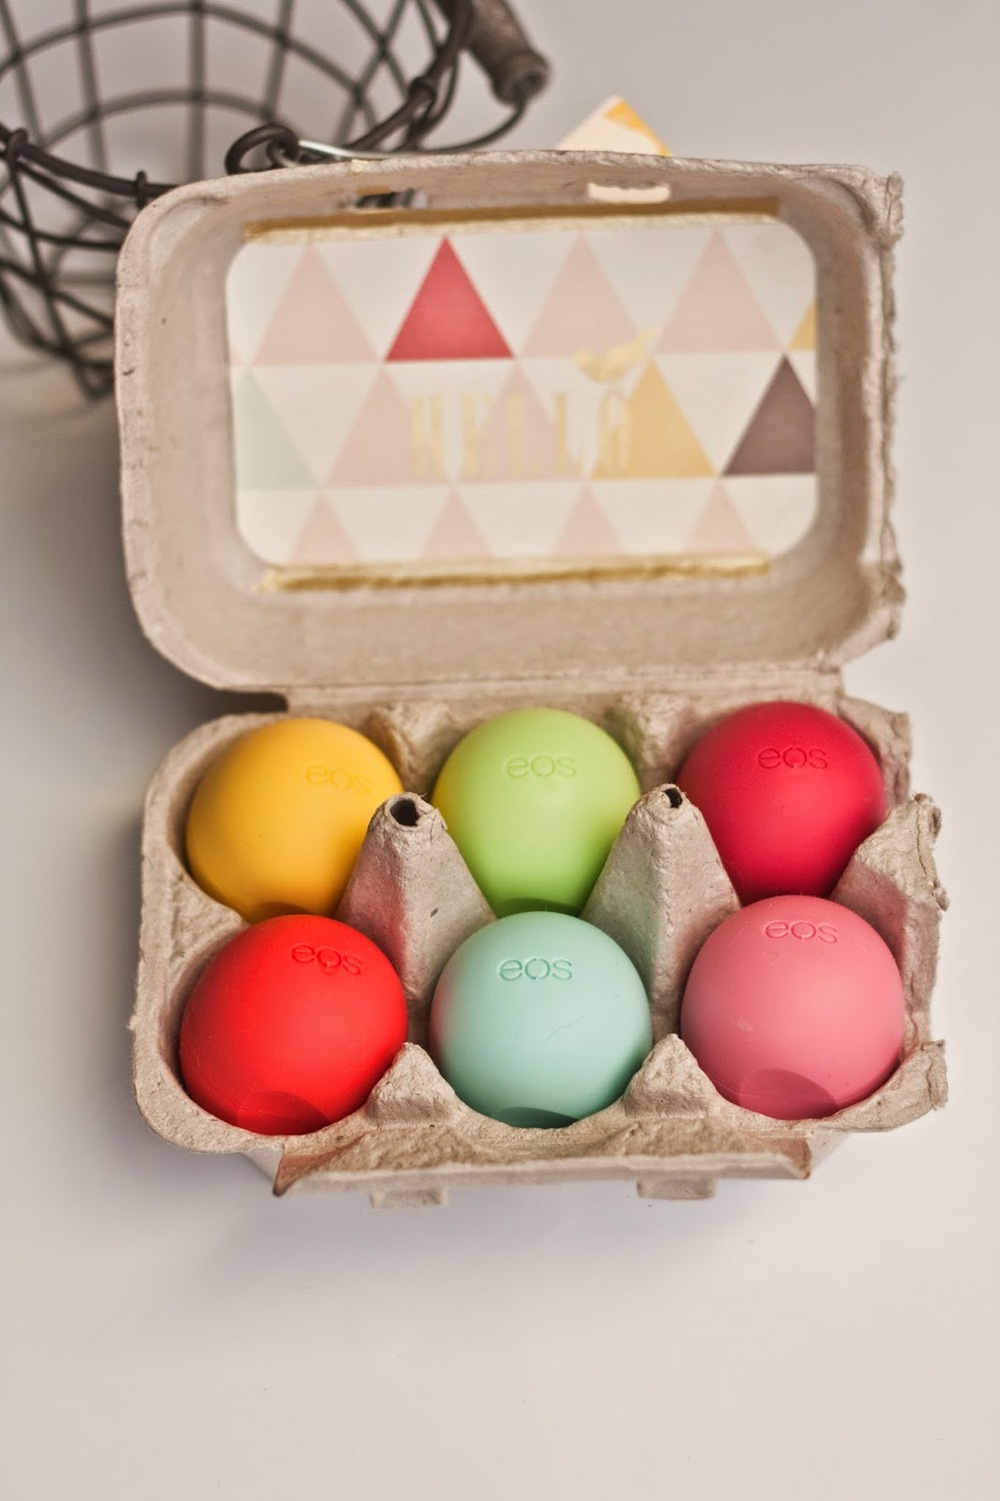
What's inside this carton, you ask? Well, let's pry it open and take a peek.


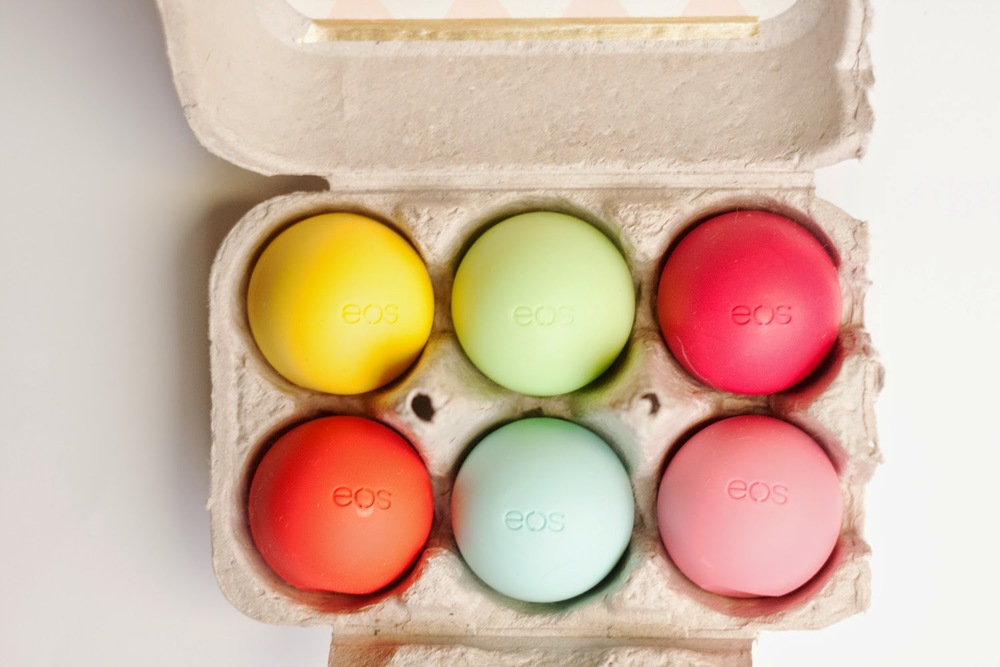
It's EOS lip balm! Betcha thought E.O.S. stood for Evolution of Smooth (or you didn't know what it stood for, like me). Nah. Not here. Now it stands for Easter O' Style!

Available in many flavors and colors, these little lip eggs look so pretty filling up a paper carton. Surprise your best friend, coworkers, or other special gal. Or give that special guy a less-than-subtle hint. *wink wink* 


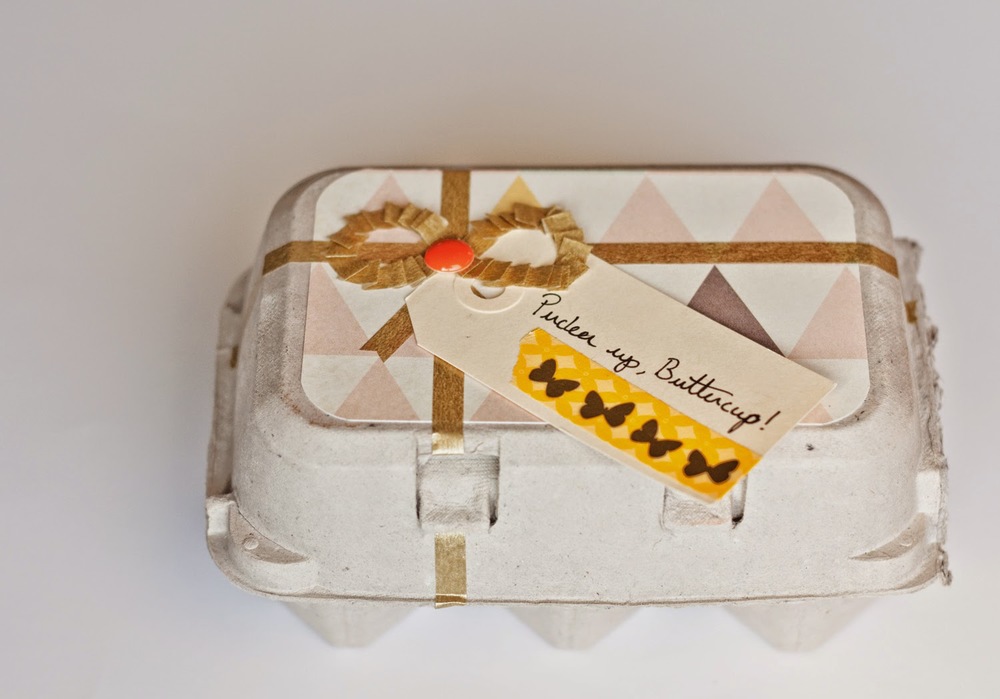
Of course, I'm all for adding a personalized touch, so I put some paper on the lid and added a washi-tape bow by pleating the tape. The gold rub-ons are by Maggie Holmes for Crate Paper, and they're some of my favs. They even worked ON washi!

The cute carton? Why, it's from Shop Sweet Lulu, an adorable online store. No time to order? No worries. Just slice a regular carton in half. Or, if you're feeling egg-stra generous, give someone 12 balms. I assure you they will not be disappointed to have a lifetime collection. 


I'm sharing this and many more out-of-the-basket Easter giving ideas this Thursday on Studio 5. If you're local (UT), tune in to channel 5 at 1. Or you can watch it stream online at 1:00 MST right here! Hope you'll hop on over. 

I'm always seeking fun and unexpected gift ideas. What gift would YOU put in this bitty egg carton?

Cheers! 

Fast Father's Day Gift with Heart

Finding that perfect gift for Pop can be tricky. What do you get the guy who has everything? You can’t go wrong with a gift card, but some feel they lack that heartfelt touch... until now. Here’s an idea that combines the ease of gift cards with the heartfelt touch of a handmade gift. 
It’s an envelope mini album!  


Attach several small envelopes (you can even use the envelopes that come with the gift cards) together using scrapbook adhesive. Decorate the envelopes, and fill each individual pocket with a gift card to one of Pop’s favorite shops. 


This is a Valentine’s Day gift I made for Cor this year. He actually carries it with him, so you’ll have to excuse it’s worn exterior. 
I filled the first envelope with a special love note to my sweet, but you can just as easily fill it with some special words for dear old dad. 
This project can double as your greeting card. Simply fill the inside of envelope #1 with a special sentiment.


I wrote a little poem for each of the remaining panels. The words are clues to the gift card contained within that envelope. 
Cor love coffee beverages, so his first card was to Starbucks--an affordable option.
The sentiment reads: "To show you that I love you a lot, let's start the fun with something hot!"
Another cost-effective choice, I included a card to Cor's favorite fast food restaurant, In n Out. Yum!
The sentiment reads: "The way to a man's heart is the tum, and this surprise I know you'll find num."  
Who doesn't love iTunes? Cor used his to purchase apps, but this is  also a nice choice for the music-lover dad.
The sentiment reads: "To the cutest tech geek I've ever known, here's something to use with your iPhone."
Include a gift card for something you can do with your dad. I went with a movie card for Cor, as we love seeing flicks.
The sentiment reads: "I love time spent with you, Romeo; let's take a night to enjoy the show."
If it's in your budget, include a bigger ticket item in your last envelope. Cor loves shoes more than I do, so I knew Foot Locker was an ideal choice for him.
The sentiment reads: "Last but not least, one more special treat; a card just for those beautiful feet."

Get the Kids in on the Fun!
Here’s an idea! Do you have more than one child. Have each child decorate an envelope, and then hook them all together. That would make this extra personal and special. 
This project can come together in minutes, and it will make for a fun shopping spree for the man who means so much to you. For a quick how-to on connecting the envelopes in a slightly different fashion, you can watch my very first Studio 5 segment (don't judge me; I was a rookie), where I demo a similar project I created for Christmas. 


Happy Father’s Day weekend to all the fabulous papas out there!

Handmade Bibs from Oilcloth and Laminated Cotton


Is it rib night yet? Because, boy do I have the bib for you! Make that three bibs. Bibs I made using laminated cotton and oilcloth. I’m super excited about this particular project, because it’s my first sewing project made from a pattern. Everything I’ve sewn up to this point, I’ve sort of made up. This time, however, I had a fun design to follow.


My cute new friend, Kirsten, who works at Material Girls Quilts in South Jordan, UT, designed this pattern. I saw it and immediately thought of another friend of mine, who was about to have a baby. Of course, that was months ago. Her beautiful babe is six months old now, but I suppose they still wear bibs at that age. Heck, I still wear a bib. ;)
Anyhoo, here’s the bib I made for little miss Claire. I hope she likes it. 


I had so much fun making it, that I decided to make a couple of others. Maybe I’ll use them on my own sweets someday. Or, if not, it’s always good to have a few handmade gifts on hand. 


Which one do you like the best? I prefer Claire’s, but most people have said they like the black and white one.
Want to make your own bib? Here’s how:
Step 1: Fold your laminated (or oilcloth) fabric in half and trace fabric on back of one half. 


Step 2: Cut out shape. 


Step 3: Repeat with cotton fabric, which will be used as back of bib. 


Step 4: Pin cut pieces together around edges and sew together using a zigzag stitch. 


Step 5: Tear cotton fabric into strips, pin those strips around bib (like hem tape), and sew hem to bib using a straight stitch. 


Note: Make sure you stitch an elastic to the top of the bib. This will act as your closure. 

Step 6: Create a medallion flower, adding a large button to the center. This is what your closure will wrap around to keep the bib on. Note: For instructions on creating a medallion flower, click here.


Had lots of fun making my first pattern project. Who knows, maybe I’ll get up the courage to try it again sometime soon.
Cheers!

DIY Felt Fortune Cookies


Hey there, cookie! Here’s a little Valentine’s Day good fortune for you. It’s a felt fortune cookie. 


Inspired by the talented Kristine McKay's Studio 5 segment, I created these cookies for my coworkers last year. They come together quickly and make a great and unique surprise for anyone who brings a little good fortune to your life. Here’s the recipe for these cute cookies.
Step 1: Cut a felt scrap into an oval.


Step 2: Cut jewelry wire to the length of the center of your cookie.


Step 3: Apply fabric glue to the center of your felt piece.


Step 4: Position your wire to the glue and secure in place by adding a strip of ribbon across the top. 


Step 5: Fold cookie in half and stitch around edge. Leave a small area unstitched so that you can insert a fortune. 


Step 6: Use your finger to form the wire into the fortune-cookie shape. 


Confucius Say: This is one project you’ll love this Valentine’s Day!
Cheers! 

A Happy (and quick) Halloween Craft


Here’s a quick (and super cute) project idea, whether you’re headed to a party this weekend and need a hostess gift or you’re hosting a frightening fiesta and are in need of a fun favor. It’s a rolled paper candy corn!


Fill the cone with candy corns and tie it up with a little baker’s twine for a cute and creative Halloween treat.


I made these in a matter of minutes with a little white cardstock, a hot glue gun, and a bit of tissue paper. Quick and easy! Download the pattern for free and find instructions for creating this sweet treat here.


Happy (and sweet) haunting!

Gift-Card Holder Card


If you’re super computer savvy, you likely know that 100110 is the binary code for the ampersand (&). I don’t speak computer, but my coworker and her new hubby do. They selected 10-01-10 as their wedding date partially because of its binary meaning. Isn’t that romantic? It was my fun job to make the happy couple a wedding card from our entire magazine staff, which meant there needed to be plenty of room for signatures, as well as for a gift card. And I naturally needed to make the ampersand a significant feature on the card. This project is the result. Whether you need a group card or not, this idea is a creative way to give a gift card and show someone you care.


Here’s how it’s done:


Step 1: Fold 6x6 cardstock base and cut a small slit in the center of the card’s spine.


Note: The slit should be long enough that you can fit a strand of tulle through it.


Step 2: Punch a decorative border along top and bottom of card front. Then stamp the front of the card with a giant ampersand stamp like this one from Stampin’ Up!. I used Jenni Bowlin paint from Ranger to ink my stamp.


Step 3: Once the stamped image is dry, feed a strip of tulle through the slit in the spine of the card.


Step 4: Tie a knot in the center of the tulle and position the knot in the center of the card.


Step 5: Secure the tulle in place by adhering to the back front cover of the card.


Step 6: Conceal glued tulle by adhering a slightly smaller card base to the inside front cover, leaving the back flap of the base free. This creates a page in your card, which is great when you have a long message to leave or plenty of people who need to sign your card.


Step 7: Stamp a butterfly to complement the colors of your project. I also added a little color using my Copic markers and some more Ranger paint, and some texture with BasicGrey pearls. Adhere the butterfly to the center of your tulle bow.


Step 8: On the inside back cover, paint a smear of color using the same color of paint you used to stamp your ampersand.


Step 8: Spell “enjoy” over the painted area using letter stickers like these from BasicGrey.


Step 9: Stitch tulle pocket over the painted area of the inside back cover, and insert a gift card. Now, when your recipients removes the card they’ll see the little message waiting for them.


There you have it, a wedding card complete with a slot for that gift card. Ampersand day may be over, but this style will still make any couple happy you thought of them on any day of the year.


Cheers!