

Hello, hoppers! I just love hopping around the Christmas tree... Wait! Christmas!? In August!? You betcha! If you’re a card maker, you know it’s never too early to be thinking about your next handmade design.

When it comes to holiday cards, I ask the following questions:
1. Is the card bulk-friendly? Will the supplies stretch and are the techniques simple enough to be done in multiples? I typically make between 75-100 cards each Christmas, so my design must pass this test.
2. Does the card support an inclusion? It needs to have space for a family photos and a message of some sort.
Thanks to the awesome new dies, stamps, and ink from Hero Arts, the cards I’ve created for today’s hop pass my test. Let’s take a look!
CARD 1: WHITE CHRISTMAS (or, as I like to call it, ‘Hood ’n’ Wood)

White on white on white—it’s elegant and, despite its lack of color, can be quite interesting. The trick is texture. Where color lacks, various textures will add interest.

To create my textures, I used two new Hero Arts dies—the Woodgrain Texture Fancy Die and the Paper Layering Neighborhood Die. I die cut both from white cardstock and then stitched the ‘hood to the wood.
TIP: USE THOSE LEFTOVERS!
When it comes to die cutting, there is nearly always an extra piece (negative image) that can be put to work somewhere. For example, my sentiment actually comes from the Very Merry Tree Fancy Die. (More on that with my second card.)
The bitty snowflakes come from my third card. This gorgeous neighborhood scene made me think of a snow globe, so the flakes were a must.
HERO ARTS SUPPLIES USED
Woodgrain Texture Fancy Die
Paper Layering Neighborhood Die
Snowflake Confetti Fancy Die
Very Merry Tree Fancy Die
CARD 2: TREE IN THE WINDOW

I love placing our tree in the center of our front window. It stands out as a holiday focal point. Perhaps that’s why I had my eye on the Very Merry Tree Fancy Die--it creates a window card!

The window offers much creative potential. Have fun exploring options. Design backgrounds to place behind the tree. See what speaks to you.
Here it is with a Glimmer Metallic Ink background. Shiny!

Here's a softer, watercolor background. Soothing!

Or, one of my fav window card pairings, a photo!

Also, cut the tree from various paper types (patterned and solid) and see what stands out.

Ultimately, I decided to double up on the die, removing the sentiment from the white version and layering it over the sentiment-ed patterned version. (This is where I got my sentiment for card one.)

TIP: MIX TO MAKE A MATCH
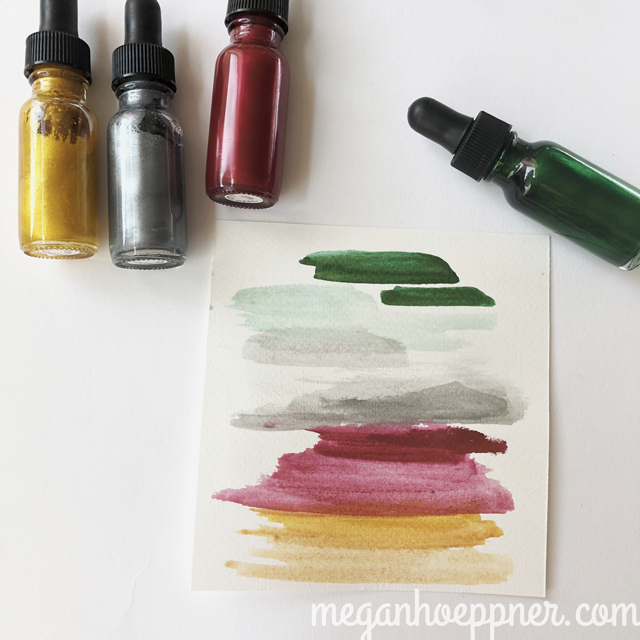
I decided to watercolor the front lightly. I wanted a color that matched my patterned cardstock, so I combined 3 squirts of the blue to 1 squirt of the green, making sure to also add plenty of water.

I then used the pretty Frost Shimmer Mist to add a little splatter texture.

TIP: TEST DRIVE FIRST!
Uh oh! I painted this animal using the Glimmer Metallic Inks and hated it. When working with a new project, it’s always wise to take a test drive before committing. Oh, how I wish I had done so here so I didn’t end up wasting a die cut piece and the paper to make it. D’oh!

TIP: FOLD A FLAP
I cut the back of the card base longer than the front and folded it up to create a pocket for a photo. The stitching along the sides ensures it stays in place, but you could also use staples or strong adhesive here.

AS SEEN ON TV
This window die offers SO MUCH potential. It’s why I included it on my latest Studio 5 TV segment—Five NEW Must Have Items.

HERO ARTS SUPPLIES USED
Very Merry Tree Fancy Die
Gold & Pewter Glimmer Metallic Inks
Green & Red Glimmer Metallic Inks
Frost Shimmer Mist
CARD 3: A SNOW SHOW

I wanted to create motion with this one, so I created a pull-out element.
First, I used the yummy Pewter Glimmer Metallic Ink to paint the insert. This ink can be used in its full capacity or watered down to a lighter shade by mixing water. I did a little of both to create the dip-dyed look.

Once dry (which happens in a jiff!), I cut the piece to a tag shape. You know I love me some tags!

I just adore the sparkle the Glimmer Metallic Ink adds. Plus, you can even stamp on top of the ink for added detail. I used the Color Layering Christmas Tree stamp set to add some detail.

I also stamped on the outside of the card for a little something extra.

To create the pocket, I used the Snowflake Confetti Fancy Die, stitching the flakes to a gray cardstock piece. I now have a place to put my jumbo tag. As the tag slides out, the snowflake action takes place!

Remember! Save those flakes. They can always work as confetti within the envelope, or, as we've seen, they make cute embellishments.

Now, as you pull the Glimmer tag out, you can see the shimmer in the flakes. I wish you could see it IRL. The glimmer is SO pretty!


On this card, a photo can be attached to the back of the tag. An easy way to do this that will make the photo detachable is to use photo corner stickers. With them, recipients can simply remove the photo from the card and keep it out long after the holidays are over.
HERO ARTS SUPPLIES USED
Snowflake Confetti Fancy Die
Pewter Glimmer Metallic Ink
Color Layering Christmas Tree stamp set
Intense Black Ink
JOIN ME IN A HOLIDAY CARD CLASS
If you want oodles of tips for creating holiday cards in bulk, my Annie's Online Class, 10 Festive Christmas Cards for the Busy Crafter, is just the ticket. Right now, it's only $7.99 to sign up, and you can watch from your computer or smart device as your schedule allows. It's never too early to start thinking holiday card making. I hope to see you there. <3
Sign up today for just $7.99.

BE A WINTER WINNER!
Hero Arts will be giving away two $50 shopping sprees, drawn from comments left across all blogs in the hop. Please comment by 11:59 PST on Sunday, August 26 and Hero Arts will announce the winner the following week.