Halloween Costume Party 2010

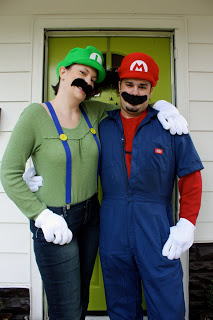
Yesterday, Cor and I had the pleasure of showing off our plumber’s cracks at a hauntingly good Halloween brunch. (Thanks, Brady and Andrew!)


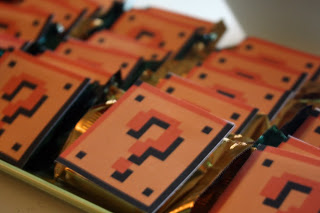
We were asked to bring a little treat, so I went with Mario mystery boxes (AKA Ghirardelli chocolates covered with cardstock question marks.) I simply copied the question box from this website, pasted it several times in a Word file, and printed it on cardstock. I then cut it out and adhered it to the chocolate for a surprise sweet!


BTW, our costumes were inspired by this awesome 80s cartoon (and the game, of course). Do you remember this gem? "Come on, it's time to go. Do the Mario!"


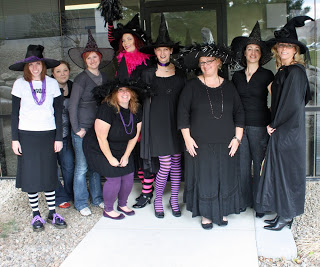
Over at Cackling Keepsakes magazine, we didn’t dress up this year. Instead it was business as usual for our team. I kid. I kid. We came to work as a pretty coven of creepies.


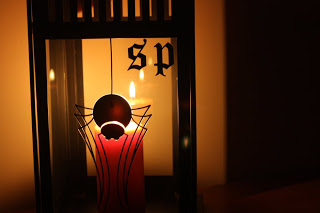
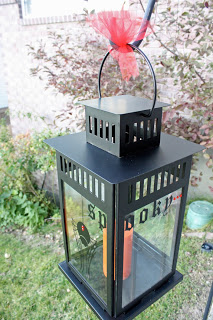
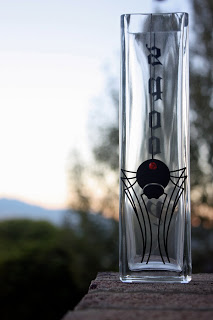
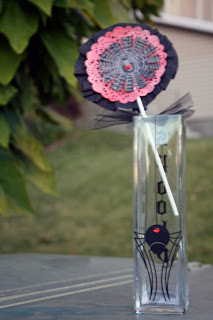
For this celebration, I filled these small candle holders from IKEA with candy.


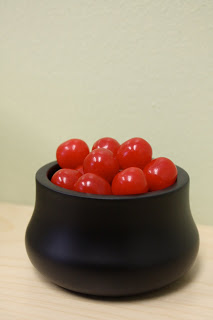
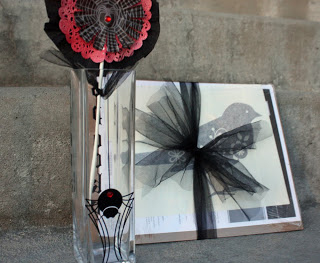
From cute candle holder to bubbling cauldron in minutes.


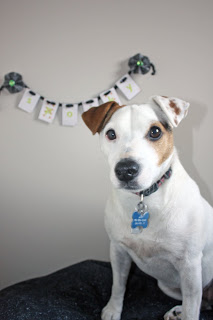
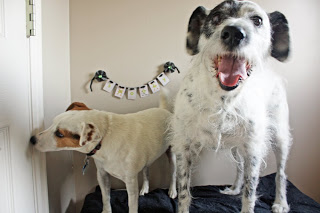
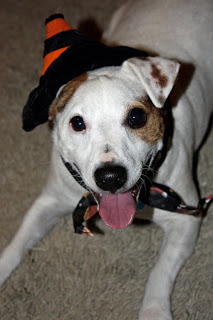
Naturally, I have a couple of puppy pics to share as well. Little Jack was my witchy-poo pup this year, complete with a candy corn bandana.


Kiss, feeling too old for the costume craze, opted for a Halloween t-shirt, which reads “No tricks, just treats!” As you can see by the shirts snug fit, he gets more than his fair share of treats.


I hope you (and your pets) had a happy Halloween!


Cheers!

A Happy (and quick) Halloween Craft


Here’s a quick (and super cute) project idea, whether you’re headed to a party this weekend and need a hostess gift or you’re hosting a frightening fiesta and are in need of a fun favor. It’s a rolled paper candy corn!


Fill the cone with candy corns and tie it up with a little baker’s twine for a cute and creative Halloween treat.


I made these in a matter of minutes with a little white cardstock, a hot glue gun, and a bit of tissue paper. Quick and easy! Download the pattern for free and find instructions for creating this sweet treat here.


Happy (and sweet) haunting!

Halloween Happiness: A Card & a Banner

My creative garden is full of accordion flowers right now. I just can’t seem to get enough of these fun-to-make paper pretties. Here's a spirited assortment!


Another spooky goodie I can’t get enough of is this paper from Making Memories. I love the bitty playing cards. Aren’t they cute? That’s right, I’m calling Halloween ghosts and goblins “cute.”


I recently sat down and made a few projects using accordion flowers and this freaky-fun paper. First, I cut out the bitty cards and strung them on black tinsel, creating a festive little banner, which I hung using a couple of my flowers.


To string the cards, I simply punched two holes in the top of each card and threaded them on the tinsel.


Whenever I pull out my camera, the pups automatically think it’s showtime. Here’s Jack posing with the banner.


And even though Kisses is far too big to be jumping up on this bench, he too decided to get in on the fun! Silly old dog.


It’s not too late to make and send a happy haunt of a greeting. I used the playing cards to make this p...p...p...poker card. I think it needs a little ‘splainin’. You see the black upside down V is supposed to be a carrot--a tool in editing that indicates you’re inserting a word. “Full Haunted House.” Get it? Yeah, it’s probably not the best card if it requires explanation, but I do like the play on words.


The playing cards pull out of the paper-crimped pocket. I think it would be fun to write little notes on the back of them.


And here’s a look at the inside, complete with a little spooky laughter!


Halloween is coming! Such a fun time to paper craft and watch old-school cartoons. Which cartoon is your favorite? I think I’ll go watch The Great Pumpkin Charlie Brown and have a little more flower fun.


Cheers!

Halloween Lighting and Prizes!

It’s starting to look like my lantern decorating is becoming an annual Halloween tradition. Last year I had fun decorating the lanterns in this post and this post. And this year I’ve been at it again. Here are a couple of my creepy creations, each created with vinyl from Stampin' Up! and lanterns (and a vase) from IKEA:


Gone Batty

I was excited to see this blood red lanterns this year, just right for a little vampire bat decor. I vant to suck your blood!


I love the shadow this style of lantern casts.


Spider Style

I couldn’t resist doing another spider lantern, but this time I used a jumbo-size lantern. It makes a freaky statement!


Venomous Vase

My vinyl fun didn’t stop at lanterns. I also adhered it to this tall, skinny vase.


I added some Stickles (glitter glue) from Ranger to the letters for a sparkling finish.


It looks like a spider has already moved into my vase. She appears to be a widow. Eep!


I made this flower with a little crepe paper, a spray-misted doily, and a bitty spider cupcake liner from Martha Stewart Crafts.


Note: Please keep in mind that these lanterns do get hot. Follow product instructions to ensure your safety. Thanks!


Enter to Win

Now’s your chance to bring a little vinyl boo-ty into your home. I’m giving away two sets of vinyl designs from Stampin’ Up! Simply leave me a comment here by Sunday, Oct. 17 and I’ll randomly select two winners to receive the following images:


The Prizes Continue

See another one of my lantern designs on the Creating Keepsakes blog and enter to win even more fabulous vinyl.


See a Demo

I’ll be on Studio 5 today at 11:00 AM sharing my lantern creations. If you’re in Utah, I hope you’ll tune in for the frightful fun! Bwa ha ha ha ha ha!


Cheers!

Folded-Paper Wreath DIY

I’m loving these rolled paper wreaths right now. So when my pal P.K. asked me to come up with a card-group craft this month, I knew this was just the ticket. We had so much fun making them that I thought I’d share the steps here so you can make your own. Here's how!


Step 1: Cut 26 6x6 squares and 20 3x3 squares from book paper. I used an old dictionary, but any book or sheet music will do (or you can use patterned paper for a completely different look).

Note: You may not need this many sheets. It depends a great deal on high tightly you roll you cones (step 2).


Step 2: Roll your cut squares into cones (with your paper positioned like a diamond, bring the sides in and form a point at the tip). Use a strong liquid glue (or a hot glue gun) to hold each cone in place. I used Fabri-Tac by Beacon.


Step 3: Add glue along the sides of the cones to glue them together, forming a larger circle wreath with the 6x6 cones and a smaller circle wreath with the 3x3 cones.


Step 4: Once glue is dry, color the wreaths with a little spray ink for a splash of color. I used Glimmer Mist by Tattered Angels.

Note: For the larger back wreath, you may want to spray it in sections before adhering the entire thing together, depending on how large your box is that's catching the spray.


Step 5: Color doily with spray ink. Once dry, adhere crepe paper to the back of the doily, pleating it for a more textured look.


Step 6: Adhere cone wreaths to cardboard-circle back for stability.


Step 7: Layer wreath components with glue, and your spooky sentiment, and hang your wreath for a splash of frightful fun. (Note: I glued a strip of tulle to the cardboard for a hanger.)


These wreaths are extremely affordable and can be done in an hour or two. To make it even faster, skip the back wreath and go with the smaller wreath only. And try switching out the colors, the paper, or the center piece for different holidays and seasons.


Cheers!

Frank & Greens


Frankly, I enjoy Halloween projects, so I’ve created a little card. I got the idea after die-cutting a bunch of bitty envelope shapes. The negative shape left in the cardstock reminded me of a Frankenstein head.


Decorative packing tape can add a little something extra to your paper crafts. I put a strip of it across the bottom of my card. I like how the green comes peeking through the tape.


I wasn't sure why, but my button stickers weren't quite cutting it as the bolts. My cute Cor had the solution. He cut two small strips of black cardstock for the bolt ends. It was just what Frankie needed to look complete. Thanks, hon!


I used a couple of fun adhesive techniques to create the glitter stitching. For more on those, check out my post on the Creating Keepsakes blog. While you're there, I hope you'll enter to win the Glue Grab Bags we're giving away this week.

Winner Winner!
Speaking of giveaways, I never did announce the winner of my Stuff Week stamp set giveaway. SO sorry about that. Congratulations, Alicia! Random.org has selected you as my winner. Please e-mail me at M2E2G@aol.com with your name and mailing address and I'll see that the stamp set is sent your way. Thanks!