Monochromatic Madness with Whisker Graphics: A layout & a card


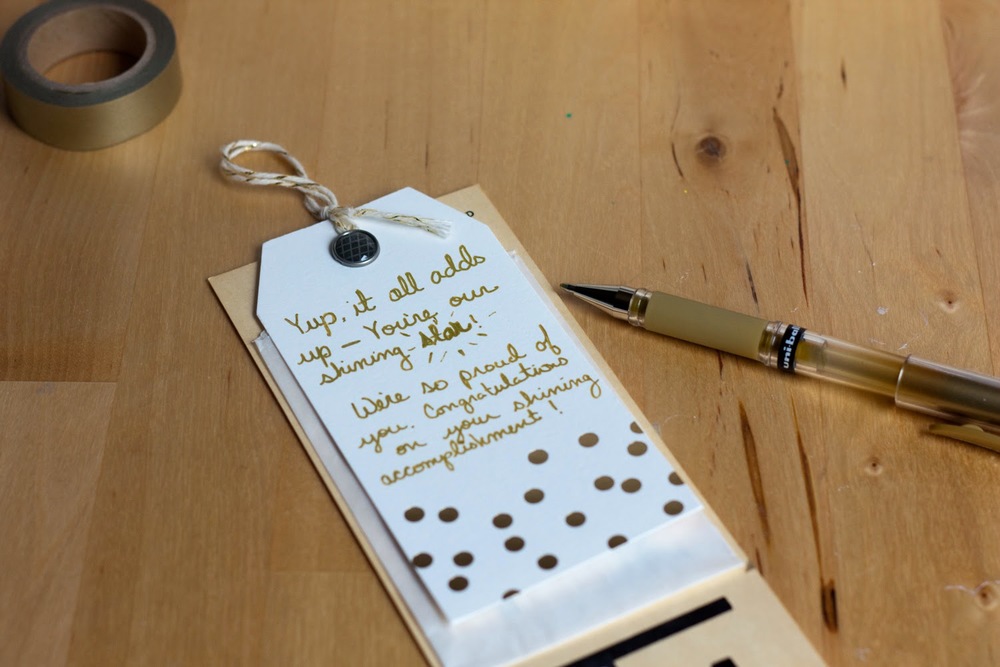
I've gone mad, I tell ya! [said in my best mad-scientist voice] Okay, perhaps I haven't completely lost it, but I am pretty coo-coo for color. Especially the various trends on the crafting scene that incorporate painting. So when the awesome loves at Whisker Graphics asked me to select a few products to work with here on the ole blog, I was instantly drawn to these gorgeous tags!


They were just the right size for putting my new Instax Share Printer to work on a layout. Here's how my page began:

Do It To It: The Photos
Knowing I wanted to document a few photos I snapped of Mags in front of a cool rainbow wall downtown, I added those pics to my photo's camera roll and printed them to my Instax Share Printer using the free Instax app. I'll have to go into this in more detail in another post. But I can tell you this printer rocks my socks!


The Polaroid-style film fits perfectly on the large tags, and my prints were ready in minutes!


Do It To It: The Background
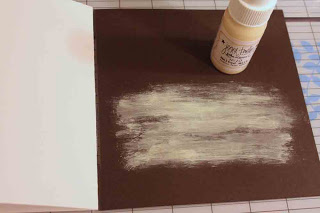
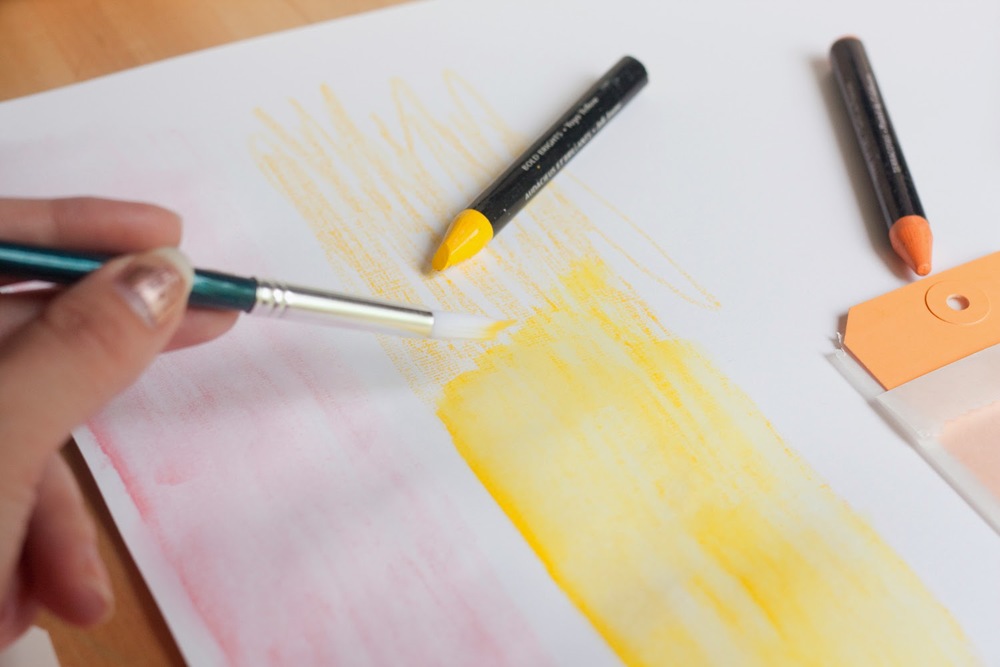
For the background, I grabbed my Watercolor Wonder Crayons from Stampin' Up! and set to work on creating my own colorful cardstock, using the colors of the tags as my inspiration.


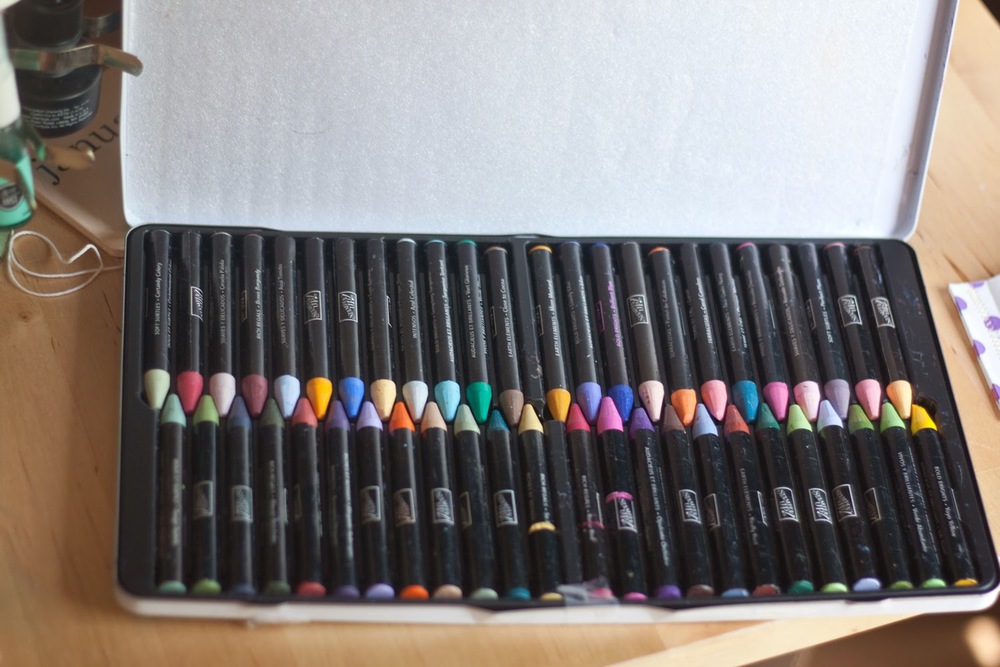
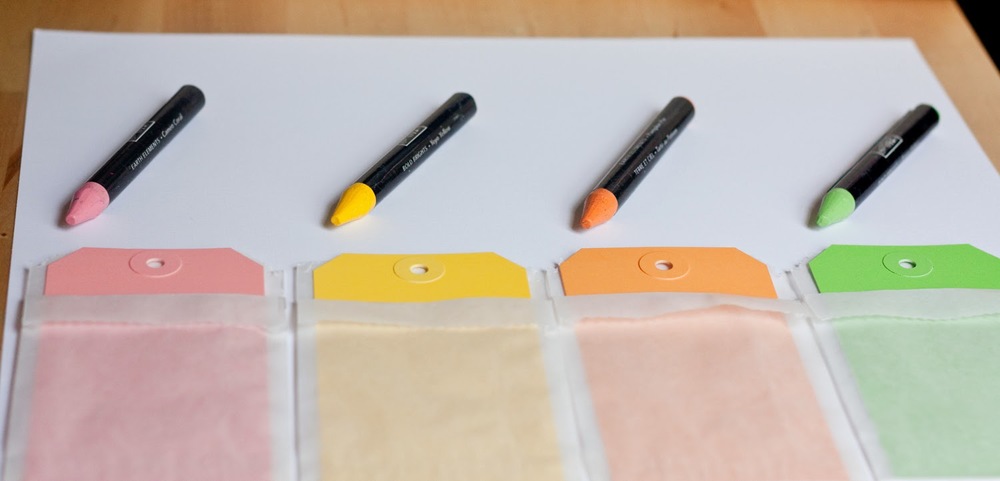
First, I colored four columns—no fancy business here, just some shloppy scribbles will do.


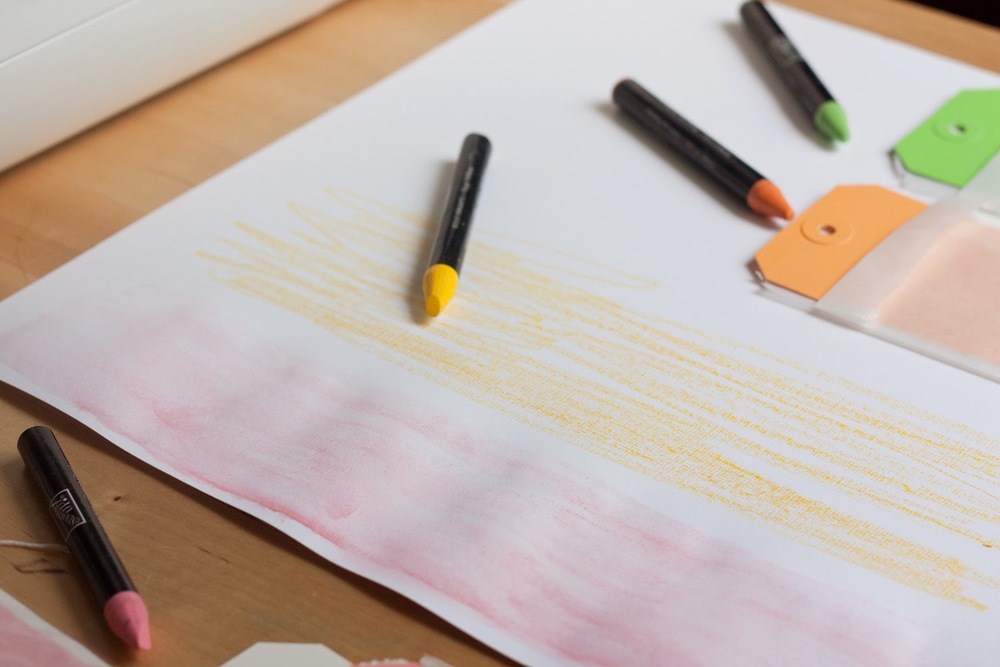
Then I took my brush, some water, and set to blending the crayons, creating a soft, watercolored backdrop for my tags.


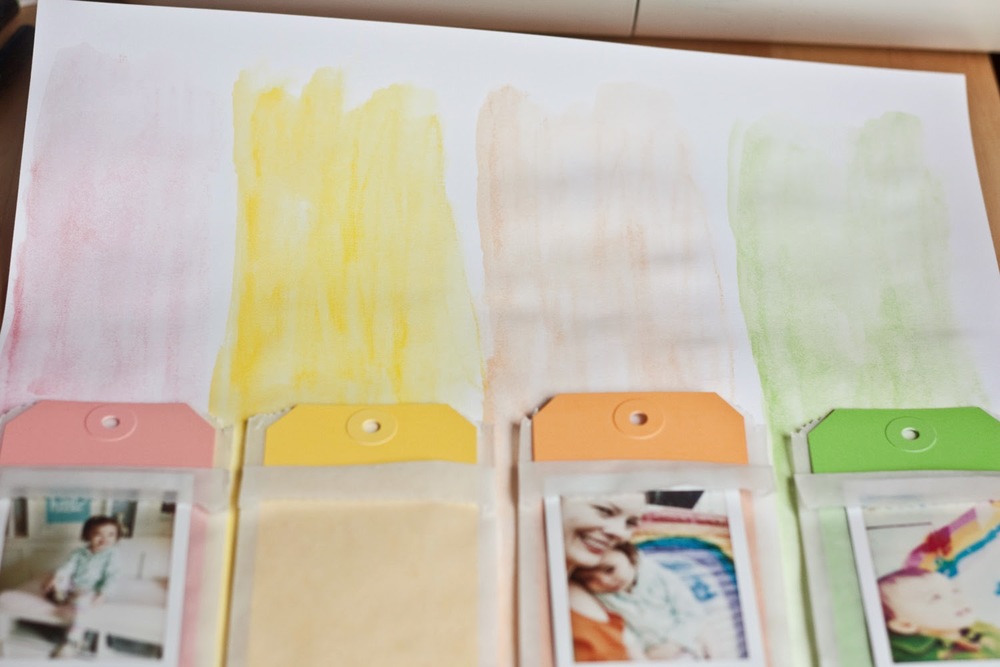
Once things were dry, I trimmed the 12x12 down to 11x11 (approximately) and matted it to heavy-weight gold cardstock, using my sewing machine. The reason being, the paper curls a bit when you watercolor, and anchoring it to heavy-weight cardstock keeps it flat and secure.


Next, I applied a bit of spray ink to the page for a splattered effect. I did my best to stick with the monochromatic-ness of it all, but the ink tends to wander. I'll be honest, I'm not in love with this detail and would probably change it if it were a simple fix, but I'm not about to start the page over now when I only sort of dislike. KWIM?


Do It To It: The Title
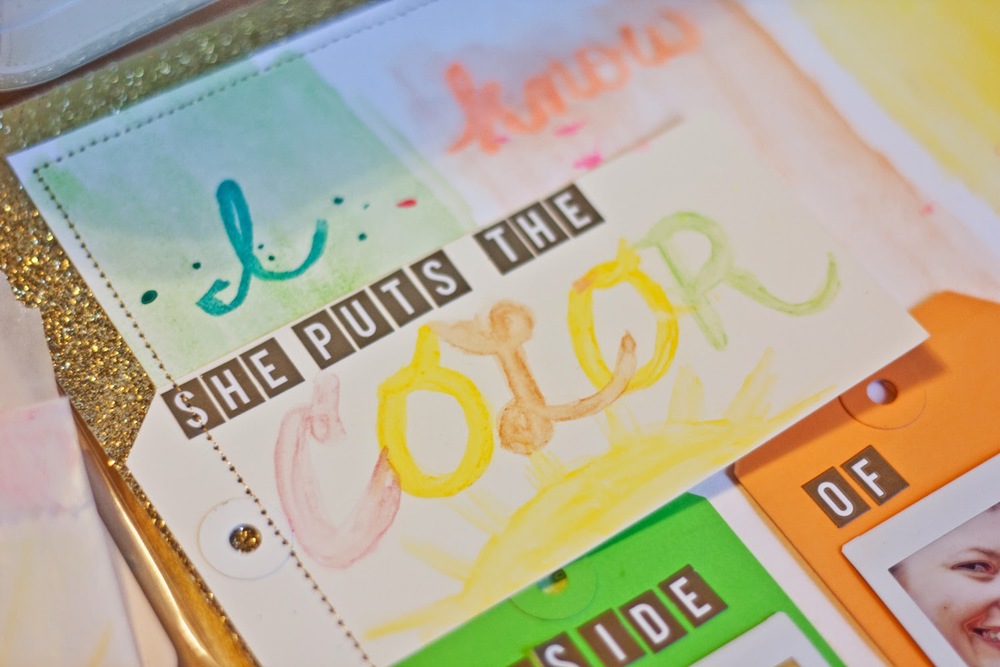
Inspired by the first line in John Mayer's song, "Daughters," I reached for my spray ink again to write "I know a girl." Like this idea, but the yellow tone-on-tone proves a bit tricky to read. Especially in the photo. It's not so bad here at home.

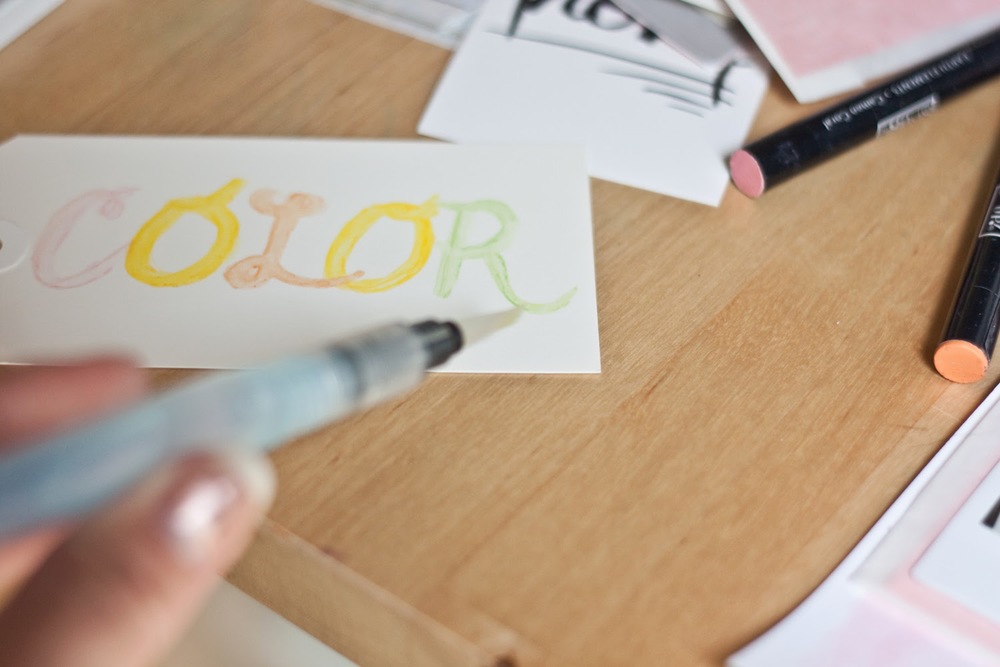
For "She puts the color," I used a large white shipping tag from Whisker Graphics.


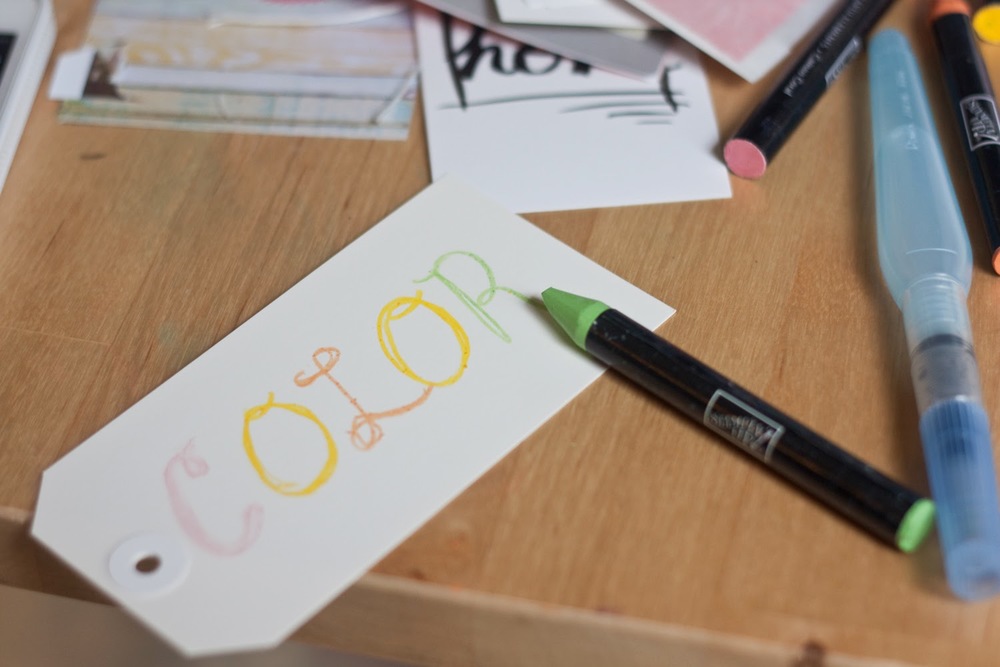
I actually wrote "color" with my Watercolor Wonder Crayons and used a water brush to blend the letters—a very cool way to create a watercolored brush script. You should try. Just go easy on the water and don't be afraid to apply more crayon color as needed.


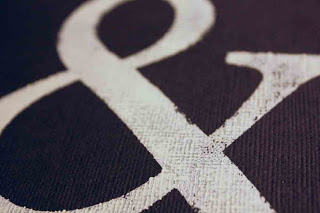
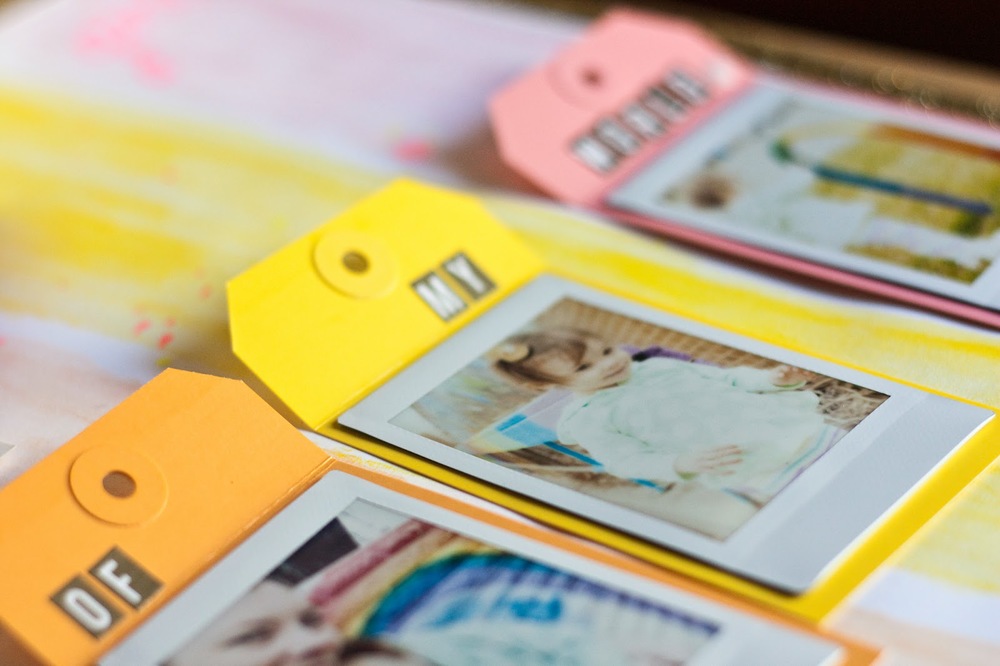
I completed the line—"inside of my world"—by adding Studio Calico stickers to the tags holding my stickers.


Is the song stuck in your head now? It's been in mine for days. If not, let's see if I can help you out. ;)


Do It To It: The Journaling
Wanting to tell the full story of my lovely rainbow-wall I find in downtown Salt Lake City, I knew I'd need ample page space, but I didn't want to disrupt the simplicity of the design, so I incorporated hidden journaling beneath the tags.


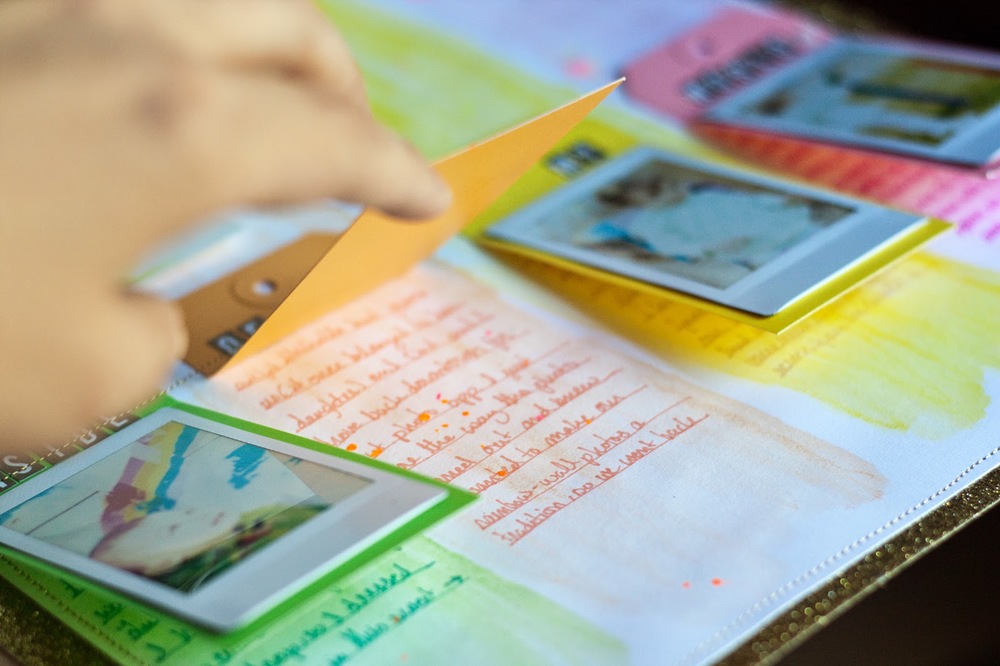
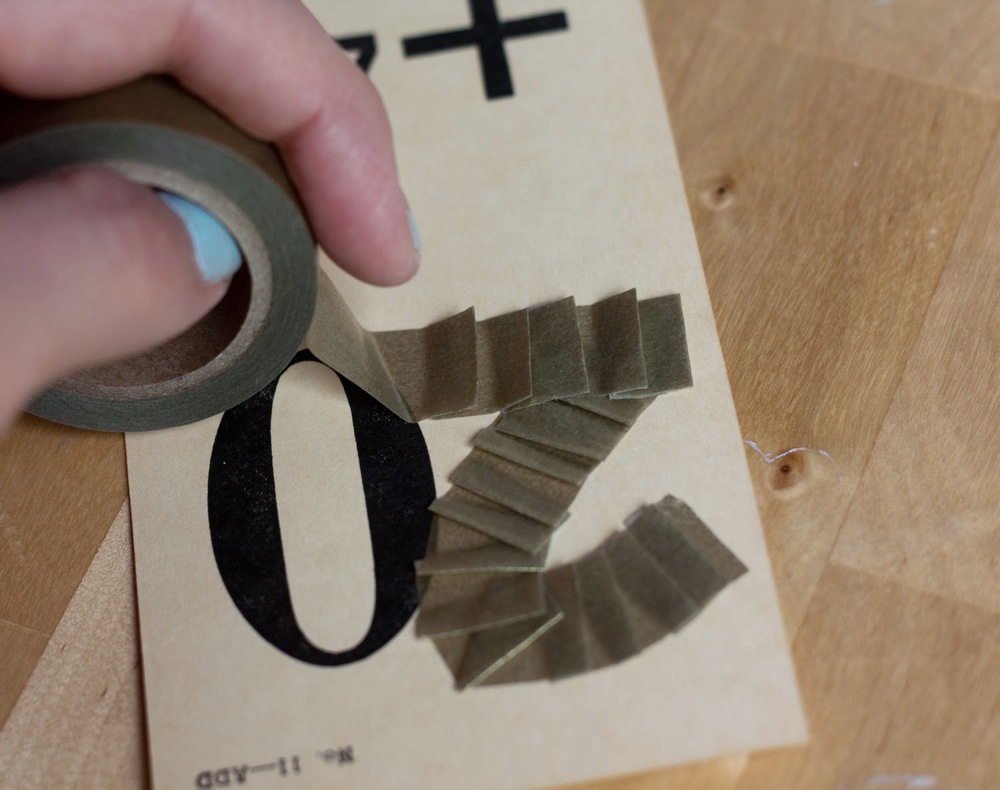
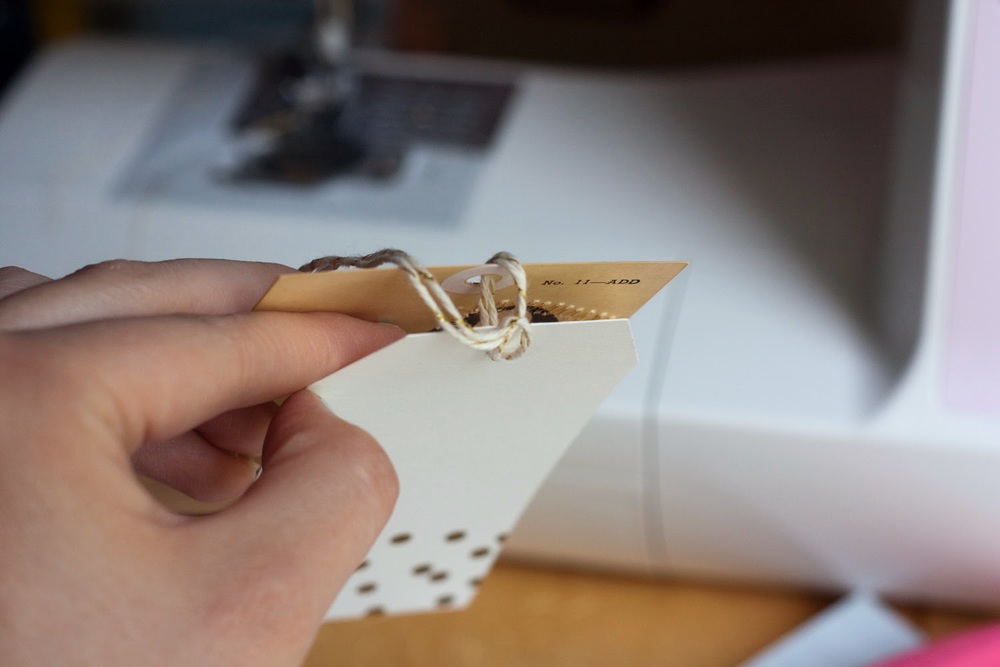
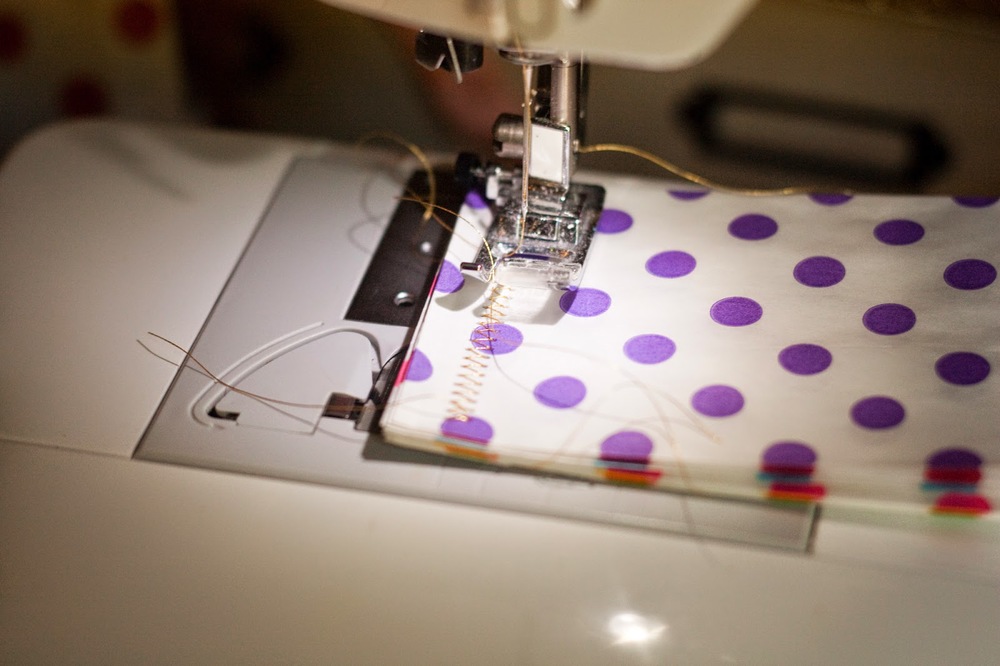
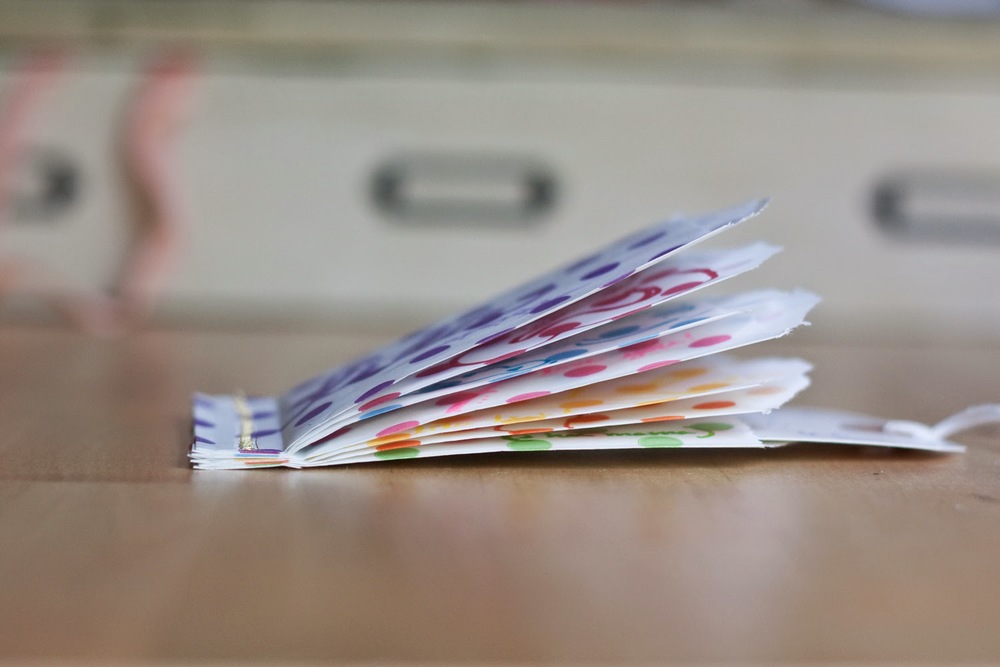
It's an easy approach. Simply score the tops of the tags and stitch above the score line using a sewing machine to adhere them to your background.


Now the tags work as flaps!


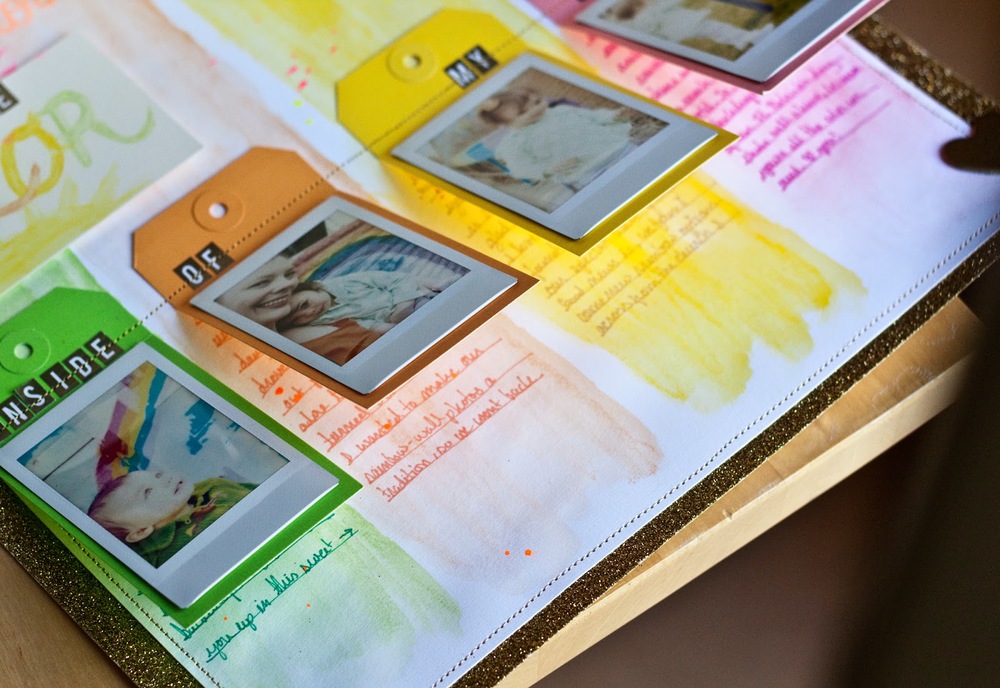
And I selected pens that matched the colors of my columns to keep the monochromatic feel going. (Except for the yellow. Learned from my title that yellow-on-yellow isn't ideal, so I went with a tan Sharpie.)

There you have it. This page was a fun afternoon art project, and I love the way the Whisker Graphic Tags work to both mat my photos and house my journaling. Thanks for that, WG!


Whew! That looks like more work than it is. Promise. I just like to really break things down for sake of explanation. I actually completed this page in under an hour, which is a massive record for me. I hope you'll give it a try. Or at least aspects of it. Especially those pretty Whisker Graphics tags. Thanks for sending them.

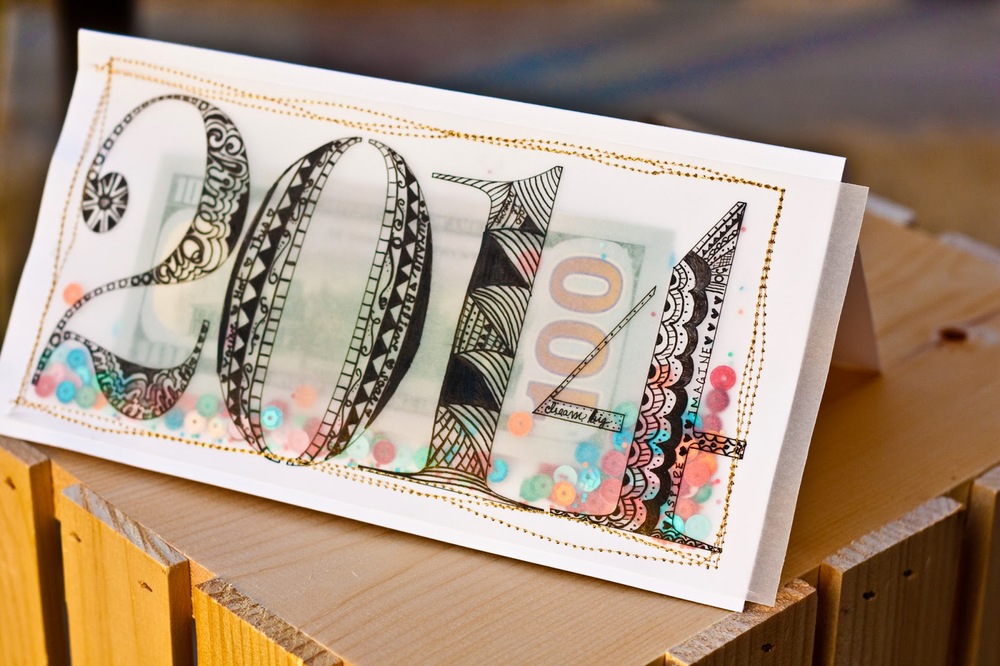
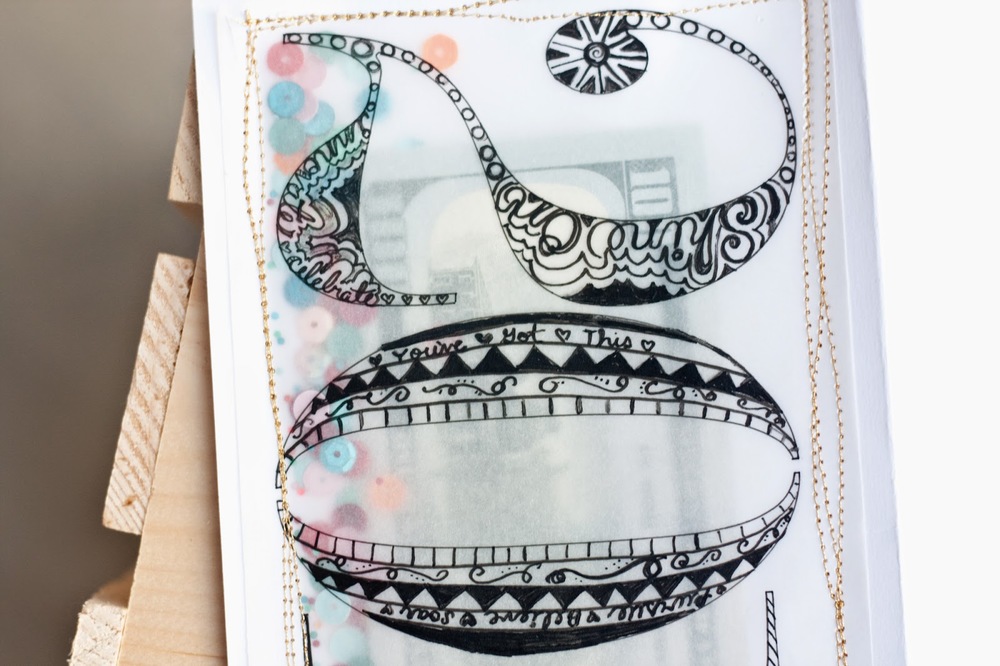
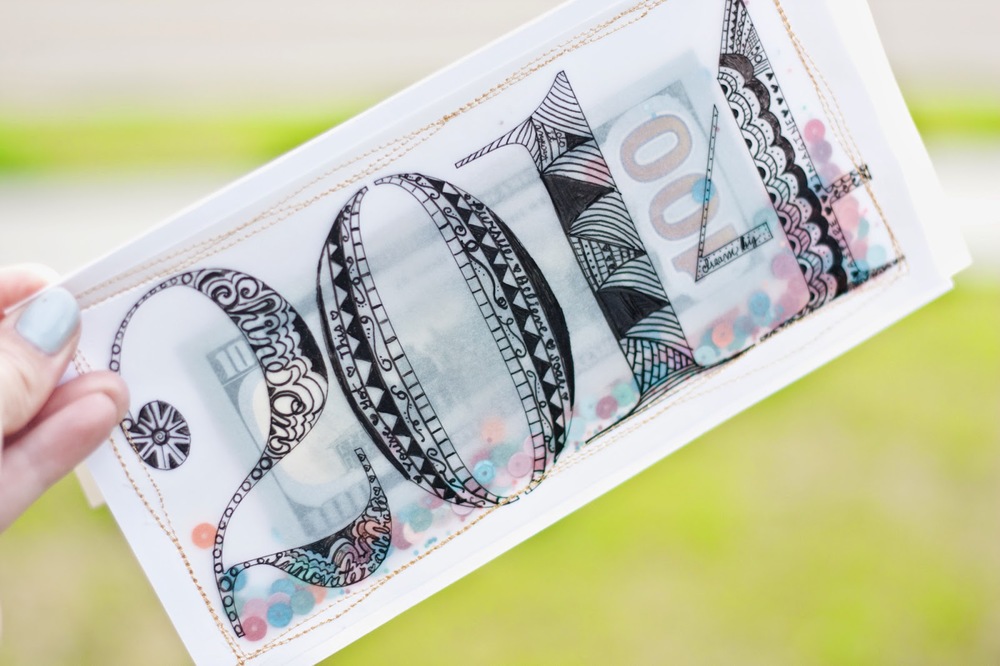
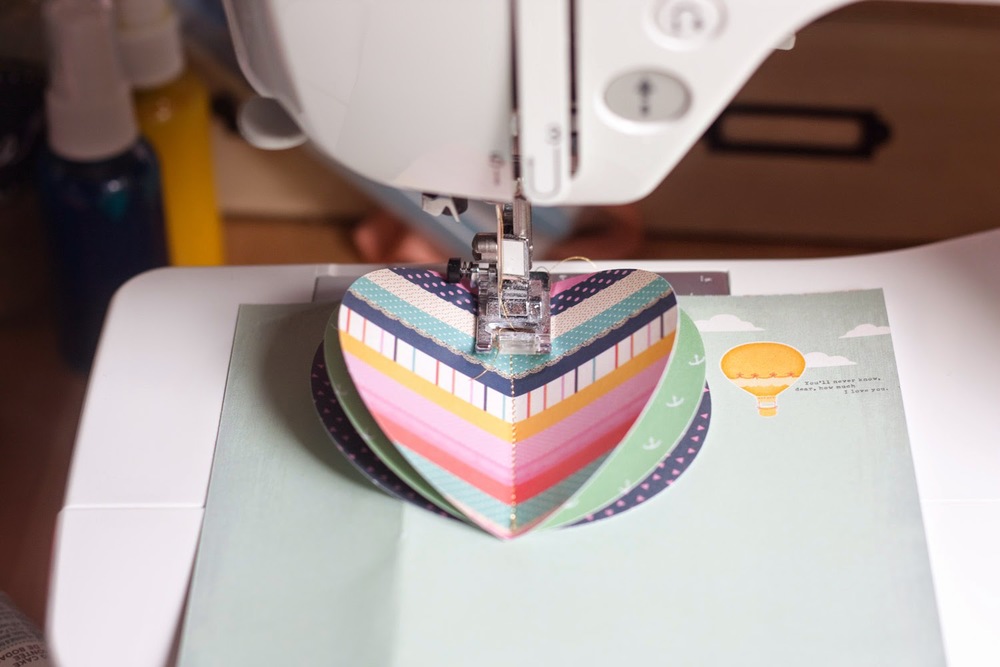
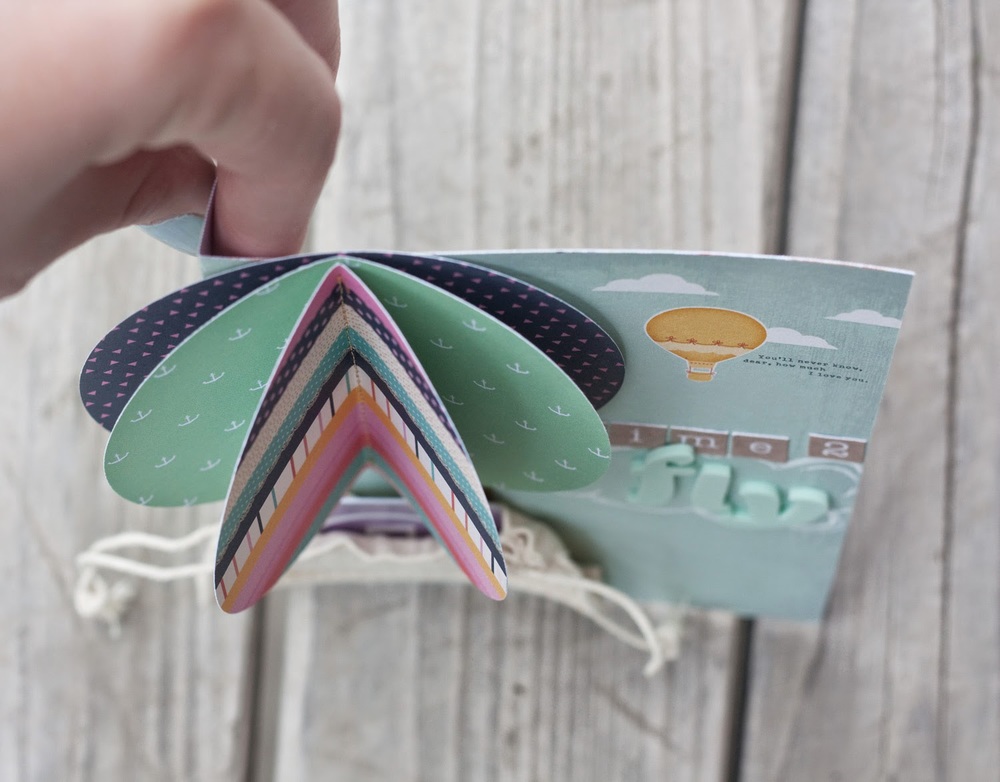
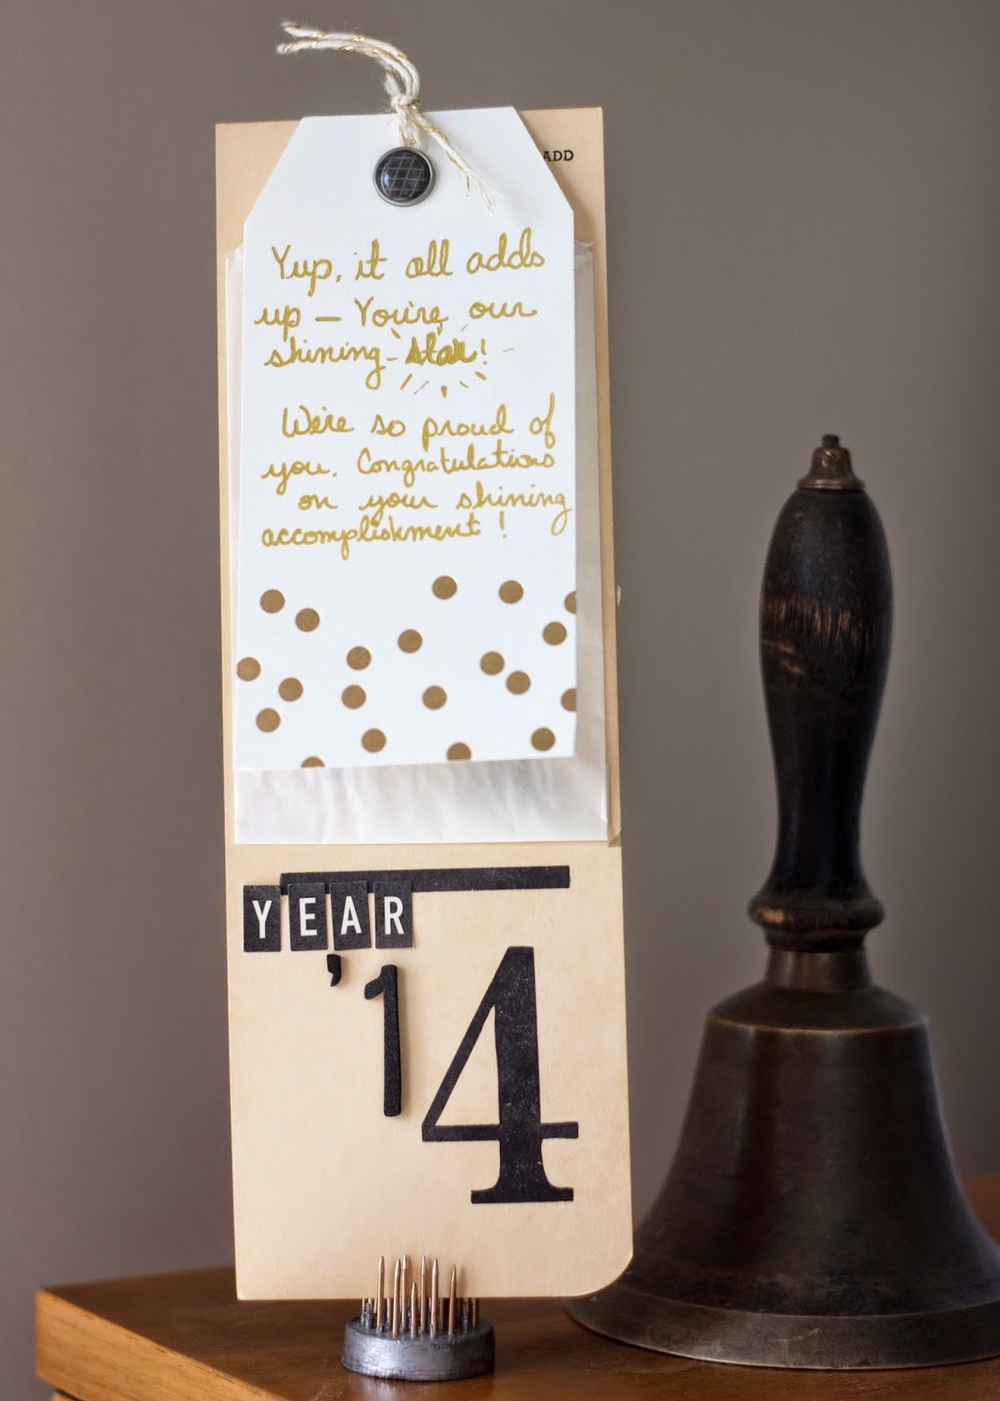
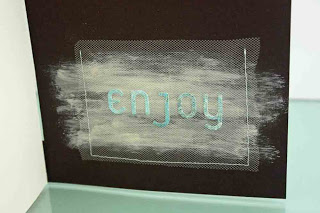
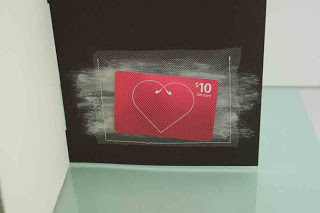
Birthday Card Quickie
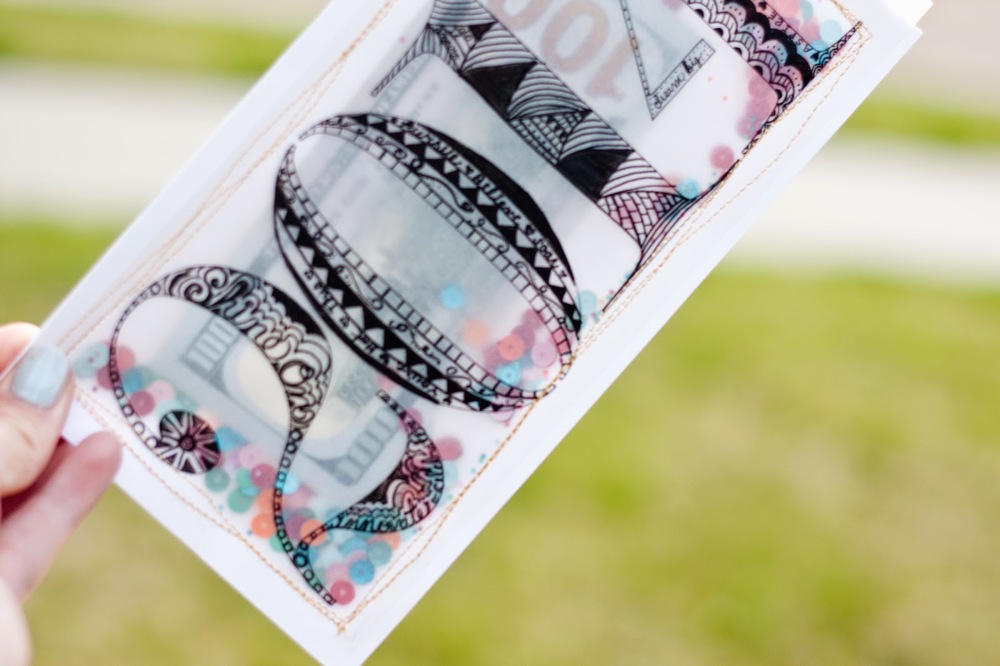
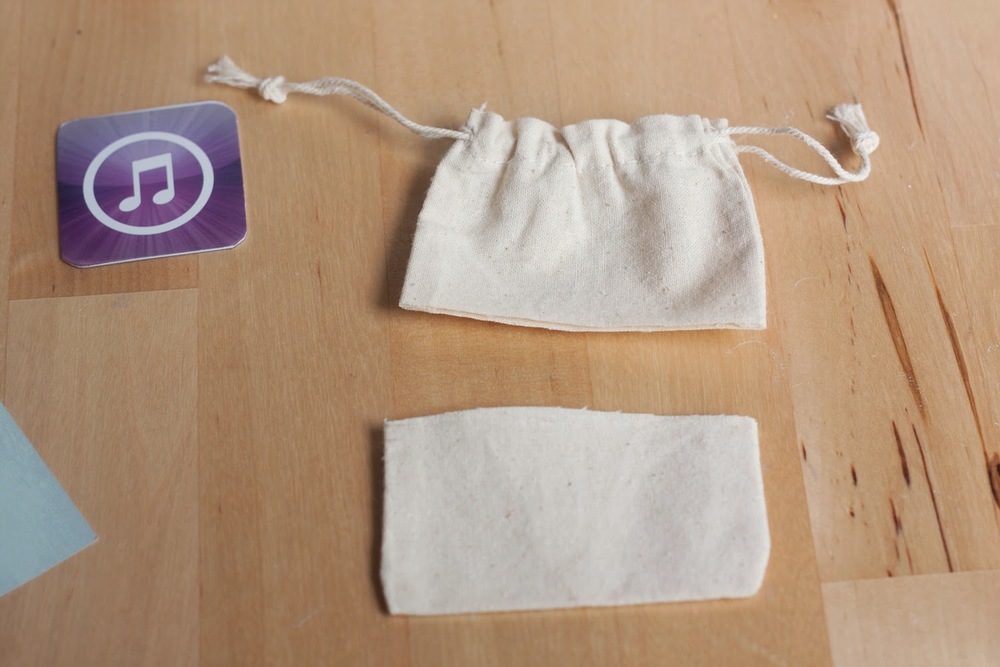
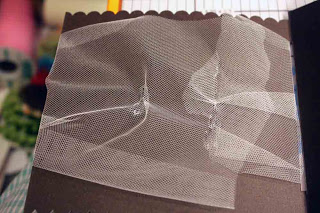
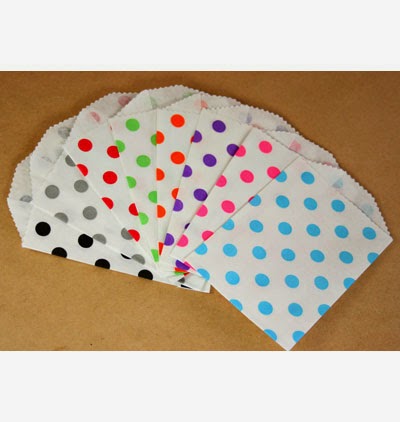
I could seriously play with Whisker Graphics goodies all day. (If only time were more accommodating), so I put together one more little project. This time, using these amazing bitty treat bags.

Image credit: Whisker Graphics


It's a little flip, interactive birthday card. It's for a sweet two-year-old, so I wanted to make it colorful and fun. Enter: doodling!


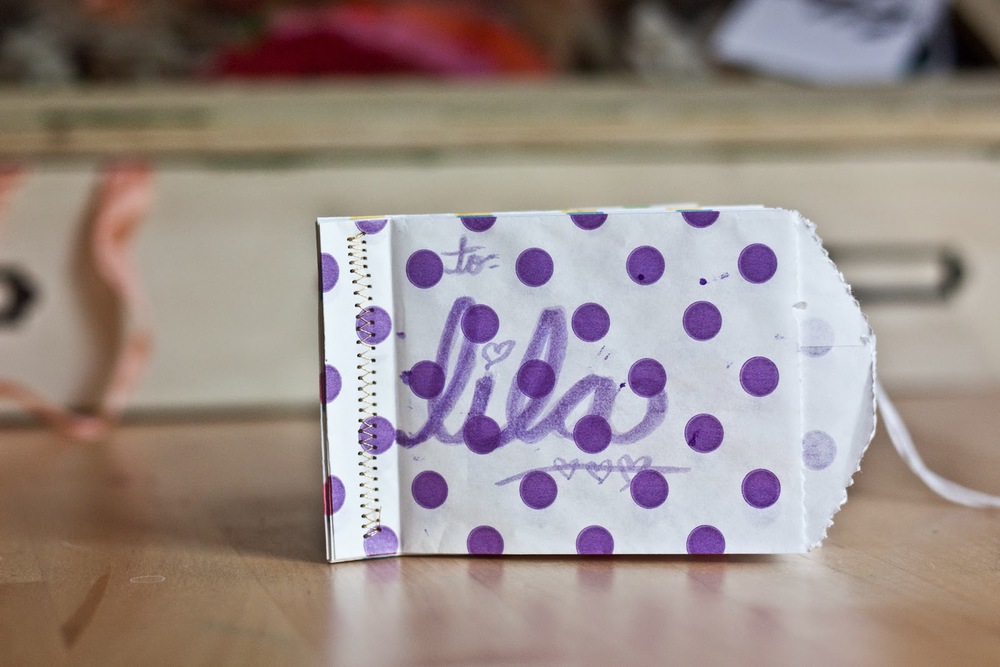
For her name on the front, I simply used the brush-script approach I've so enjoyed these days. For the inside pages, I turned to my awesome Sharpie assortment. Gotta love da Sharpies!


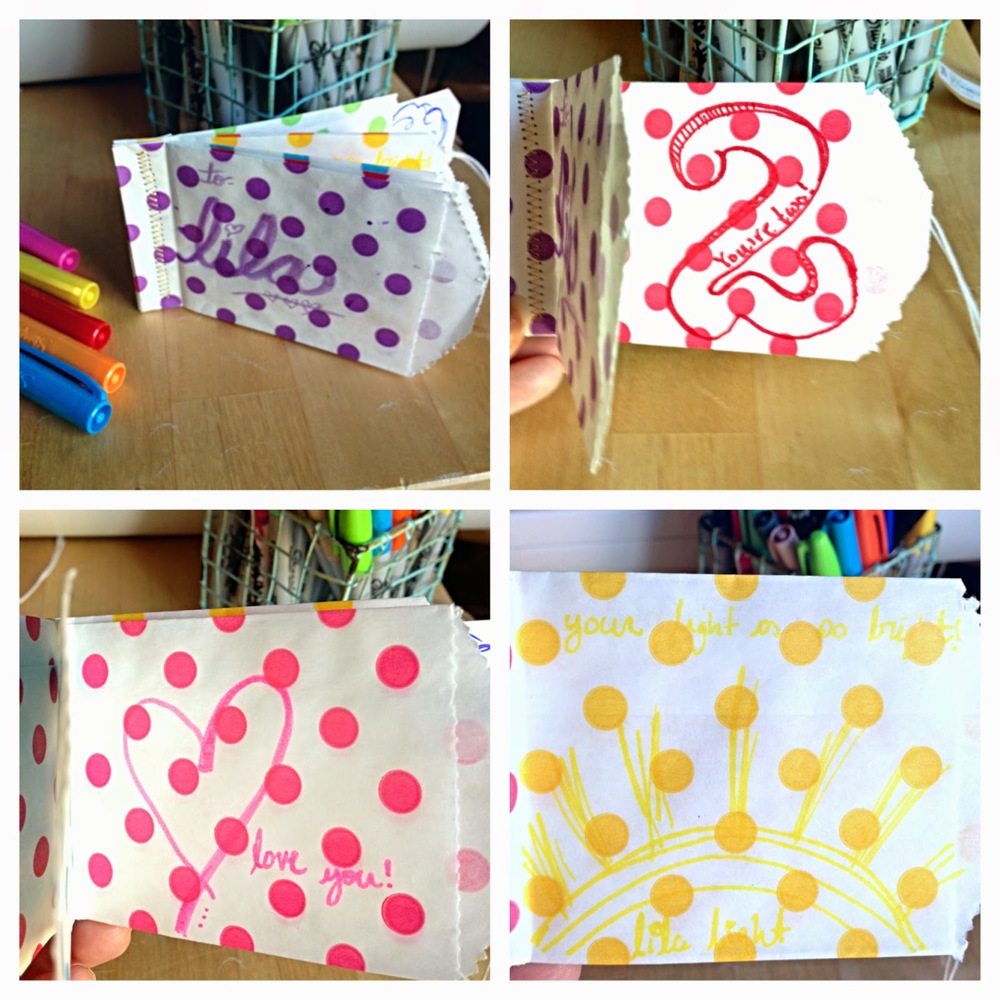
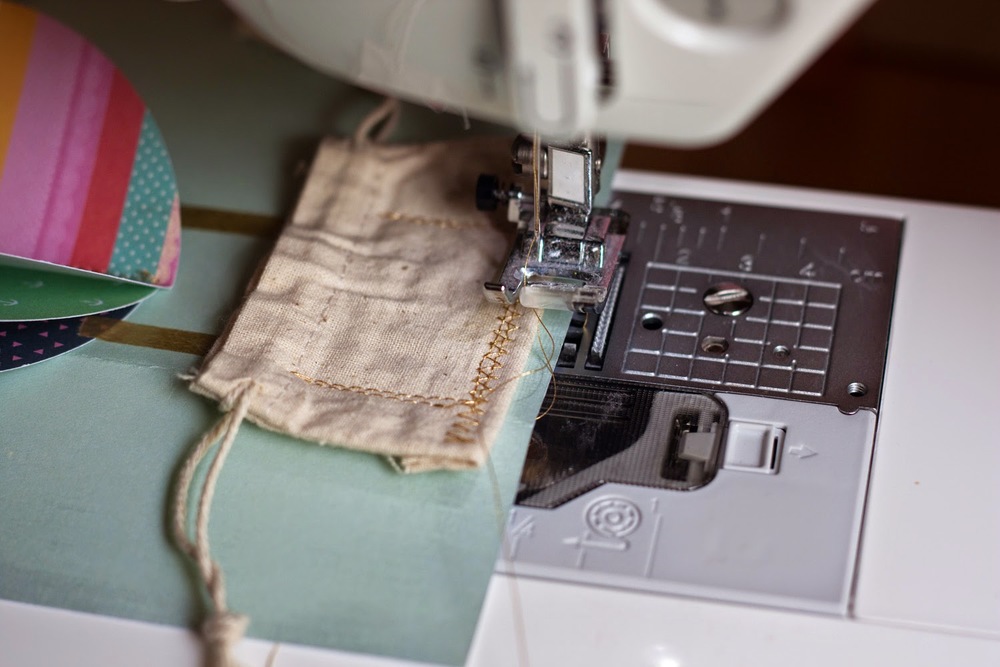
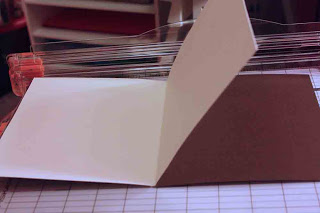
Creating the pages is as easy as stacking the bitty bags evenly on top of one another and sewing along the left (closed) edge. I used a zigzag stitch for extra reinforcement.


I had the idea of tucking a Whisker Graphics tag (large) into each pocket but found I didn't need to after doodling on each bag front, so I saved that surprise for the last pocket, where I placed a little love note.

I'm definitely going to take this card approach again soon, as I can see it being an awesome gift-card holder, money holder, etc. And it was so super easy and fun to make. What a treat!

Thank YOU for stopping in today! And thanks to Whisker Graphics for inviting me to be part of their May fun. Between my Mother's Day card and these projects, I've thoroughly enjoyed myself. Your goodies rule!

Cheers!
Megan

Quick Follow-up Question: I'm currently preparing an interactive card class (so fun!). Tell me, would you make a card out of treat bags like this (and this)? Your feedback on my last post was SO helpful (thank you!) that I thought I'd seek it here as well. Many thanks!

Paper Source?! And graduation-card making?! AND Studio 5?! *pinch me*


If you know me, you know I'm a Paper Source fanatic. Before we were finally lucky enough to get a store here in Utah, I made a point of visiting the Bellevue, WA and Chicago, IL shops on a semi-regular basis. So when my awesome Studio5 producer, Stephanie, suggested I contact them to see if they wanted to be involved with my Graduation-card segment, I was delighted.

And scared!

This would be like being asked to give Oprah a call for the normal person. *gulp*

But I put on my brave shirt and reached out. To my complete delight, they were not only on board to provide cards from their store for my segment, but they also offered to send me additional products to work with when creating my handmade projects. Whaaaa?!

Livin' the dream, my friends. Livin' the dream!

So, it is with happiness that I share that collaboration with you today on Studio 5 at 1:00 PM mst. You can either tune in to channel five if you're in UT, or you can watch it stream on their website at the same time (1:00 PM mst). I'm immediately following the first commercial break. :)

The results of that segment? Well, I have five handmade cards to share, as well as links to some pretty awesome store-bought options. Let's do it to it!

Feeling Zen
I'm in love with zentangling! Have been ever since i was first introduced to it around four years ago. So when I spotted this smiling card at Paper Source, I decided to carpe my own diem and do a little doodling of my own!


This is the result. A 2014 money holder with a little zentangle flava.


To create this card, I simply traced the awesome number stencils from The Crafter's Workshop onto vellum using a Vellum Writer by Zig. I then added my doodles using the same pen. They're not perfect. Nor should they be. That's part of the Zen-charm.


If you look closely, I sprinkled grad-related words throughout—Shine on, celebrate, innovate, You've got this, soar, dream big, etc.


Once my doodling was complete, I stitched 3/4 of it to white cardstock. I then paused the stitching to load up my $$ and confetti, and then stitched the fourth side shut. Shake, shake, shake señora!


As promised on my Studio 5 segment, here are a few links to different zentangle tutorials:

* Pattern A
* Pattern B
* Pattern C

Time to Fly
Inspired by this Dr. Seuss classic, available at Paper Source...


I created my own up, up & away version, using a circle punch and the Dear Lizzy Lucky Charm pack of patterned paper.


For the balloon, I simply punched three circles of the same size.


And stitched them together down the center, which also adhered them to the card front (a paper from the Lucky Charm pack).


For the balloon's basket, I simply snipped a bitty muslin bag in half and stitched the top half to the card. It works perfectly for holding a small iTunes gift card. Sweet!


Cap-tastic
Inspired by the traditional graduation getup, I turned a 6x6 card on its side to create a paper cap.


2014 = Your Time to Shine
It's your year, grads! All of that reading, writing and arithmetic has paid off. So you can finally put those old flashcards to new use—make a grad tag, complete with a gift card holder!


BTW, I did a quick Etsy.com search and found some flashcards like mine here. You're welcome. ;)

To create the taped numbers, I simply pleated my gold washi (from Paper Source) and then added some stitching for reinforcement.


I wanted the flashcard to act as a tag, so I added a hole and little reinforcer sticker.


I then added a second tag (also from Paper Source) to both hide the backside of my stitching (gotta hide that messy backside) ;) and also provide a place to write a note to the grad.


2-0-1-4
Back to those fab The Crafter's Workshop number stencils. This time, I used my VersaMark pen to trace the numbers on patterned paper. I then sprinkled them with embossing powder and set to heat embossing. A bitty tassel and Stickle-adorned cap completed this little number.


Okay, you can officially turn those tassels...on your hats. ;) The card-making class of '14 is complete. Thanks for attending! I hope you were inspired by my ideas. If you find you need to purchase your cards this year, you'll find a brilliant Paper Source assortment here.

Congrats, 2014! This is your time to shine. Live it up!

Cheers!

Gift-Card Holder Card


If you’re super computer savvy, you likely know that 100110 is the binary code for the ampersand (&). I don’t speak computer, but my coworker and her new hubby do. They selected 10-01-10 as their wedding date partially because of its binary meaning. Isn’t that romantic? It was my fun job to make the happy couple a wedding card from our entire magazine staff, which meant there needed to be plenty of room for signatures, as well as for a gift card. And I naturally needed to make the ampersand a significant feature on the card. This project is the result. Whether you need a group card or not, this idea is a creative way to give a gift card and show someone you care.


Here’s how it’s done:


Step 1: Fold 6x6 cardstock base and cut a small slit in the center of the card’s spine.


Note: The slit should be long enough that you can fit a strand of tulle through it.


Step 2: Punch a decorative border along top and bottom of card front. Then stamp the front of the card with a giant ampersand stamp like this one from Stampin’ Up!. I used Jenni Bowlin paint from Ranger to ink my stamp.


Step 3: Once the stamped image is dry, feed a strip of tulle through the slit in the spine of the card.


Step 4: Tie a knot in the center of the tulle and position the knot in the center of the card.


Step 5: Secure the tulle in place by adhering to the back front cover of the card.


Step 6: Conceal glued tulle by adhering a slightly smaller card base to the inside front cover, leaving the back flap of the base free. This creates a page in your card, which is great when you have a long message to leave or plenty of people who need to sign your card.


Step 7: Stamp a butterfly to complement the colors of your project. I also added a little color using my Copic markers and some more Ranger paint, and some texture with BasicGrey pearls. Adhere the butterfly to the center of your tulle bow.


Step 8: On the inside back cover, paint a smear of color using the same color of paint you used to stamp your ampersand.


Step 8: Spell “enjoy” over the painted area using letter stickers like these from BasicGrey.


Step 9: Stitch tulle pocket over the painted area of the inside back cover, and insert a gift card. Now, when your recipients removes the card they’ll see the little message waiting for them.


There you have it, a wedding card complete with a slot for that gift card. Ampersand day may be over, but this style will still make any couple happy you thought of them on any day of the year.


Cheers!