
 Just because their products are classy cool doesn’t mean they’re above telling little white lies, or at least stretching the truth. For example, when they say, “Creating a memory wall just takes a little planning,” they’re leaving out a few important steps. Sure, there’s the planning, but creating a “memory wall” (AKA a photo collage with frames) involves SO much more than that, as I found out the hard way.
Here's how it went down:
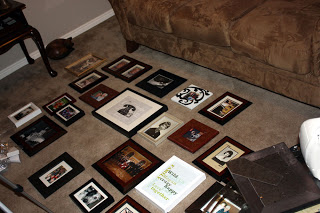
Step 1: Find the photos, gather the frames and fill the frames with the photos. Then it's time to arrange those frames. I put mine out in an area of my living room floor that was the same size as my wall space.
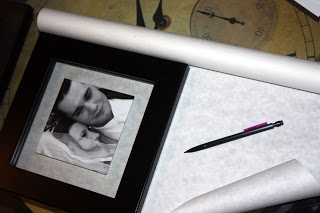
Step 2: Trace each frame on white paper, cut out each outline and mark where each nail will go on the paper.
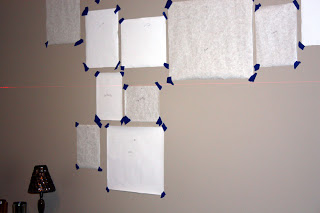
Step 3: Now that your paper frames are ready, it’s time to arrange them on the wall using painter’s tape and a laser level, following the frame pattern you’ve set up on the floor.
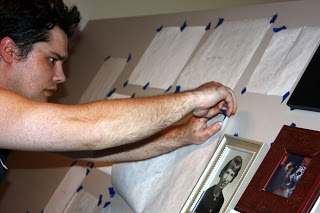
Step 4: Following the nail spots you marked on each piece of paper, begin putting small nails in the wall. These will hold your frames when the time comes to hang those beauties.
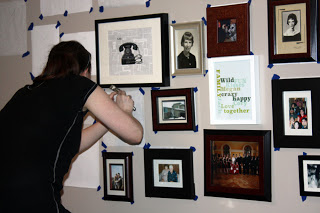
Step 5: When each nail is in place, remove the paper and hang those frames, as Cor is doing here.
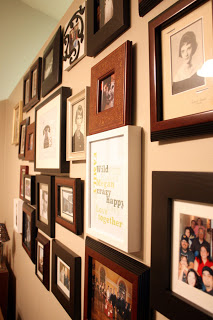
Step 6: At last, after a looong day of work, you have yourself a memory wall. Whew! What a relief. And what a fun addition to our home.
Trust me, when all is said and done it’s more than just “a little planning,” despite what PB may say on the matter.
BUT…
This is not to say that it’s not worth it. Sure, I spent most of my day off working on this project, but I love the way it turned out. If you want more on this look, check out this post on the subject by my creative pal, Wendy.
And take a look at this how-to video by Pottery Barn, keeping in mind they aren’t 100% accurate with their description of the work involved, and I even took some serious shortcuts, as you’ll see when you watch this little flick. Enjoy!