Paper Source?! And graduation-card making?! AND Studio 5?! *pinch me*


If you know me, you know I'm a Paper Source fanatic. Before we were finally lucky enough to get a store here in Utah, I made a point of visiting the Bellevue, WA and Chicago, IL shops on a semi-regular basis. So when my awesome Studio5 producer, Stephanie, suggested I contact them to see if they wanted to be involved with my Graduation-card segment, I was delighted.

And scared!

This would be like being asked to give Oprah a call for the normal person. *gulp*

But I put on my brave shirt and reached out. To my complete delight, they were not only on board to provide cards from their store for my segment, but they also offered to send me additional products to work with when creating my handmade projects. Whaaaa?!

Livin' the dream, my friends. Livin' the dream!

So, it is with happiness that I share that collaboration with you today on Studio 5 at 1:00 PM mst. You can either tune in to channel five if you're in UT, or you can watch it stream on their website at the same time (1:00 PM mst). I'm immediately following the first commercial break. :)

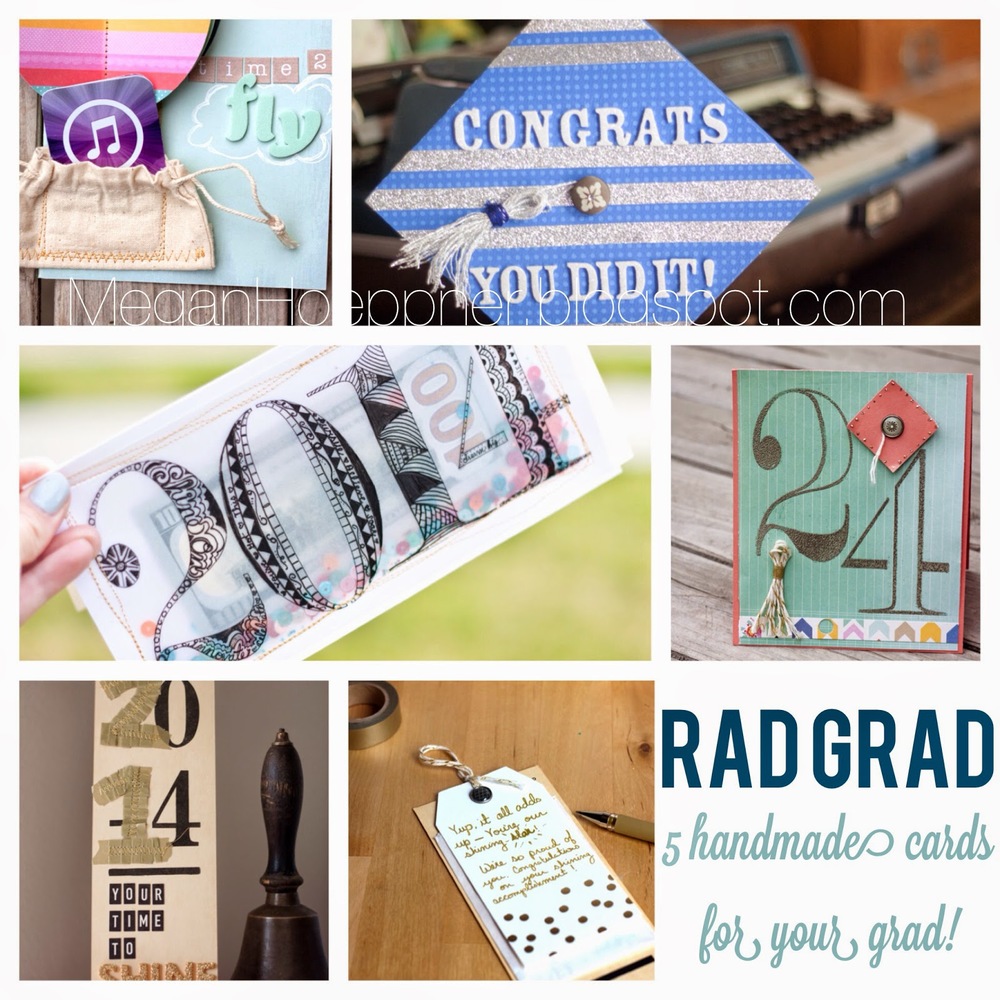
The results of that segment? Well, I have five handmade cards to share, as well as links to some pretty awesome store-bought options. Let's do it to it!

Feeling Zen
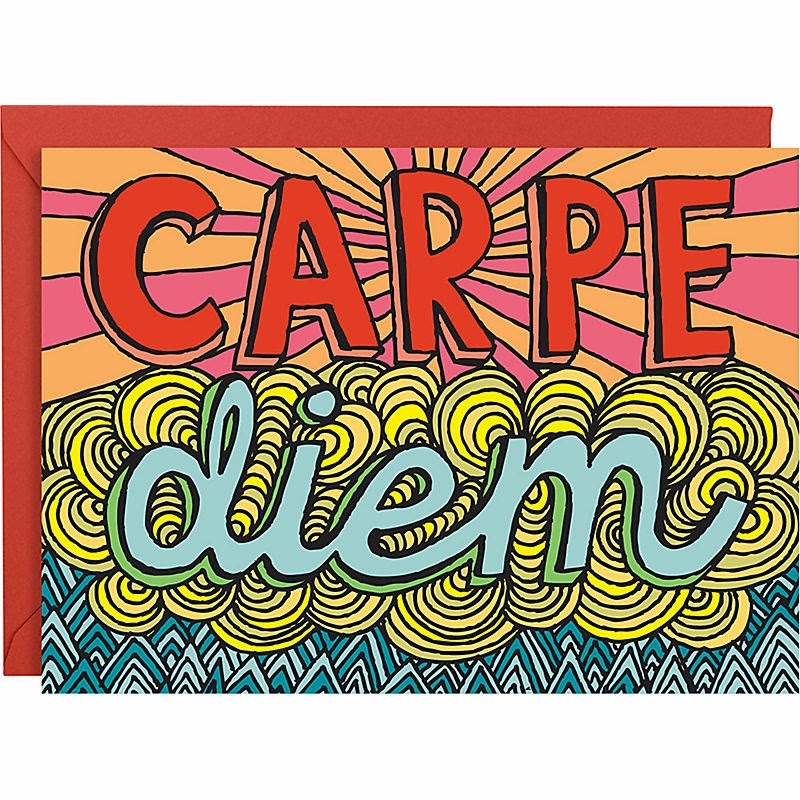
I'm in love with zentangling! Have been ever since i was first introduced to it around four years ago. So when I spotted this smiling card at Paper Source, I decided to carpe my own diem and do a little doodling of my own!


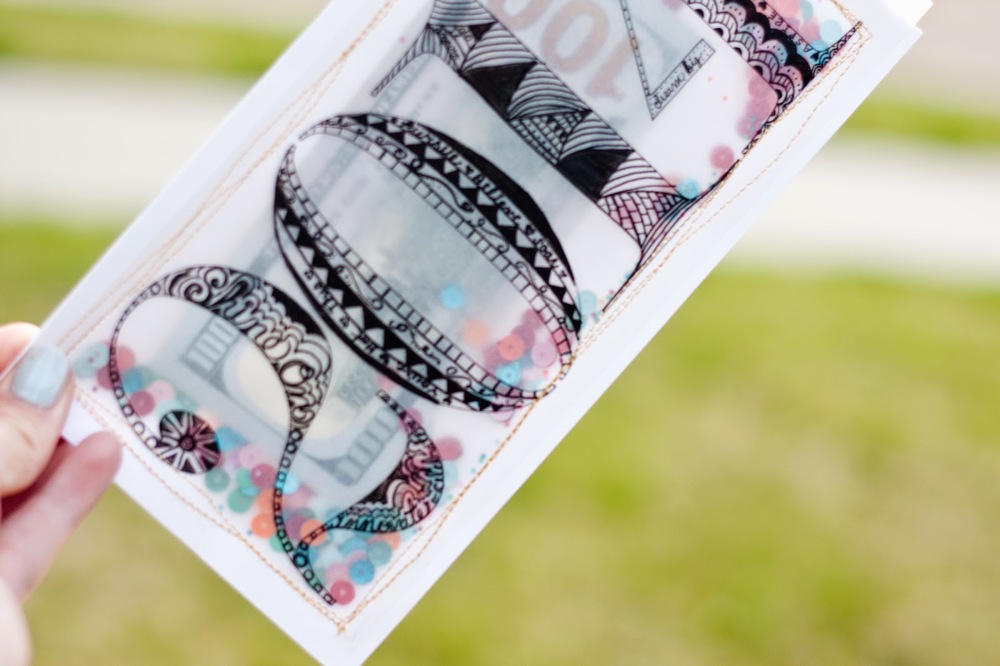
This is the result. A 2014 money holder with a little zentangle flava.


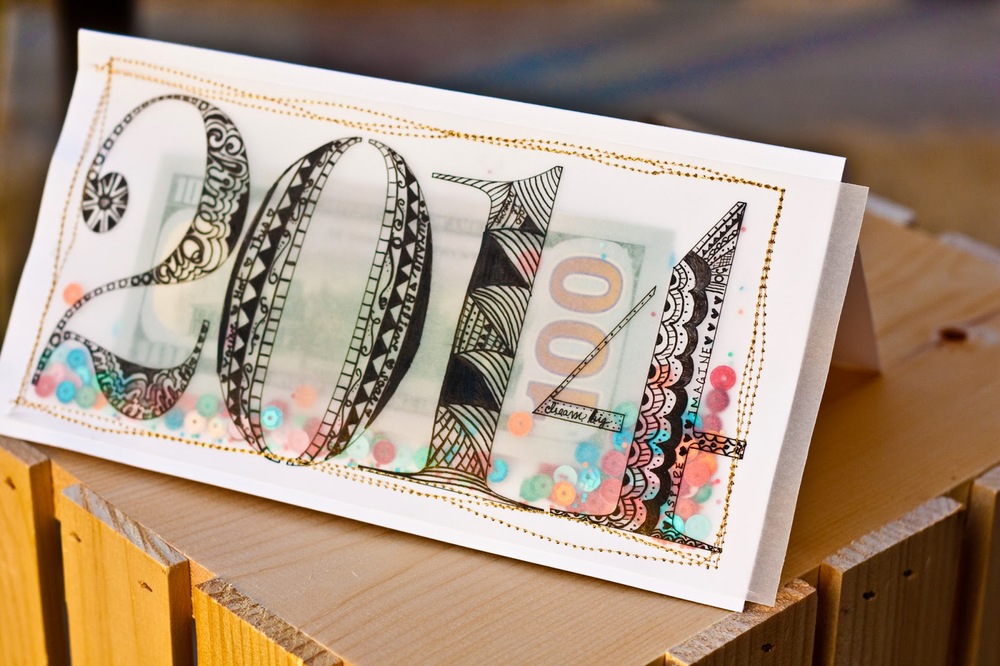
To create this card, I simply traced the awesome number stencils from The Crafter's Workshop onto vellum using a Vellum Writer by Zig. I then added my doodles using the same pen. They're not perfect. Nor should they be. That's part of the Zen-charm.


If you look closely, I sprinkled grad-related words throughout—Shine on, celebrate, innovate, You've got this, soar, dream big, etc.


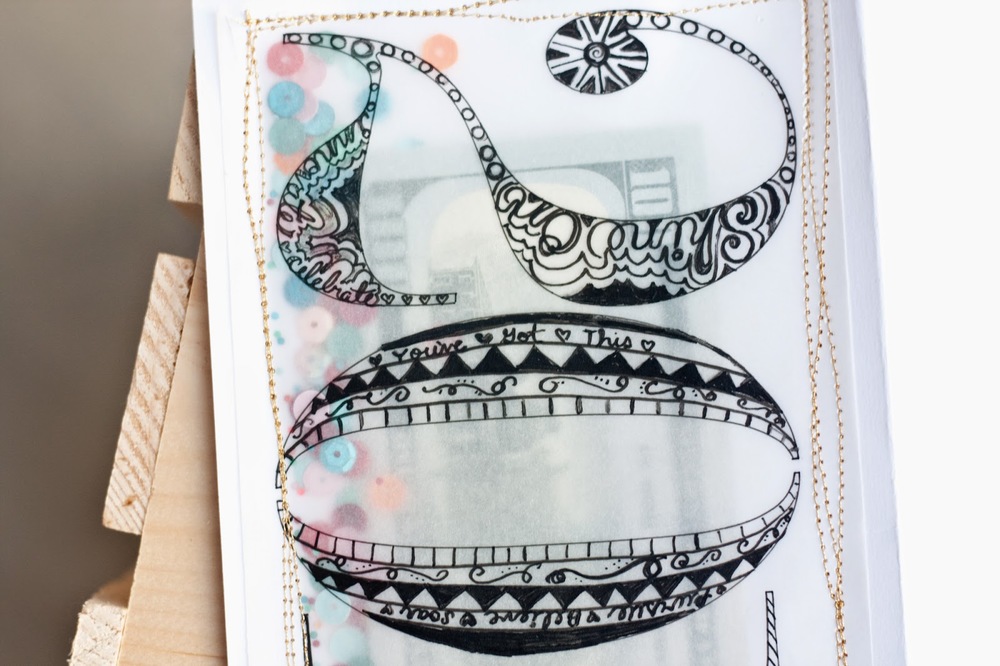
Once my doodling was complete, I stitched 3/4 of it to white cardstock. I then paused the stitching to load up my $$ and confetti, and then stitched the fourth side shut. Shake, shake, shake señora!


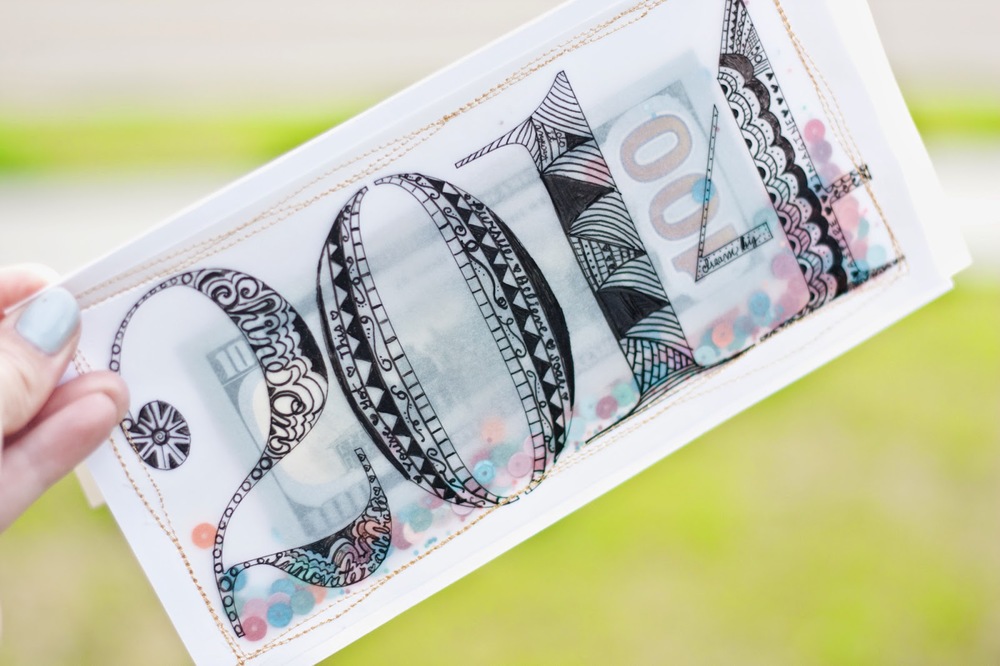
As promised on my Studio 5 segment, here are a few links to different zentangle tutorials:

* Pattern A
* Pattern B
* Pattern C

Time to Fly
Inspired by this Dr. Seuss classic, available at Paper Source...


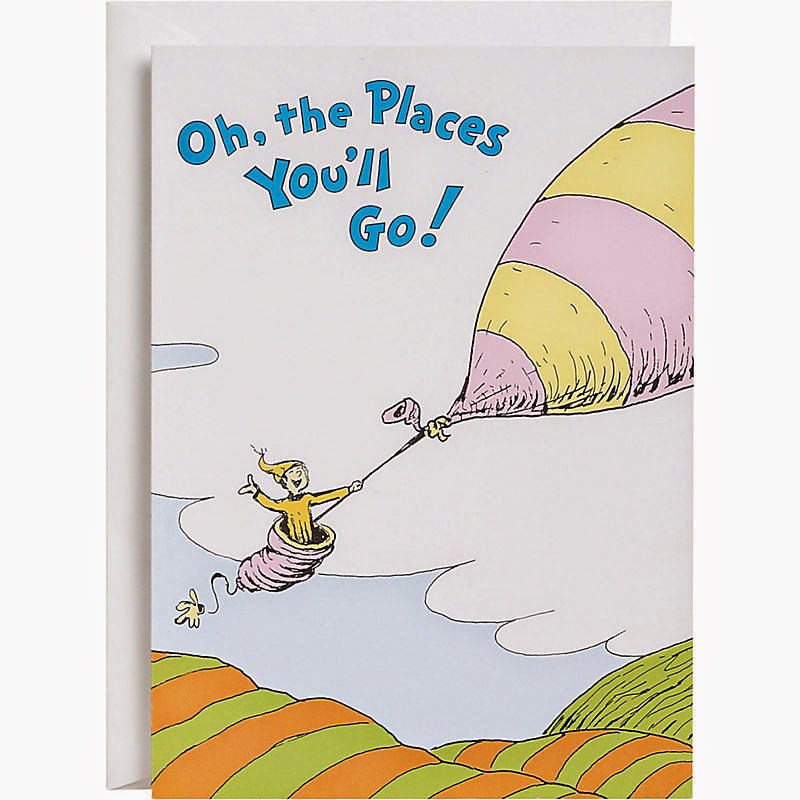
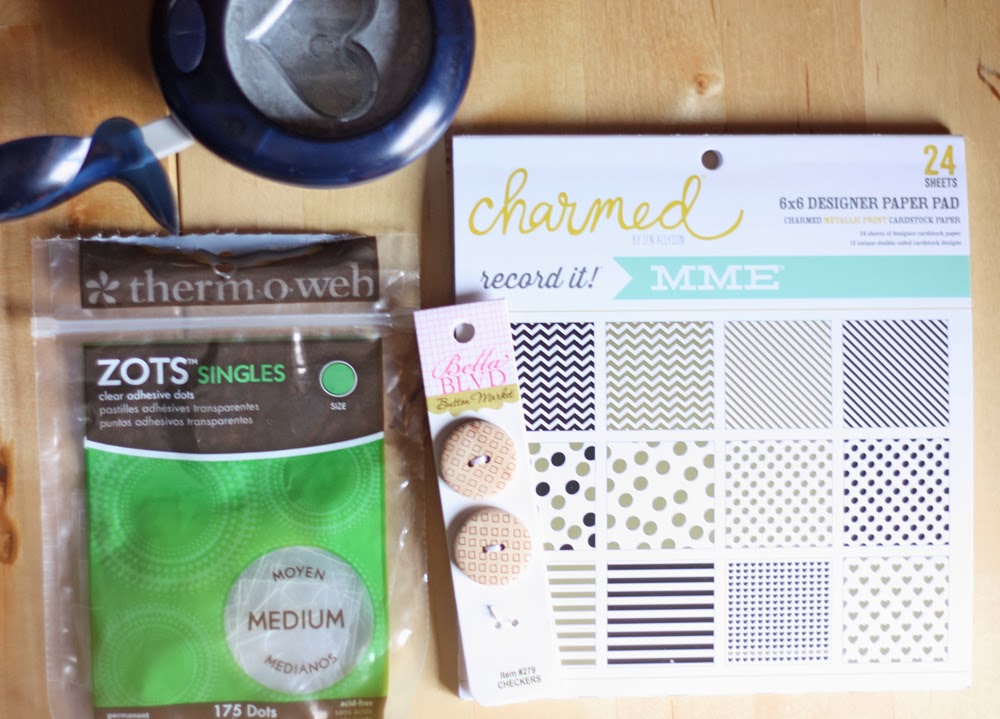
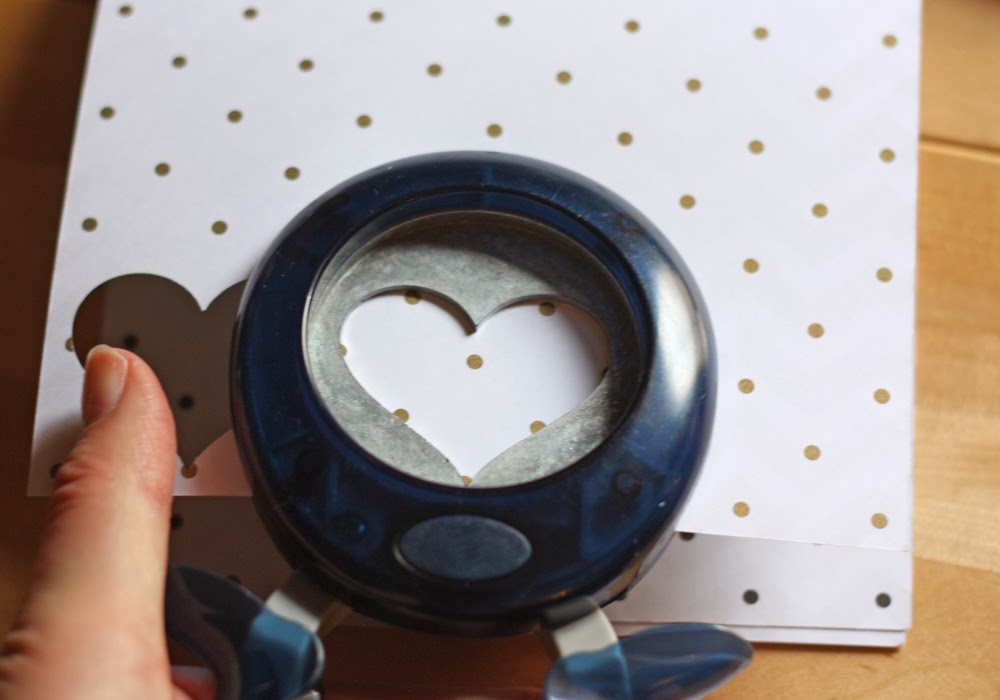
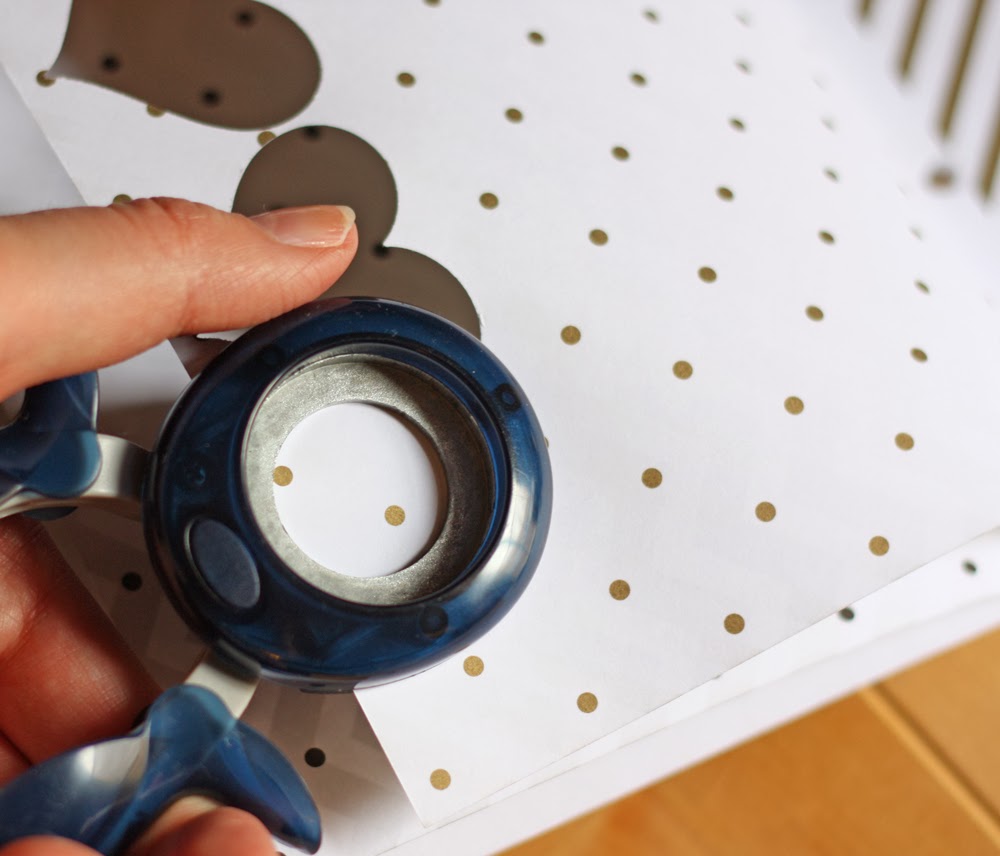
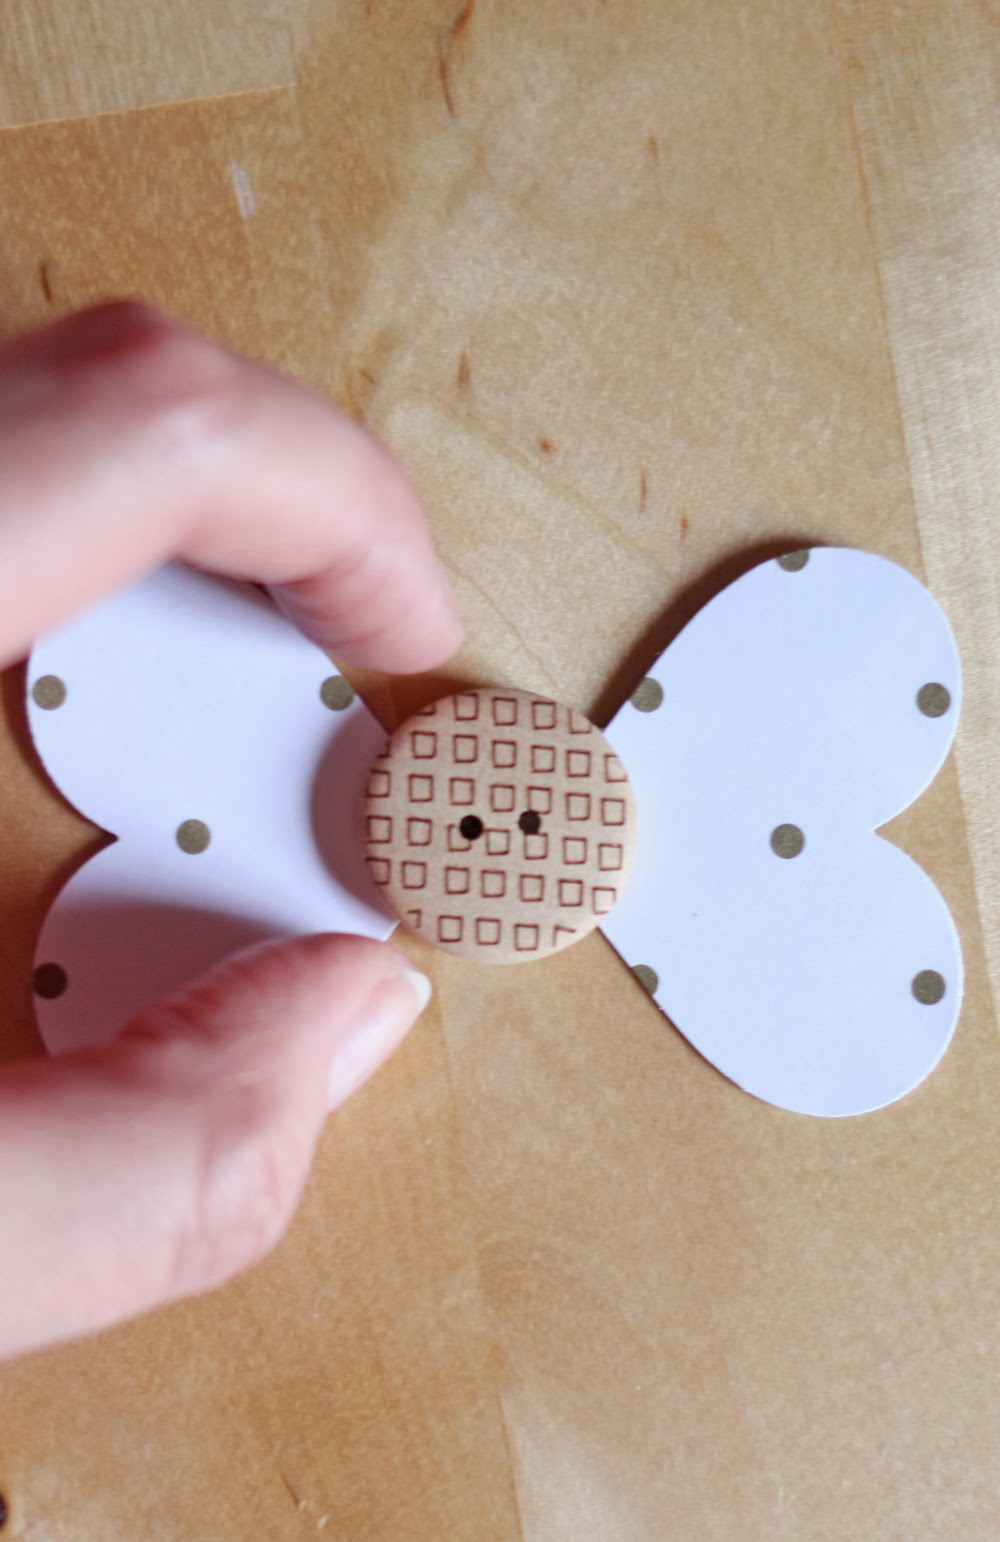
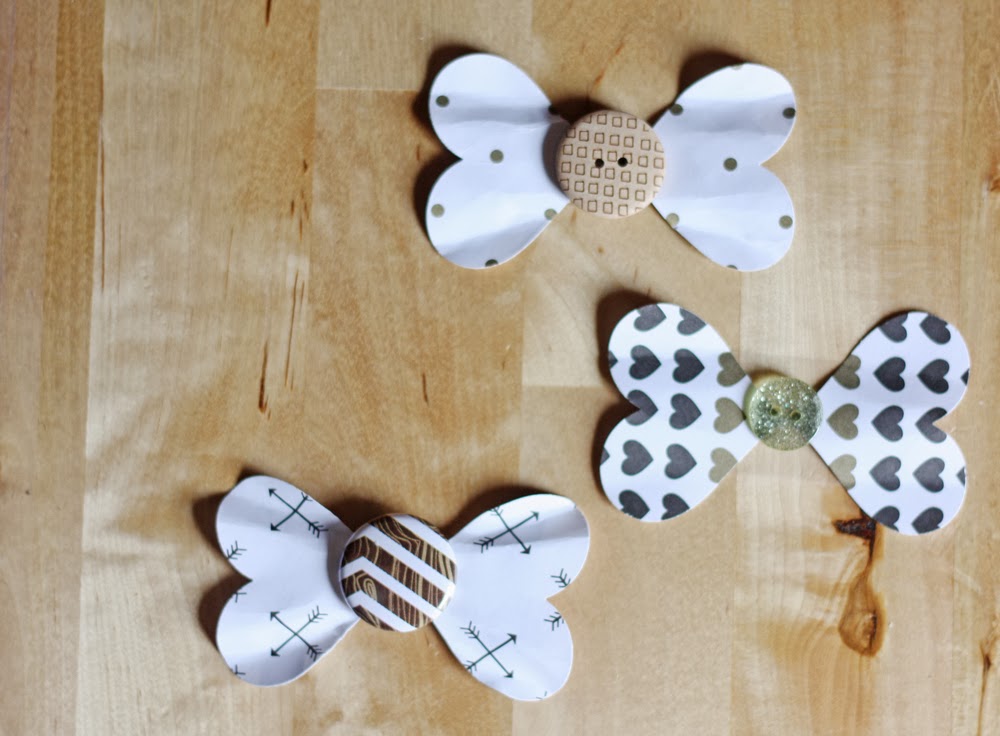
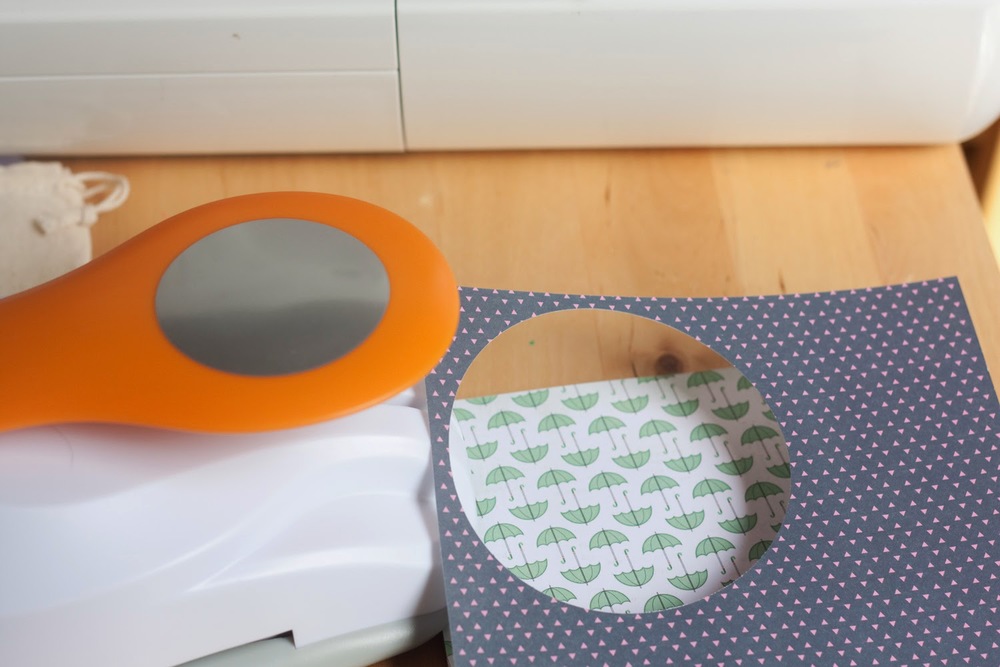
I created my own up, up & away version, using a circle punch and the Dear Lizzy Lucky Charm pack of patterned paper.


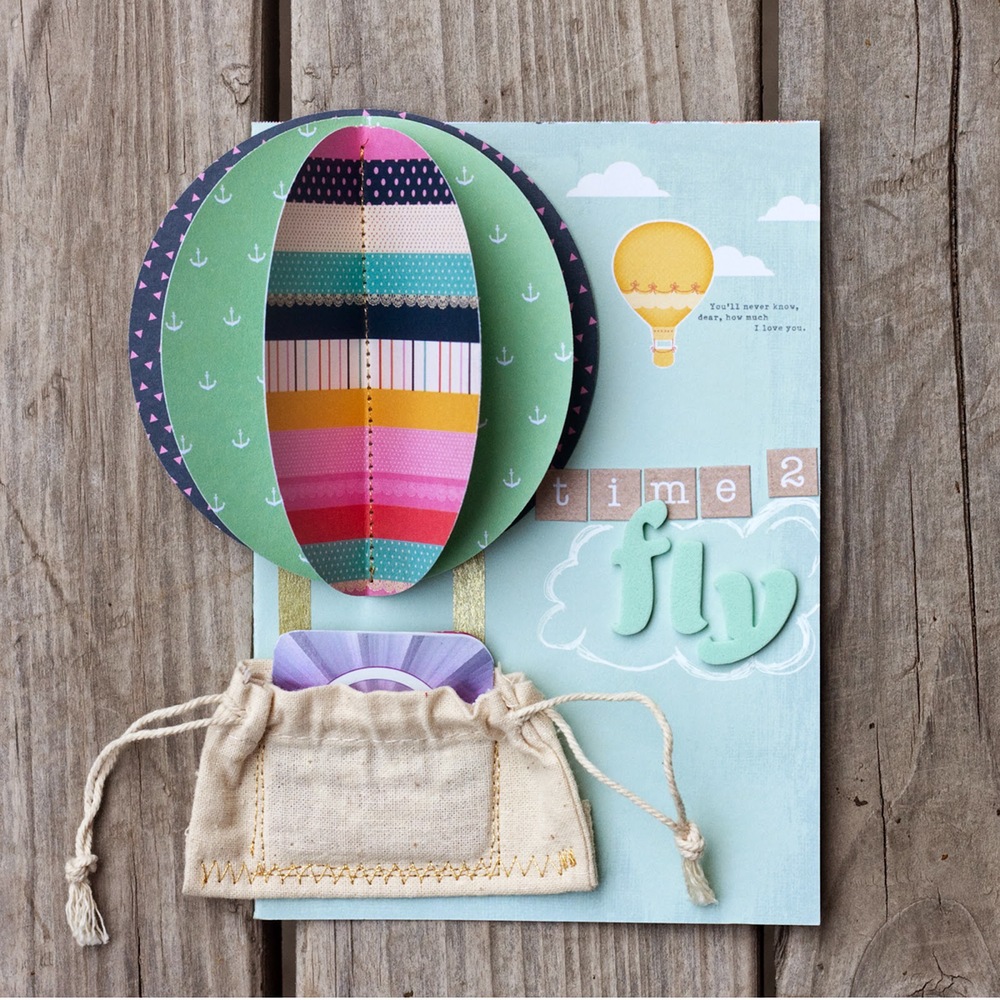
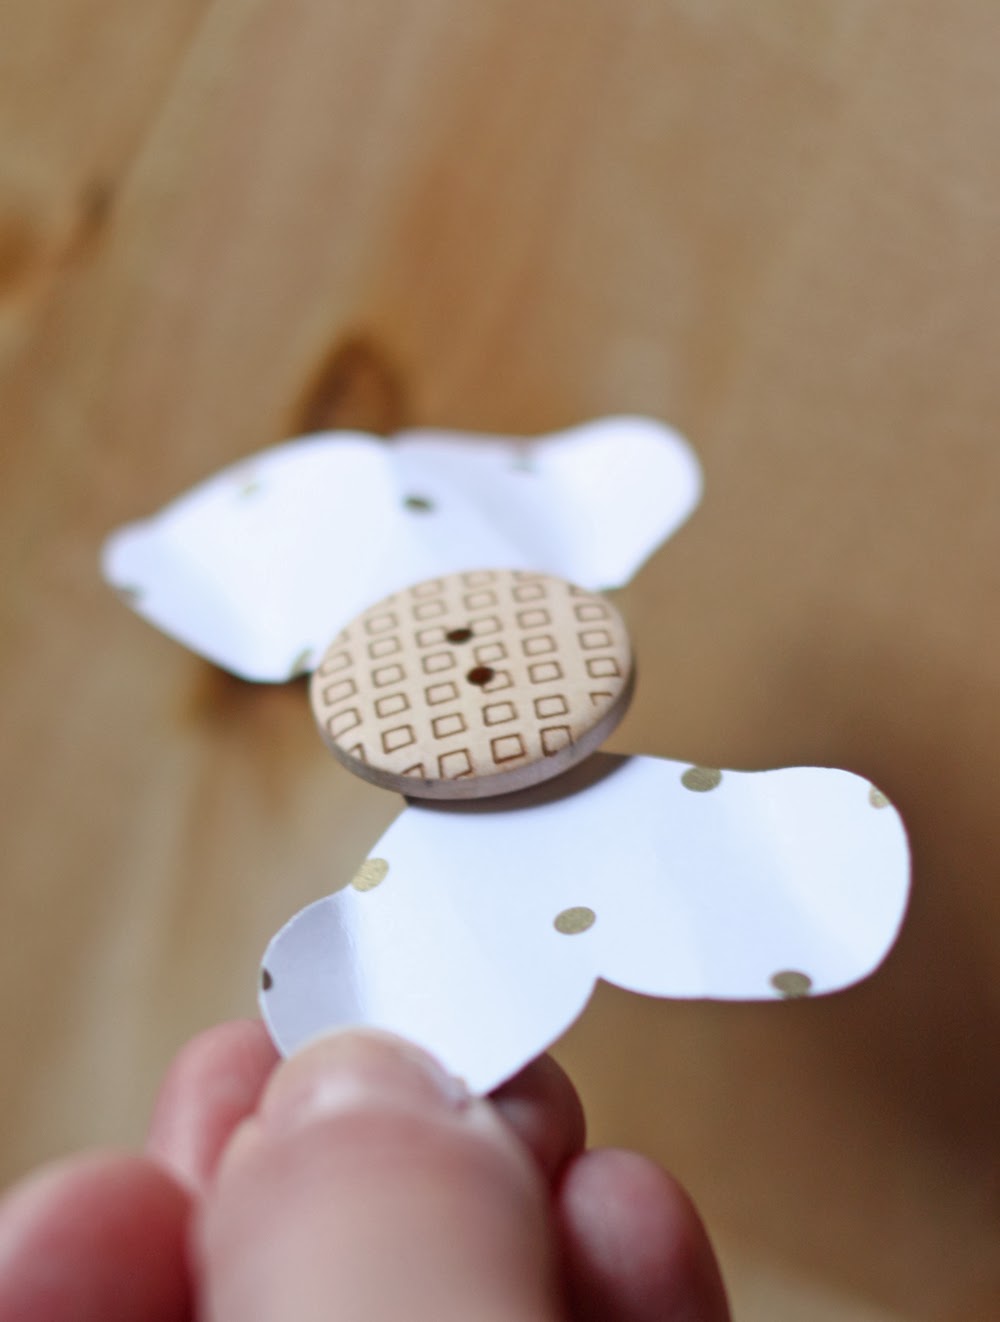
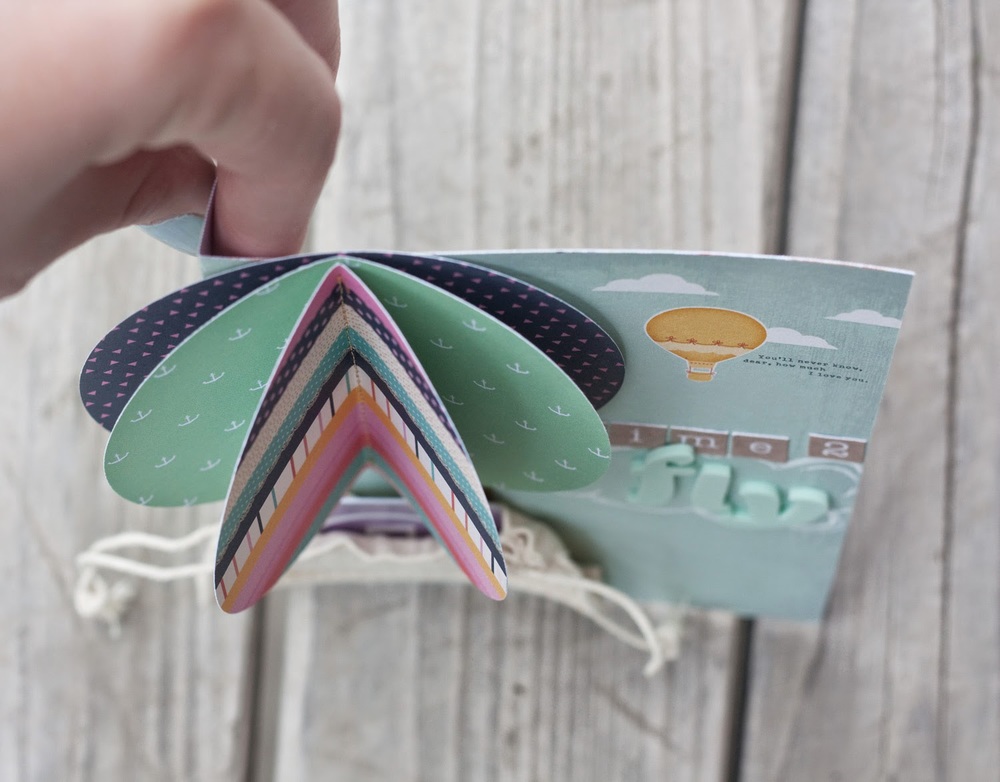
For the balloon, I simply punched three circles of the same size.


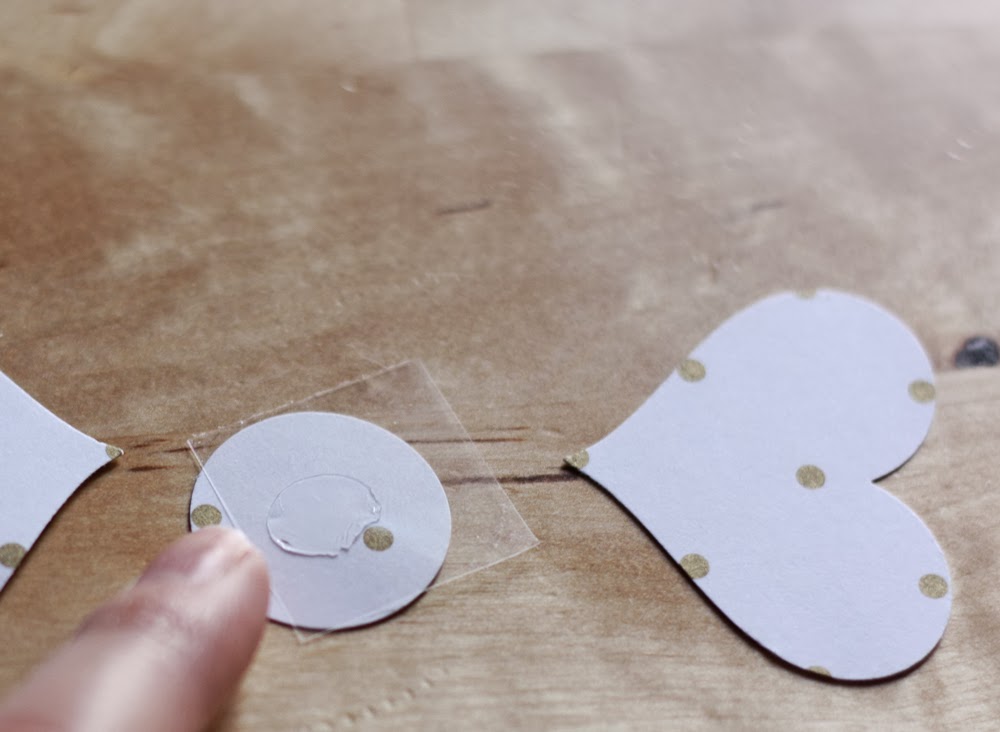
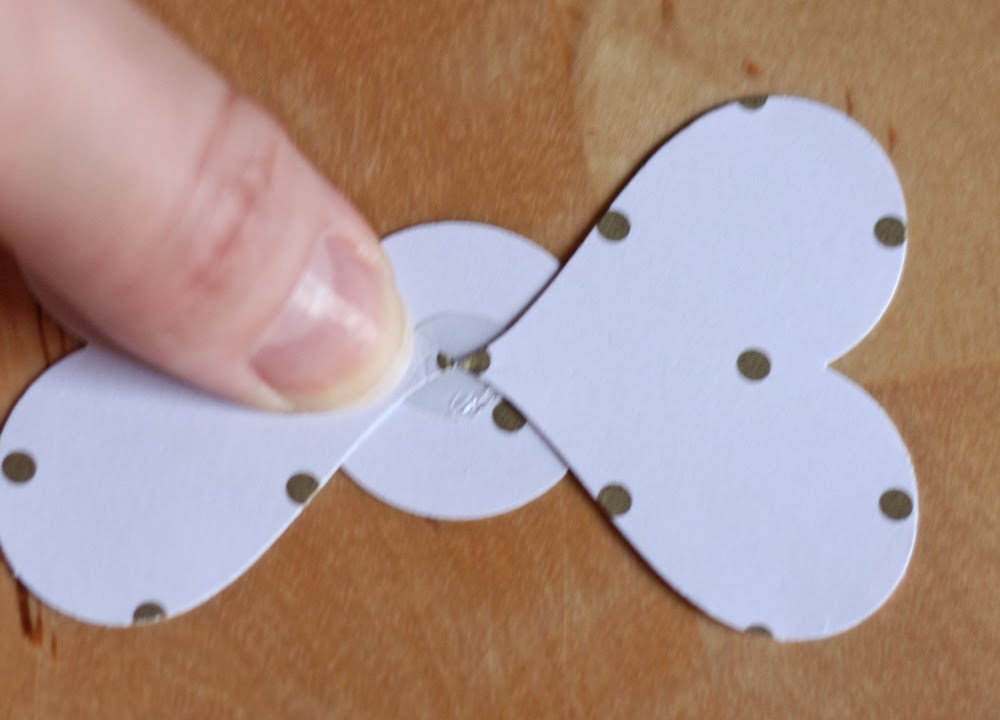
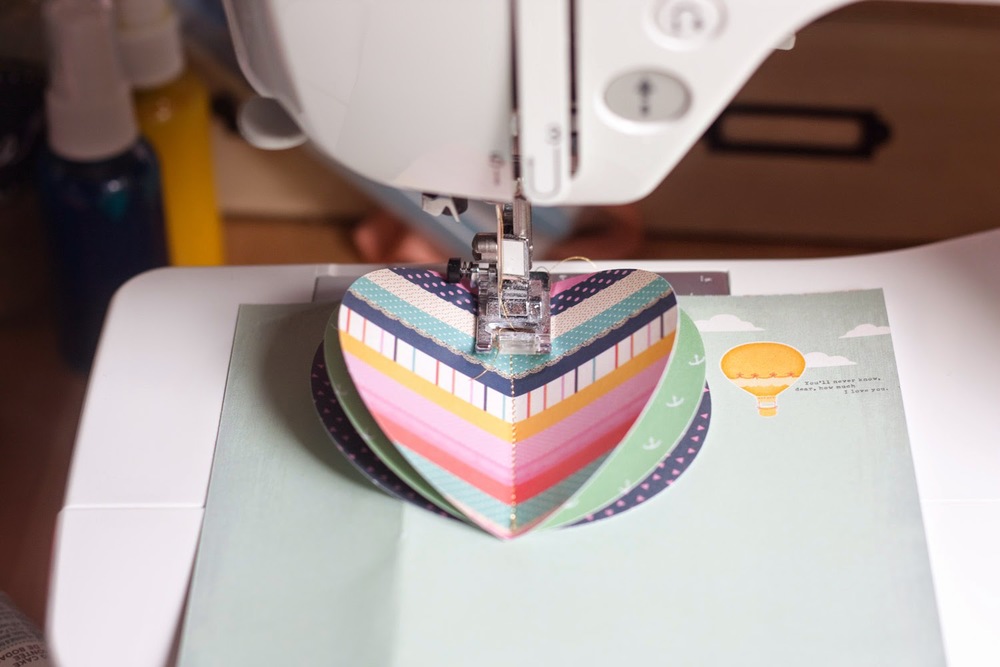
And stitched them together down the center, which also adhered them to the card front (a paper from the Lucky Charm pack).


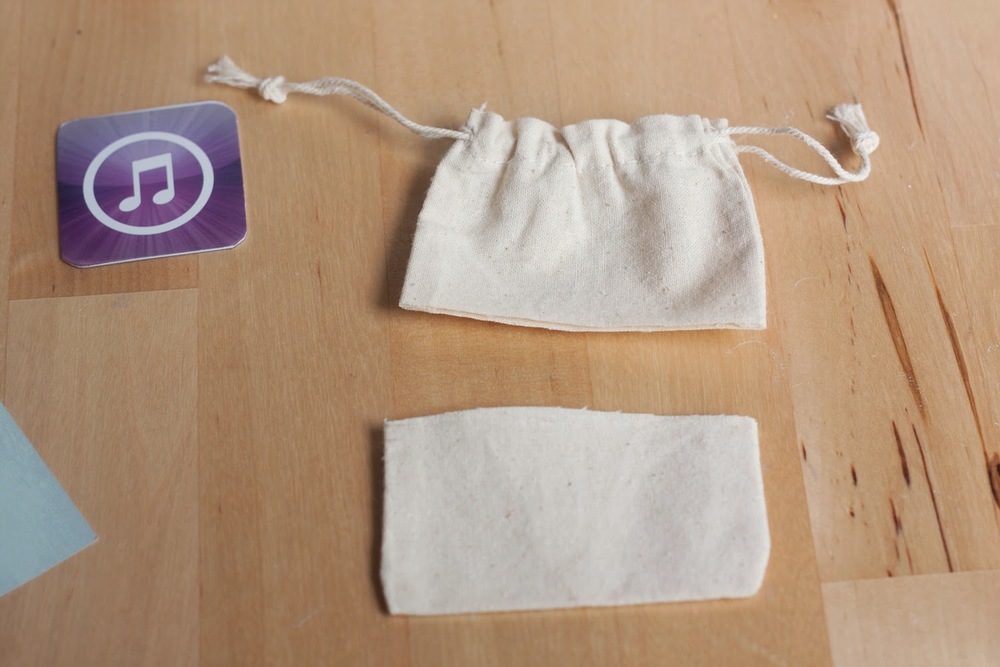
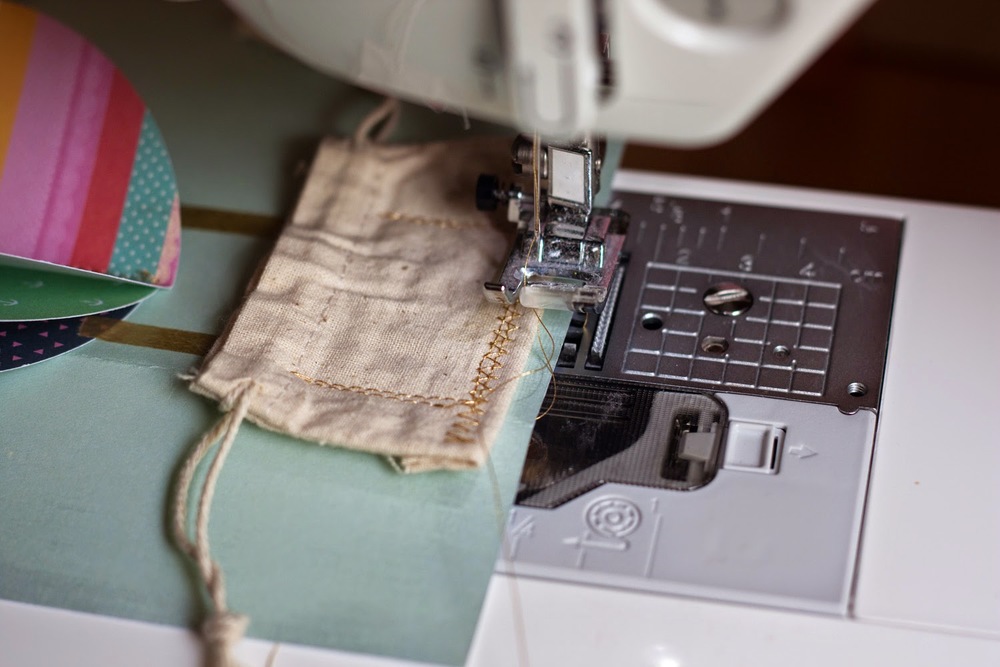
For the balloon's basket, I simply snipped a bitty muslin bag in half and stitched the top half to the card. It works perfectly for holding a small iTunes gift card. Sweet!


Cap-tastic
Inspired by the traditional graduation getup, I turned a 6x6 card on its side to create a paper cap.


2014 = Your Time to Shine
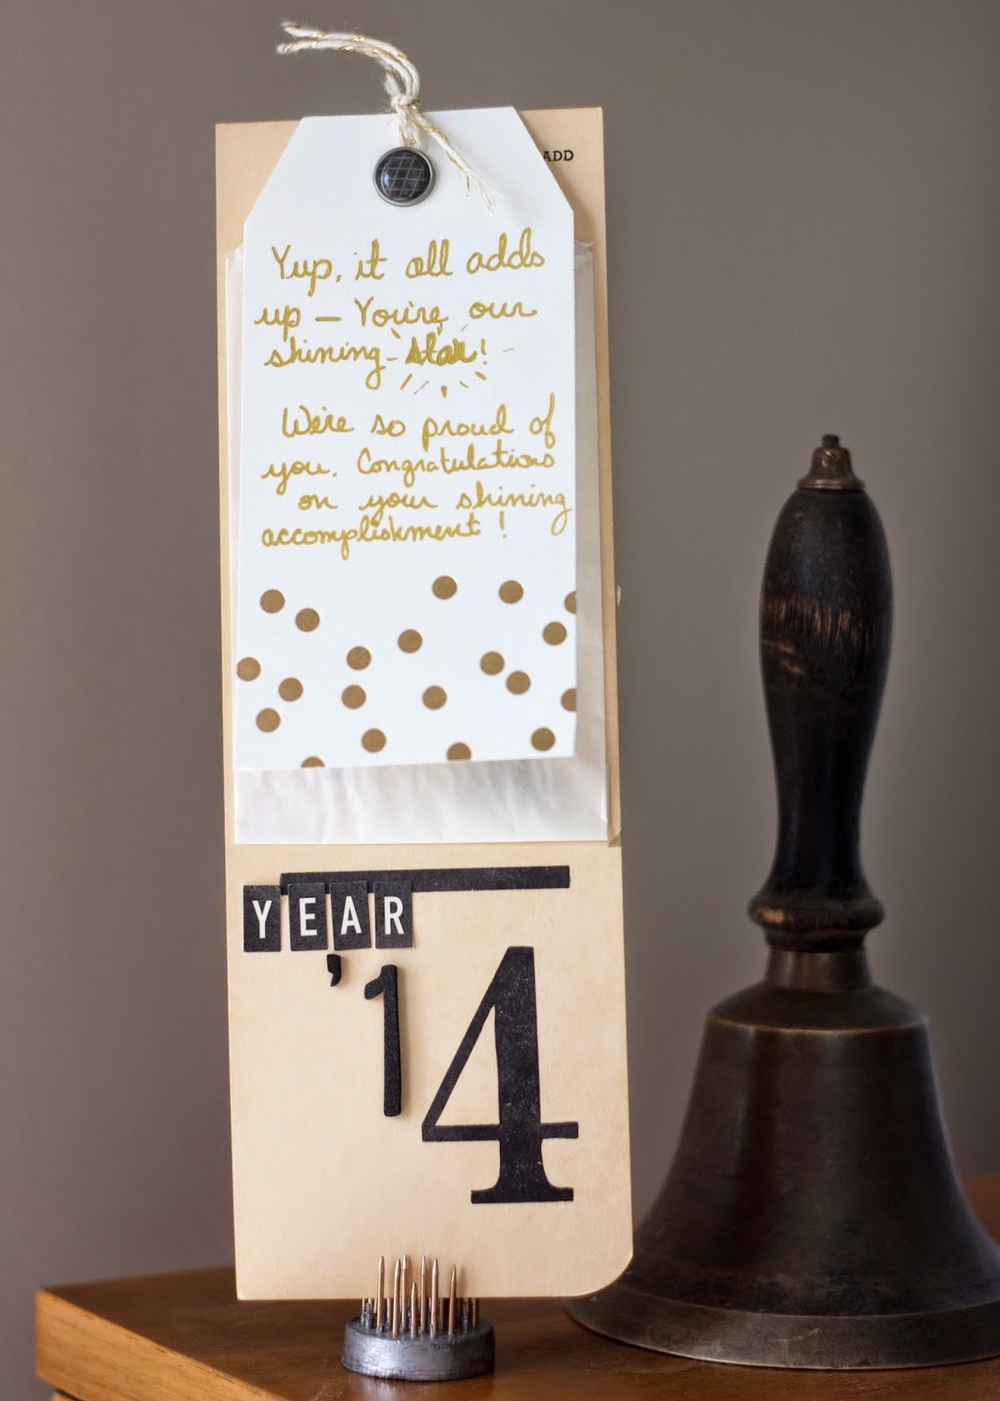
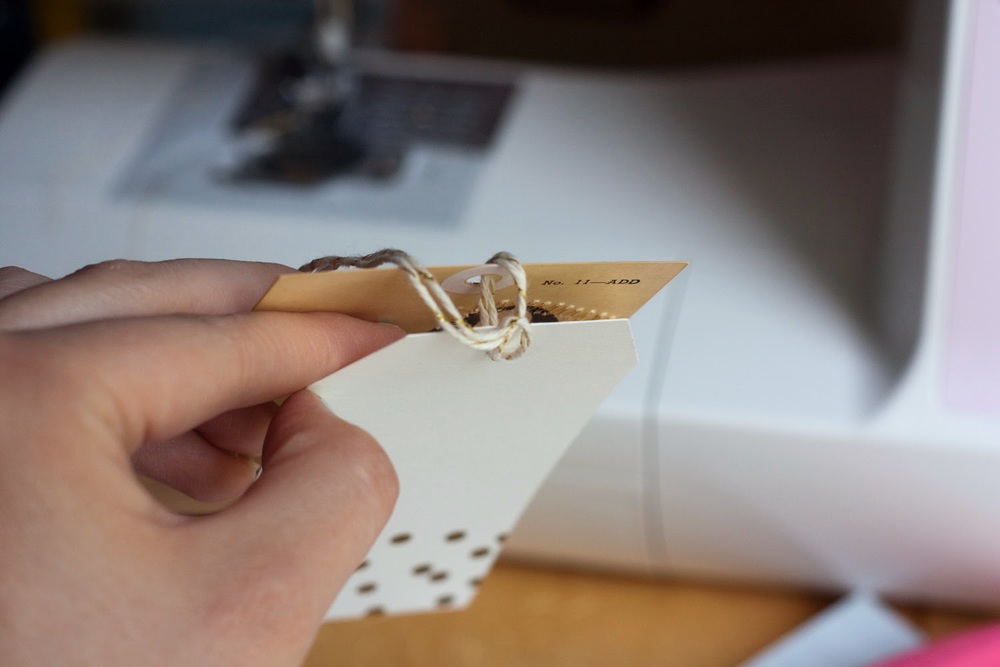
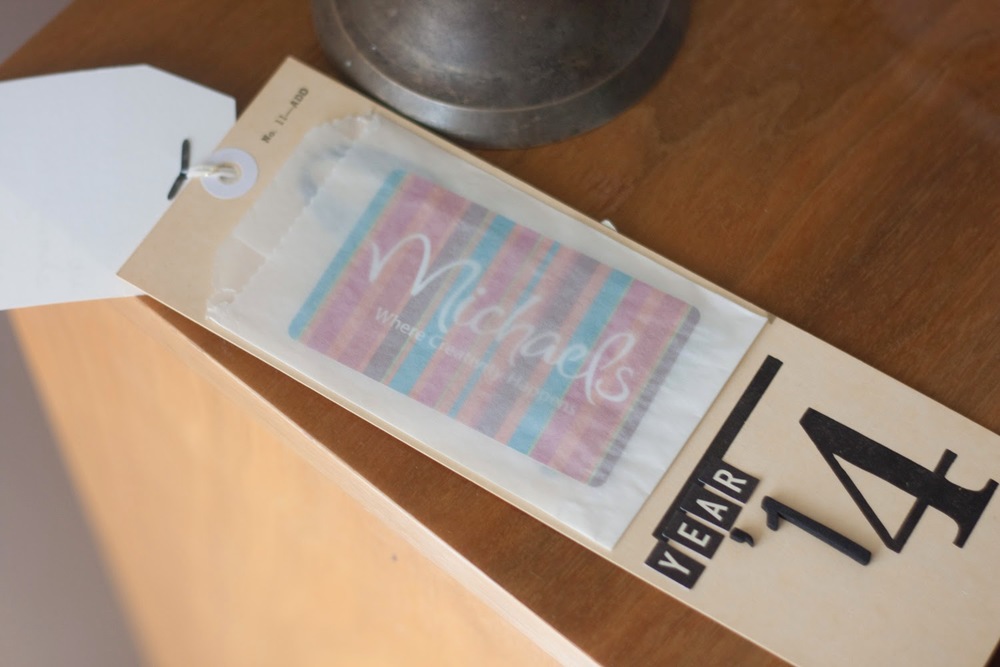
It's your year, grads! All of that reading, writing and arithmetic has paid off. So you can finally put those old flashcards to new use—make a grad tag, complete with a gift card holder!


BTW, I did a quick Etsy.com search and found some flashcards like mine here. You're welcome. ;)

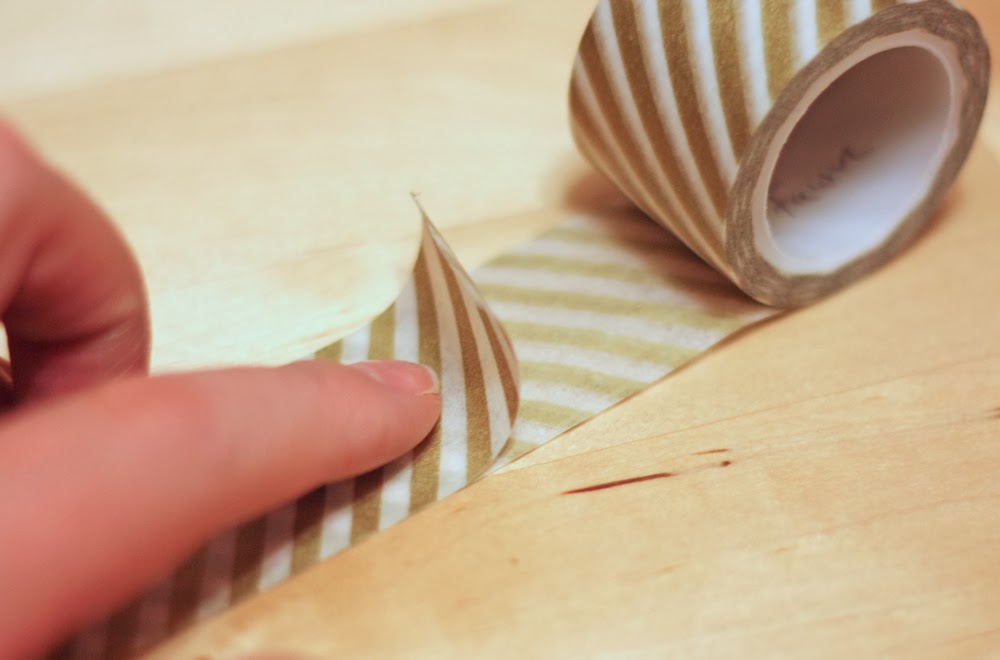
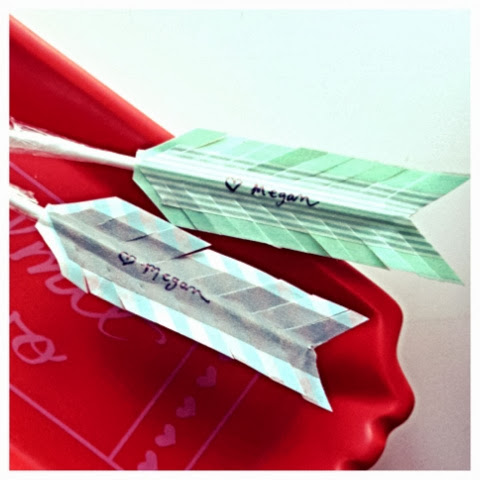
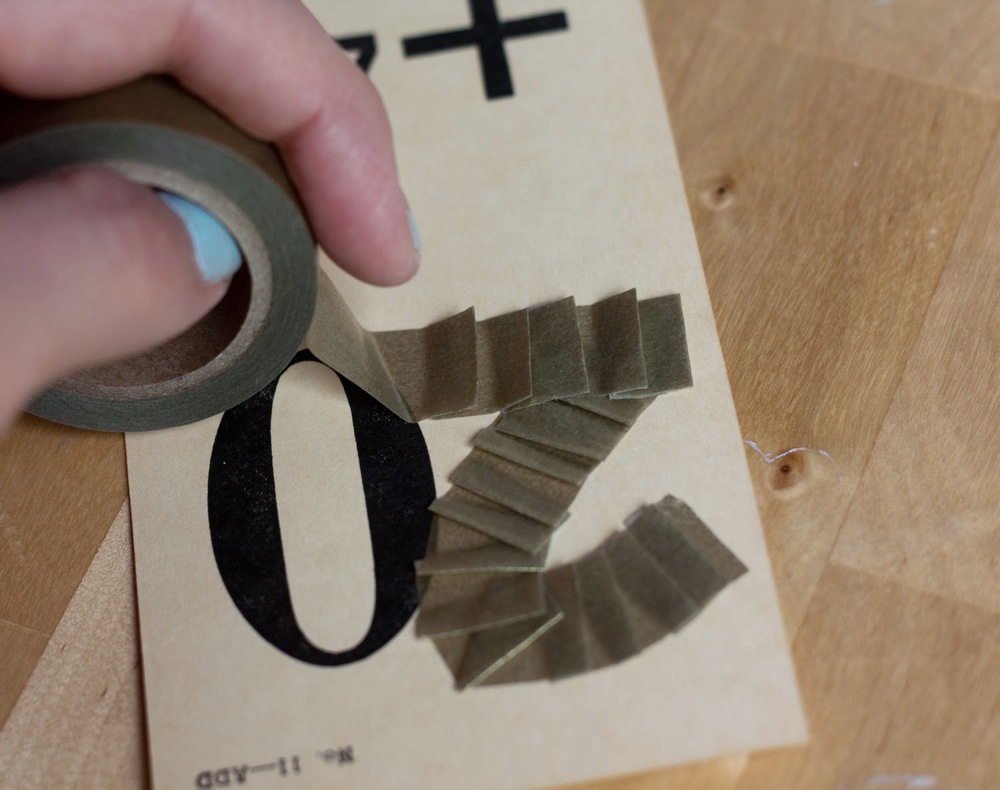
To create the taped numbers, I simply pleated my gold washi (from Paper Source) and then added some stitching for reinforcement.


I wanted the flashcard to act as a tag, so I added a hole and little reinforcer sticker.


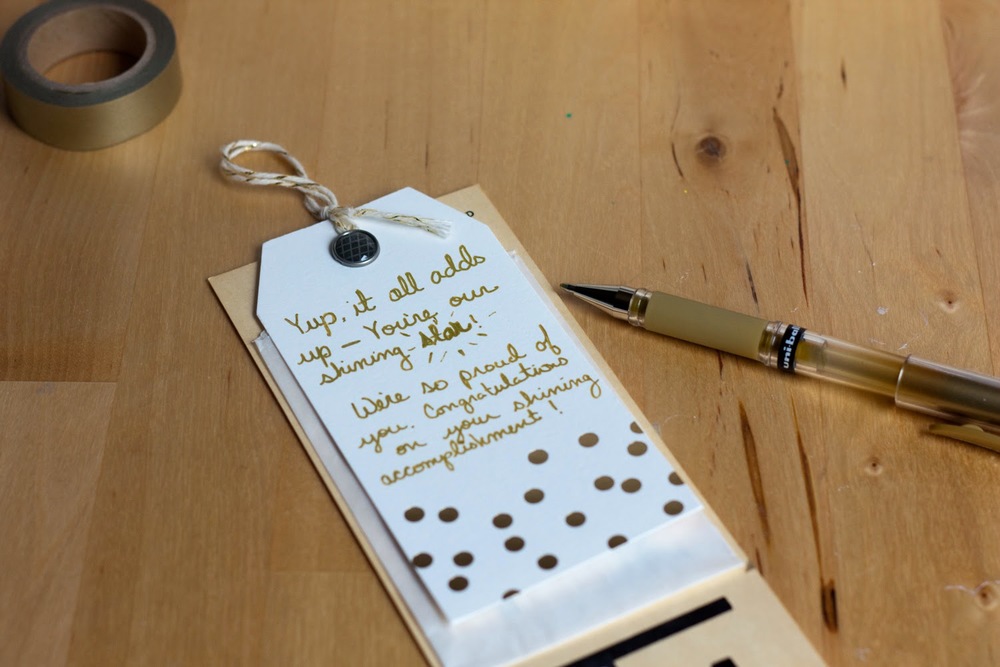
I then added a second tag (also from Paper Source) to both hide the backside of my stitching (gotta hide that messy backside) ;) and also provide a place to write a note to the grad.
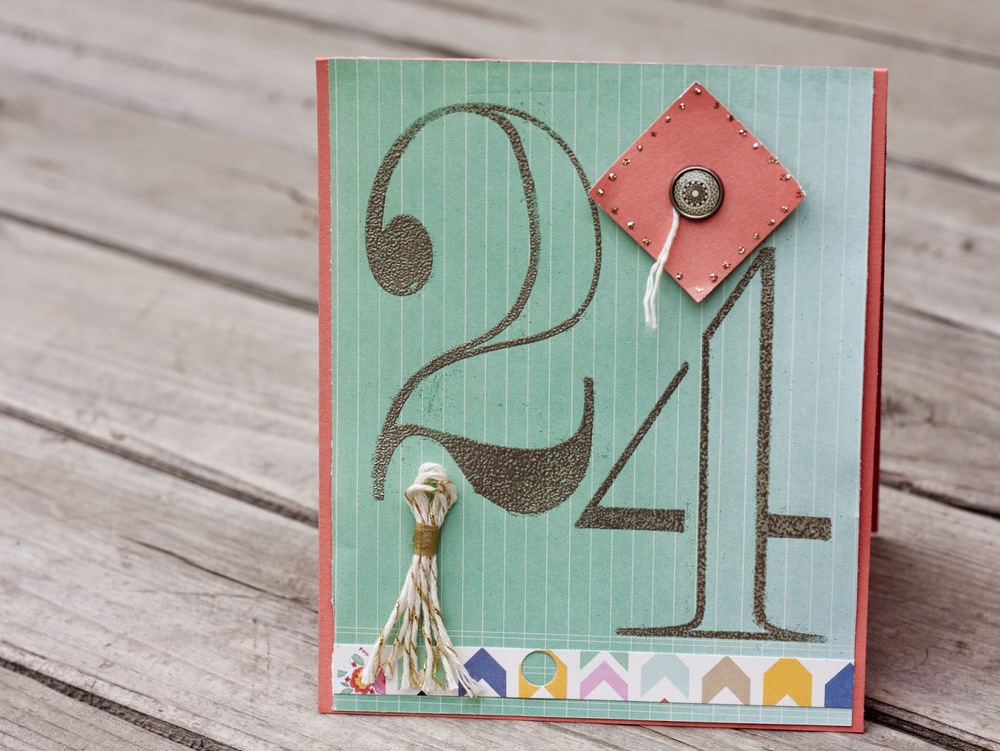


2-0-1-4
Back to those fab The Crafter's Workshop number stencils. This time, I used my VersaMark pen to trace the numbers on patterned paper. I then sprinkled them with embossing powder and set to heat embossing. A bitty tassel and Stickle-adorned cap completed this little number.


Okay, you can officially turn those tassels...on your hats. ;) The card-making class of '14 is complete. Thanks for attending! I hope you were inspired by my ideas. If you find you need to purchase your cards this year, you'll find a brilliant Paper Source assortment here.

Congrats, 2014! This is your time to shine. Live it up!

Cheers!

Sweet Easter Treat (and it's even zero calories!)


You might say I have a crush on this Easter goodie. Nope. It's not Rainblow Eggs, but I share almost as much love for these, which is odd, considering they're not even edible.


What's inside this carton, you ask? Well, let's pry it open and take a peek.


It's EOS lip balm! Betcha thought E.O.S. stood for Evolution of Smooth (or you didn't know what it stood for, like me). Nah. Not here. Now it stands for Easter O' Style!

Available in many flavors and colors, these little lip eggs look so pretty filling up a paper carton. Surprise your best friend, coworkers, or other special gal. Or give that special guy a less-than-subtle hint. *wink wink* 


Of course, I'm all for adding a personalized touch, so I put some paper on the lid and added a washi-tape bow by pleating the tape. The gold rub-ons are by Maggie Holmes for Crate Paper, and they're some of my favs. They even worked ON washi!

The cute carton? Why, it's from Shop Sweet Lulu, an adorable online store. No time to order? No worries. Just slice a regular carton in half. Or, if you're feeling egg-stra generous, give someone 12 balms. I assure you they will not be disappointed to have a lifetime collection. 


I'm sharing this and many more out-of-the-basket Easter giving ideas this Thursday on Studio 5. If you're local (UT), tune in to channel 5 at 1. Or you can watch it stream online at 1:00 MST right here! Hope you'll hop on over. 

I'm always seeking fun and unexpected gift ideas. What gift would YOU put in this bitty egg carton?

Cheers! 

No Business Like Bow Business: Easy bow techniques


Just call me a bow-fessional. You know, like a bow profe... Ah, never mind. I’m about bow-punned out after all the fun I had over on the Scrapbook & Cards Today blog. If you had a chance to check out my Monday with Megan post today, you, too, know bows. 

I even shared a tutorial for making your own crepe paper bows. They’re fast, easy and oh, bow cute! (Okay, so maybe I have a pun or two left in me. Consider yourself warned.) ;) 


A dear friend of mine is expecting a baby (two of ‘em, actually), so I thought I’d make my crepe bow into a little gift tag for her shower gift. 

I simply attached the bow to an SRM Stickers glassine bag (love these!), using a stapler. But I first layered some sequins from Teresa Collins Designs and Hazel & Ruby on the center of my bow, giving the stapler one more thing to hold on to. 


I then added a little washi and a few additional sequins to a standard shipping tag to complete the look. I now have a handmade gift tag to add to my friend’s shower gift. Bow kidding. It’s that easy!


Bow the Distance!
Make bows like bow-body's business with this faster-than-fast washi-tape technique!

Do It To It
Step 1: Fold strip (approximately 5") of washi tape on itself (leaving you with a 2.5" strip).


Step 2: Pinch to form bow shape and staple to secure. 


Step 3: Wrap strip of washi tape around stapled center.


Oh, bow you didn't! Yes, I did. A washi bow in 3 easy steps.


Looks to me like this bow tie needs a Mr. 

Back to my Stained by Sharpie technique.


Just color a fella on a bitty bag. If only I'd given him a fedora instead of a top hat. He would have made Humphrey Bow-gart proud. 


And stitch the bow to the bag with a needle and some embroidery floss. 


Fill it with treats and make your mustached Mr. smile. 


But what's a Mr. without his Mrs.?


Yup! The Stained by Sharpie markers work on burlap bags, too. Isn't that awesome? 

I made her bow using dictionary paper. 


Uh oh! Looks like my candy bandit is back! Those adorable, tiny fingers are caught candy-handed. 


Bow-nus Technique
Here's one more bow for this show. The supplies you need are:


Brand new, delicious paper from My Mind's Eye; classic wood buttons from Bella Blvd.; an awesome heart punch from Fiskars (and a small circle punch, not shown); Zots from Therm O Web

Do It To It
Step 1: Punch two hearts from patterned paper. 


Step 2: Punch small circle from scrap of paper (any paper is fine as this won't be visible).


Step 3: Place adhesive in center of circle. 


Step 4: Push tips of hearts down into glue using your fingernail. 


Step 5: Place additional adhesive on back of button and attach to center of bow.


Step 6: Shape hearts to enhance bow shape. 


Have fun with this technique, trying different paper patterns and bow centers (buttons, flair, etc.). 


Bow ties—just what I needed to make Cory's Valentine's Day gift complete! More on that in another post. I've gone on for long enough today. Thanks for stopping. And remember, there's no business like bow business!

Cheers!

Cupid's Arrow: A Washi Tape Treat


Need a quick Valentine that doesn't suck? These should, ahem, point you in the right direction!

Washi Arrows


Supplies
* heart suckers
* washi tape in 2 varying widths
* fine-point permanent marker (I used Sharpies)

Do It To It
1. Adhere two strips of wider washi to sucker stick, extending the tape approximately 2" beyond end of stick. 

2. Cut ends of tape closest to sucker to a point that points towards the sucker. 

3. Layer thinner strip of tape over center of wider tape (both front and back) and cut sucker ends to point.

4. Make a dovetail cut to outside end of tape and cut some fringe to complete your feather. This is the fun part! 

5. Write a little love note on feather using permanent, fine-point marker. 

6. Call Cupid and tell him you have his arrows ready to rock and roll. (800-LOVE-YOU)

Love Buds


If a bouquet of flowers is more your speed, you can use most of the same supplies (and a couple of punches) to make these botanical beauties!


Do It To It
1. Punch hearts from patterned paper (or cardstock) using heart-shaped punch. Note: Approximately 5 hearts per flower.

2. Punch small hole in base of each heart. Note: Hole should be the size of your sucker stick, if not slightly smaller.

3. Thread punched hearts up stick and fan out around sucker to create flower.

4. Add leaves using by wrapping a strip or two of washi around sucker stick, beneath hearts. Note: This will also hold hearts in place. 

5. Write a little love note on tape using a fine-point journaling pen.

6. Call the florist and tell him he has the day off; you've got this!

Supplies
* heart suckers (Target)
* basic hole punch
* washi tape 
*  heart punch (I used Fiskars scalloped heart)
* fine-point permanent marker (I used a Sharpie)


Cost
I think the complete project was only $4 for 32 suckers. 

* Suckers = $1/pack of 8 @ Target
* Crafting Supplies = $free.99, because I used supplies I already had on hand

Cheers!