

Let’s make a plan, Fran! Are you in, Stan? Good! Because I have some ideas to try using stamps in your planner. My goal: to take the intimidation out of stamping in your planner. Trust me, I know putting ink directly on the page can be a freaky commitment, but it doesn’t have to be. Here are a few fear factors I hear about when I teach stamping in planning. It’s time we conquer those fears. You see, stamps are the perfect planner supply. They can be used over and over and over again. No way should we let any uncertainties get in our way of such cost savings.
Supplies Used: NEW Taylored Expressions Clearly Planned stamp sets and my Carpe Diem planner by Simple Stories.
Fear Factor #1: What if the stamp doesn’t fully take and I’m left with only part of an image?

No prob! Many stamps are clear, so you can go over them again. If you’re working with red rubber stamps or only need to make minor touch-ups, you can simply take a pen and fill in some of the gaps, which is what I did here with this cutie from the new Cheery Banners set.

Fear Factor #2: What if you change your mind and don’t want that stamped image there? There’s no backspace button!

That’s what decorative doodads are for. If, for whatever reason, you aren’t feeling a stamped image, simply cover it up with another cute something.

In this case, as much as I LOVE that heart banner, I didn’t love where I ended up putting it. So I added some banners below it and covered the hearts up with some diecut shapes by Simple Stories. Problem solved!

Fear Factor #3: How do I know where to stamp?

My best tip here is to start with some basic placement. I knew I had events and dates I wanted stamps for (birthdays, and other happenings), so I began by placing stamps in those spots. This helped me see if the placement felt balanced or if I needed to move things around. It also helped me determine how the stamps fit within the boxes on my monthly spread.
Fear Factor #4: How do I know what color of ink to use?

Yeah, this one can be tricky for me too. I don’t want to go hog wild and end up with too much color on a spread. But I also don’t want to stick to all black when color is so happy! Typically, I choose around 3 key colors to work with and use those most prominently. I then add additional color in smaller quantities using colored pencils to fill in the details.

Fear Factor #5: What if my event isn’t included in the stamp set?

Use your imagination. I have a sweetheart graduating from preschool this month. *whaaaa! There wasn’t a grad cat in the Cattitude mix, so I simply took the balloon cat and drew a mortarboard cap on him. Voila! Grad Cat!


I did the same here to create a Baby Shower Cat. It’s so easy to alter these fab felines!
Fear Factor #6: But… stamps are so flat!

Yes! And that’s why they’re perfect for planners! But I get it if you want to add more texture to your pages. In those instances, simply pair your stamps with other bits. For this birthday party hat, for example, I covered the stamped hat topper with a sticker. It wasn’t that I didn’t like the top of the hat on the stamp, but the sticker mixed up the textured a little, which was nice. I then outlined the entire image, sticker and all, to create a finished look!
Fear Factor #7: How do I know what ink to use?

This is a GREAT question! Ink can make or break your stamping experience. Planner pages are often pretty thin, so you want to be extra careful. I will say, and I’m not just saying this because I’ve used TE products for this post—TE ink is AWESOME! It’s honestly some of the best I’ve used and it works beautifully in my planner. Plus, the bitty pads are just right for taking with me when I plan on the go. If you don’t have access to these, I’ll just advise you to use dye (water-based) ink or hybrid ink. You’ll definitely want to stay away from pigment ink, which is super juice and will soak through your pages.
Fear Factor #8: How do I do lots of stamping without overwhelming my spread?

I was wondering the same thing. I wanted to use the cute Fun in the Sun set images for my recent trip to Myrtle Beach, but I didn’t want my page to quickly get crazy. Fortunately, the size of this set worked in my favor. The images are bitty, offering just enough decoration without filling up and taking over the page. Fortunately, most planner stamps are pretty small, so you shouldn't have a prob squeezing in all the fun your stampy heart desires!

I also opted for the same neutral shade of gray ink for each. This helped connect the week as a single event and make that section of my month feel more cohesive.
Fear Factor #9: I like this stamp, but I can’t fit it all.

Then you don’t have to use it all. These bitty banners, for example, don’t fit in the daily box, but you bet I wanted to use them to decorate the box for today. (Happy birthday Curtie!) So I simply placed the banner over the box, noted where the banner stopped, and only inked that far. The bitty TE ink pads make it easy to get in and precisely ink a specific portion of the stamp. You can also use stamping markers to do this, or try traditional stamp masking using a Post-it Note.

I did the same thing with the balloon, not because I wanted it to fit a space, but because I wanted it a different color. Either way, this is a way to stretch your stamp use.
Fear Factor #10: Now what? I don’t want to buy ink just to be used for a single month of stamping.

Trust me when I say, there are so many ways you can use stamps and ink. Even stamps marked “planner” can be used beyond the pages of your planner. Wouldn’t a series of bitty birthday cards look cute with these cats? And I love to use my ink and a makeup sponge to transform basic hole-reinforcement stickers into customized stickers that match the look and feel of my spread.
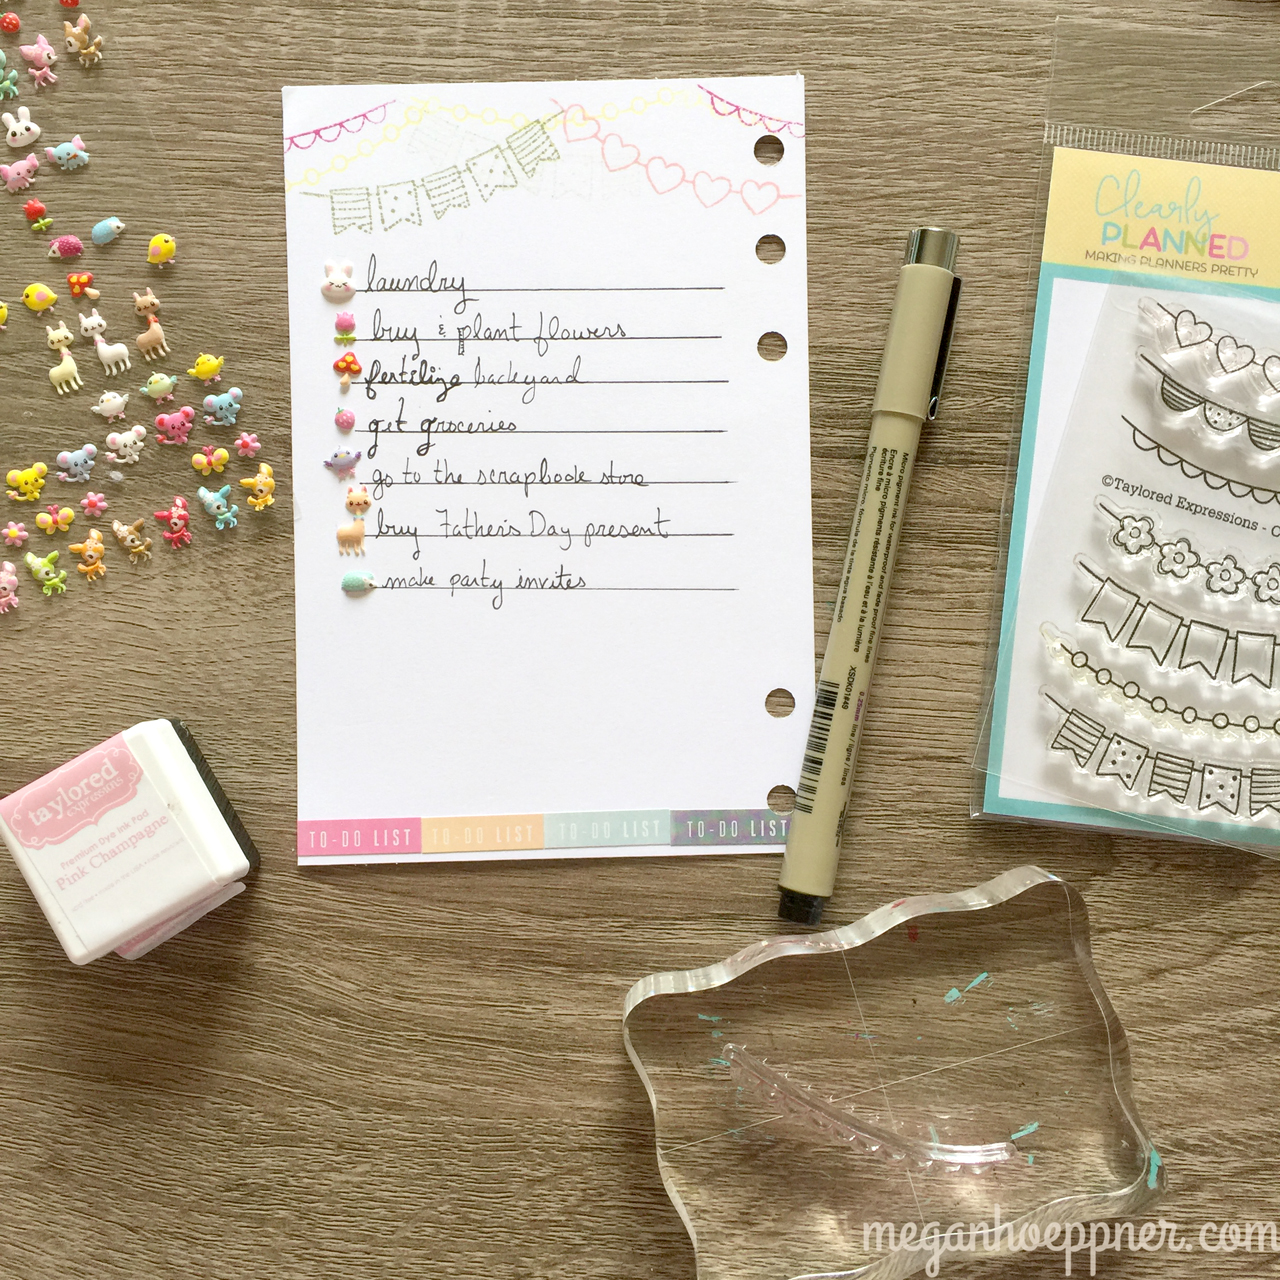

So, are you planning on some stamping now? If you’re still on the fence, channel your inner Bob and take baby steps (obscure 80s reference for ya!). Create a planner insert—something you stamp on, punch, and add to the center space in your planner. That’s one of the fun things we did in my planner class last month to get a warmup round with the banner stamps. We made to-do list inserts with cute banners across the top. Nothing like banners to make “do laundry” more fun! And starting by stamping on an insert page meant we could mess up and start over as many times as we wanted until we were fully comfortable. Though, I can tell you, it wasn’t long before we were all in. I didn’t see anyone start over. It was one and done. Stamps really are an easy way to make your days pretty! I hope you’ll give them a try.

I’d like to thank Taylored Expressions for sending me a few stamps to try. But I also want to mention that I’m not compensated for this post. I just love stamping and I love planning, and I was happy to write about those experiences coming together. It’s a match made in to-do heaven. ;) To see the rest of the new releases, click here. And for more info on my planning classes, click here.
Cheers!