
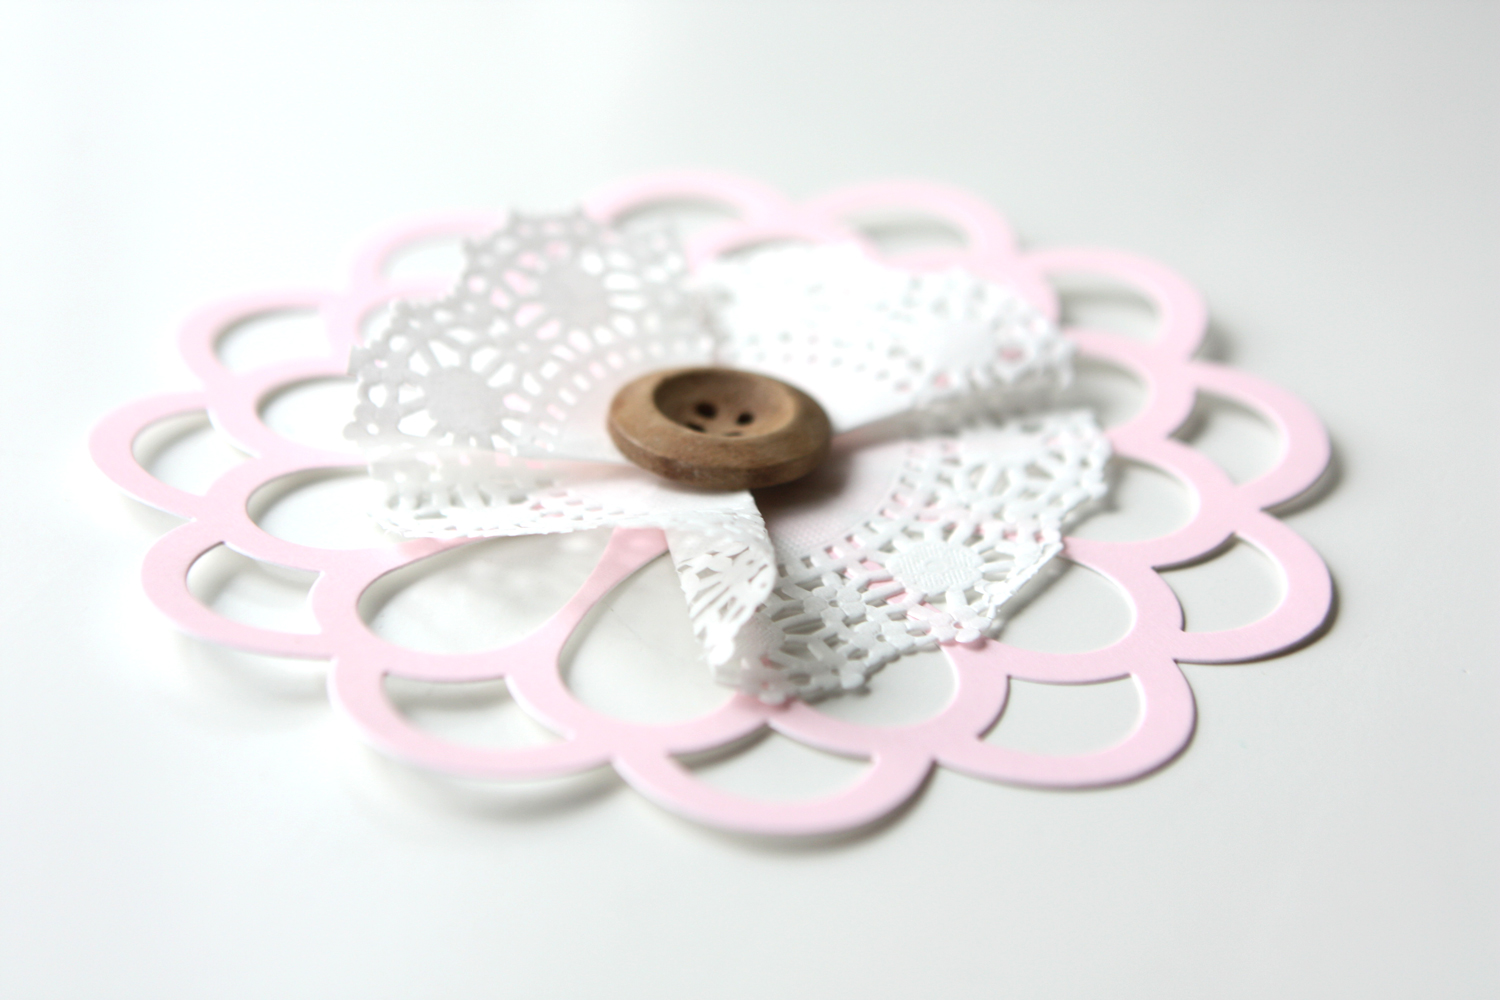
Have you seen the look of laser cuts that have come onto the crafting scene? This intricate design motif appears to be inspired by the look of doilies and die cuts, which have been popular for quite some time. Cut from various materials, including paper, fabric and wood, you can achieve a variety of textured looks using these cut cuties.
Here are just a few of the projects I created for my latest Studio 5 segment, which is all about working with laser cuts.
1. Laser Cut Wreath: I used the paper flowers to create a spring wreath, which would be nice for spring, a Mother's Day celebration, or a baby shower.
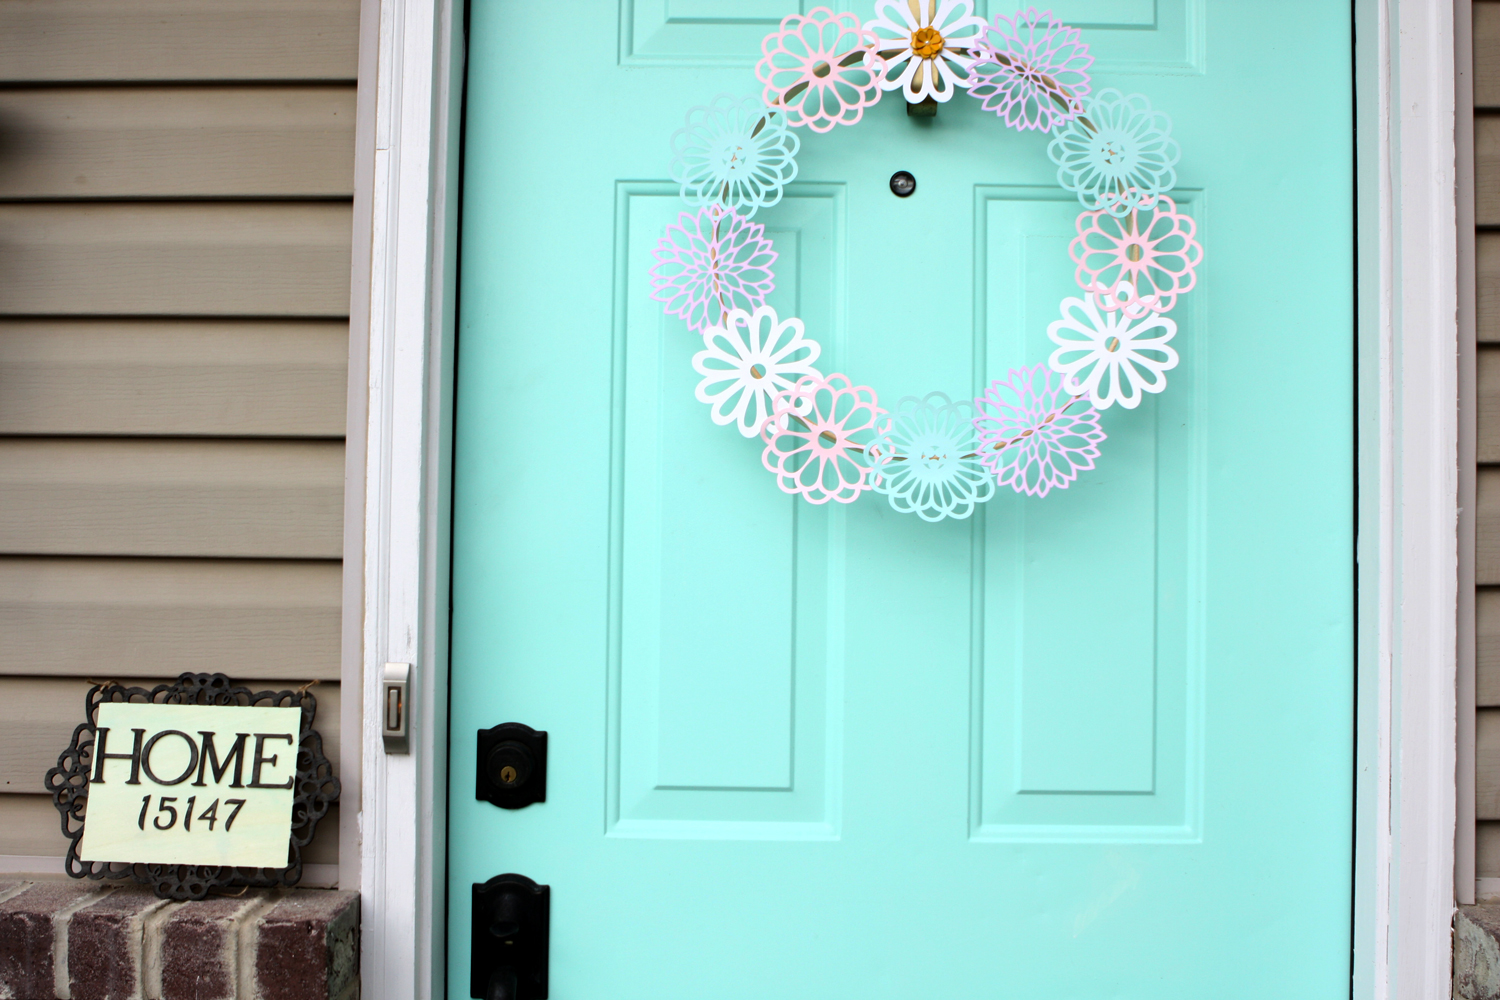
Tip: One of the reasons laser cuts are cool is the way the light shines through them, so I purposefully selected a thin wreath base (embroidery hoop), which allows the bulk of the laser cut pieces to stand free so the light can pass through.
2. Home Address Plate: The laser cut plaques offer great creative potential, from creating a menu frame to designing your own calendar. I decided to go with an outdoor piece--a home address plate. After all, this is the time of year that people are putting their energy outdoors to up their springtime curb appeal.
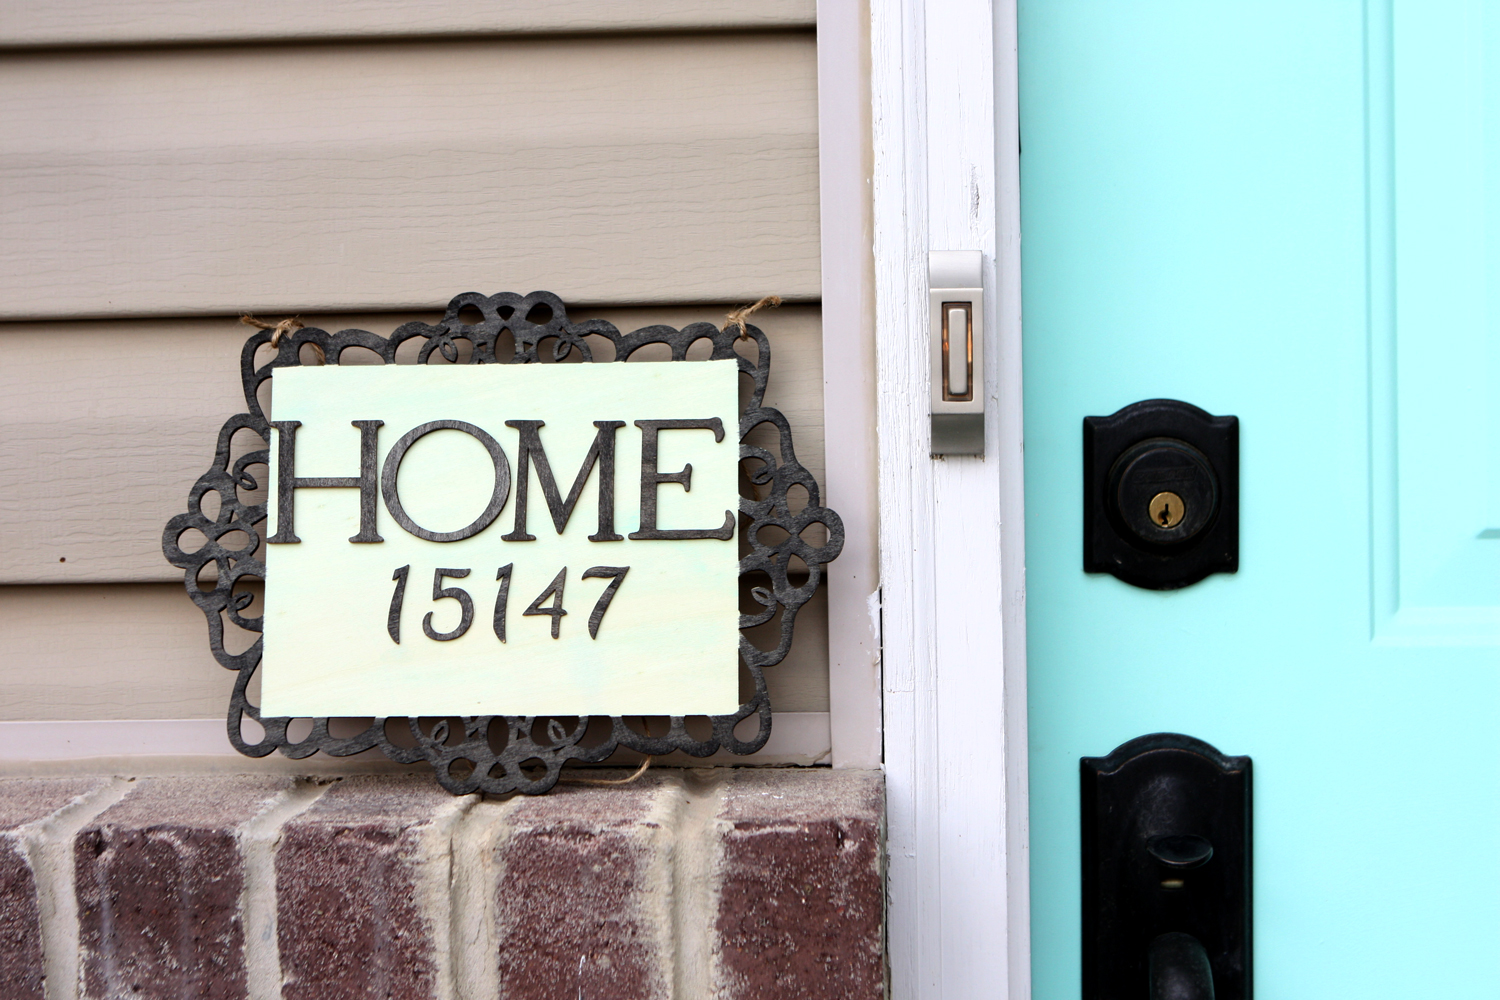
Tip: With nothing more than a marker, you can tint wood cut pieces. I used an india ink marker (the Pitt Pen by Faber-Castell) to color the black elements on this plaque. For the green center, I watered down acrylic paint to create a colored stain--a great budget tip (colored stains can get expensive).
3. Garden Pick: Decorative picks add personality to garden spaces, but they can also be quite expensive. This is a way to make your own--one that is completely customizable and charming. Get the kids in on the fun. My sweet Maggie Dawn painted this one.
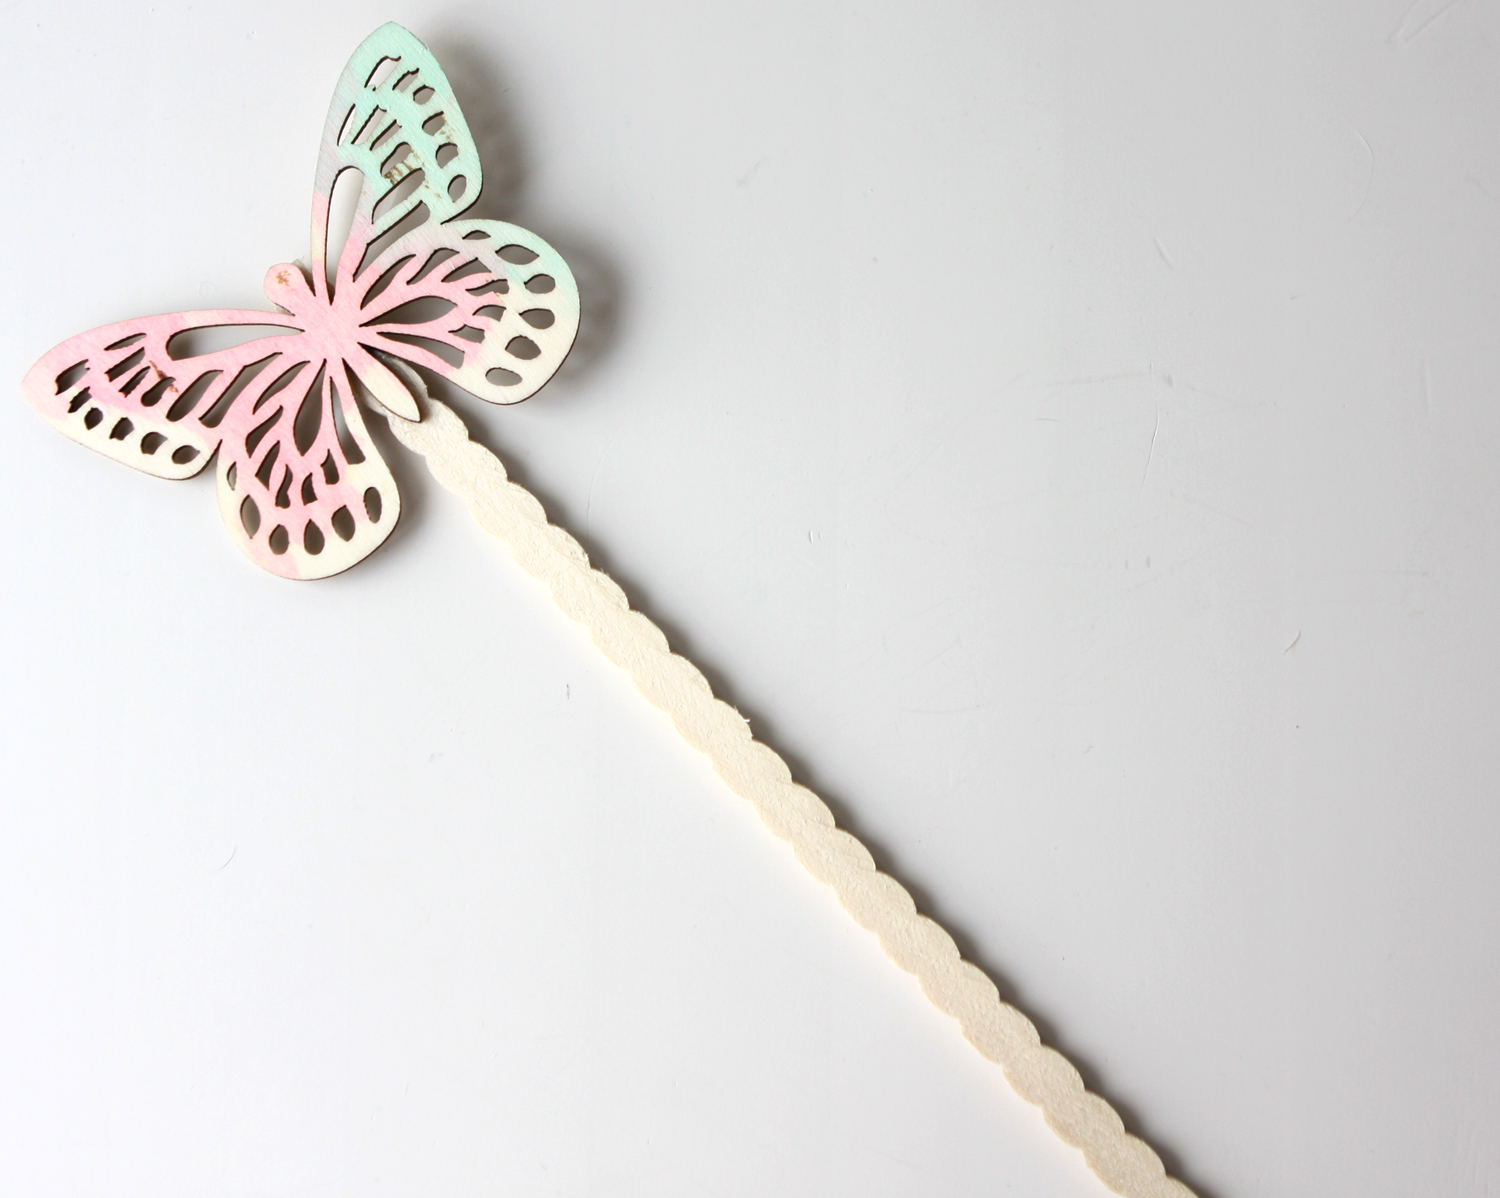
Tip: Use an outdoor sealant to help the wood withstand the elements, and looking at placing the pick in a pot that you hand water vs. a garden that will get regularly saturated by sprinklers.
4. Coasters: The laser cut wood circles are just right for creating outdoor color in the form of coasters (or indoor).
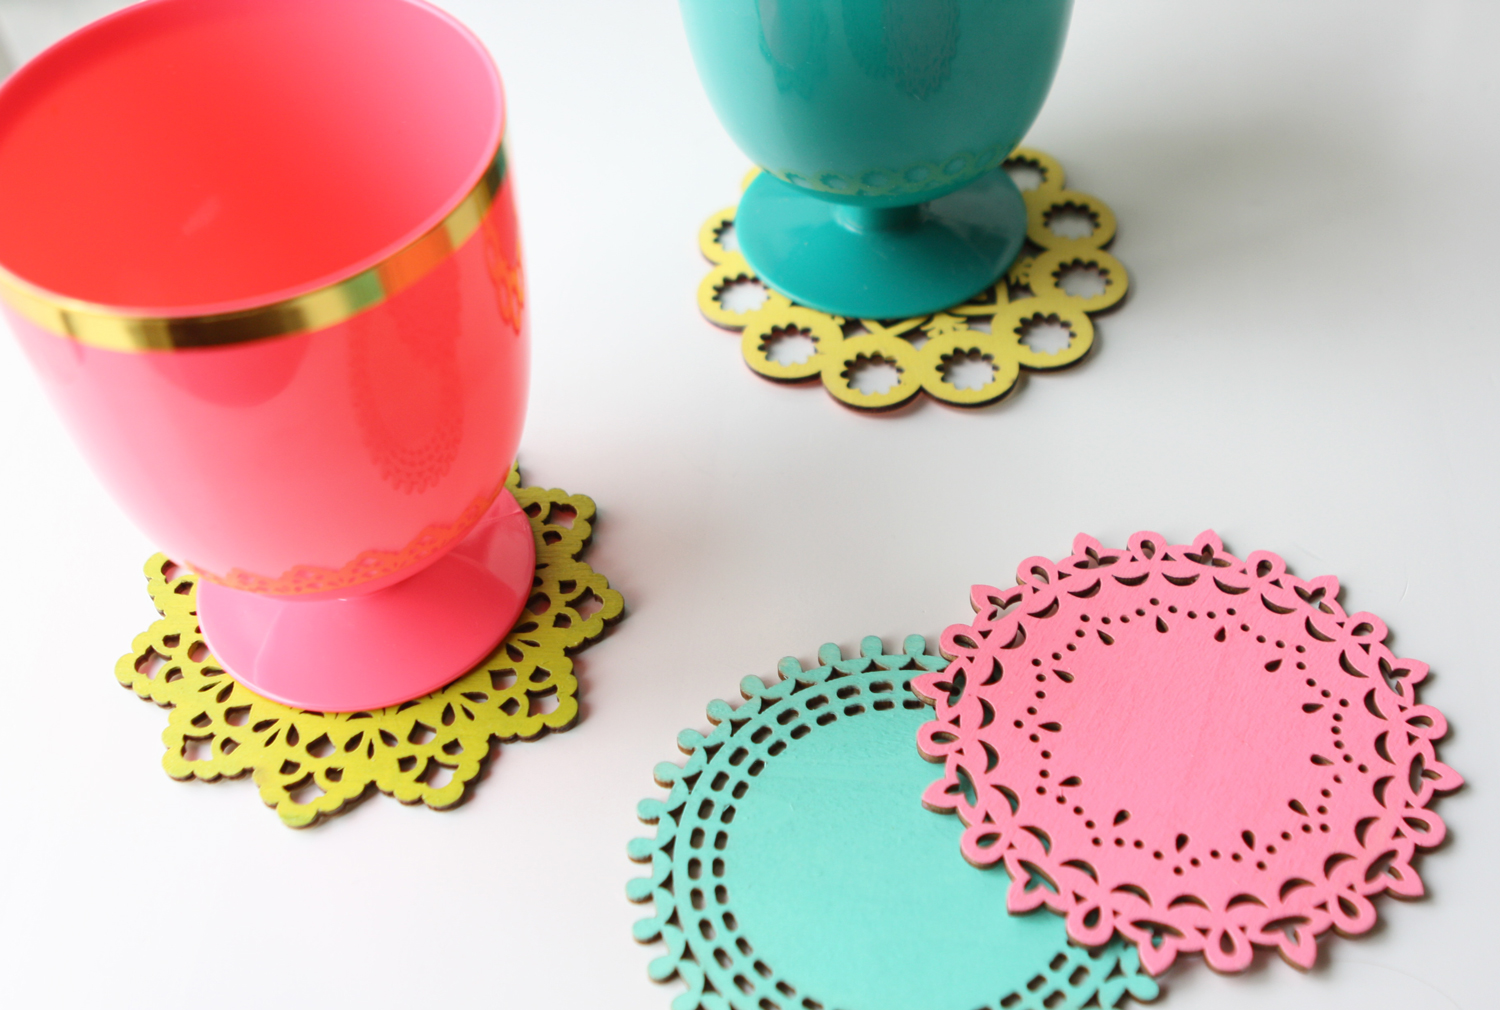
Tip: I sealed these with Mod Podge so they'll stand up to wet glasses.
5. Luggage Tag: The travel-themed cuts are perfect for adding personality to your luggage. They're sturdy enough to hold up and eye-catching.
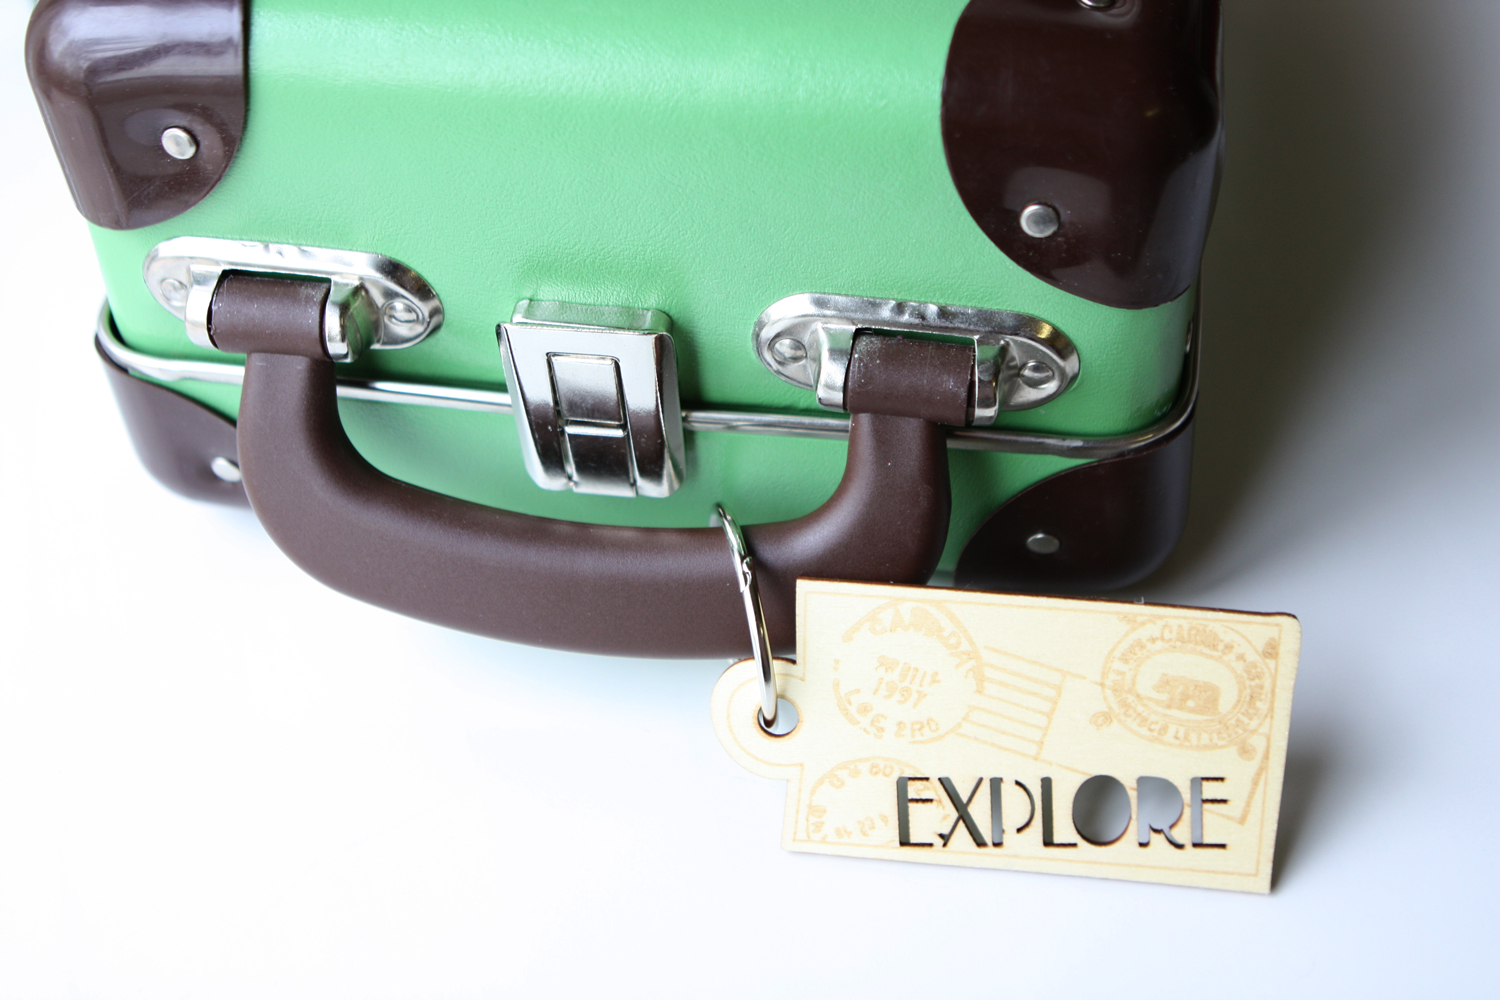
Tip: To include my info on the back, I simply used letter stickers, which I sealed using Mod Podge.
6. Travel Album: I was instantly drawn to the travel-themed tags and knew they'd make an awesome mini album.
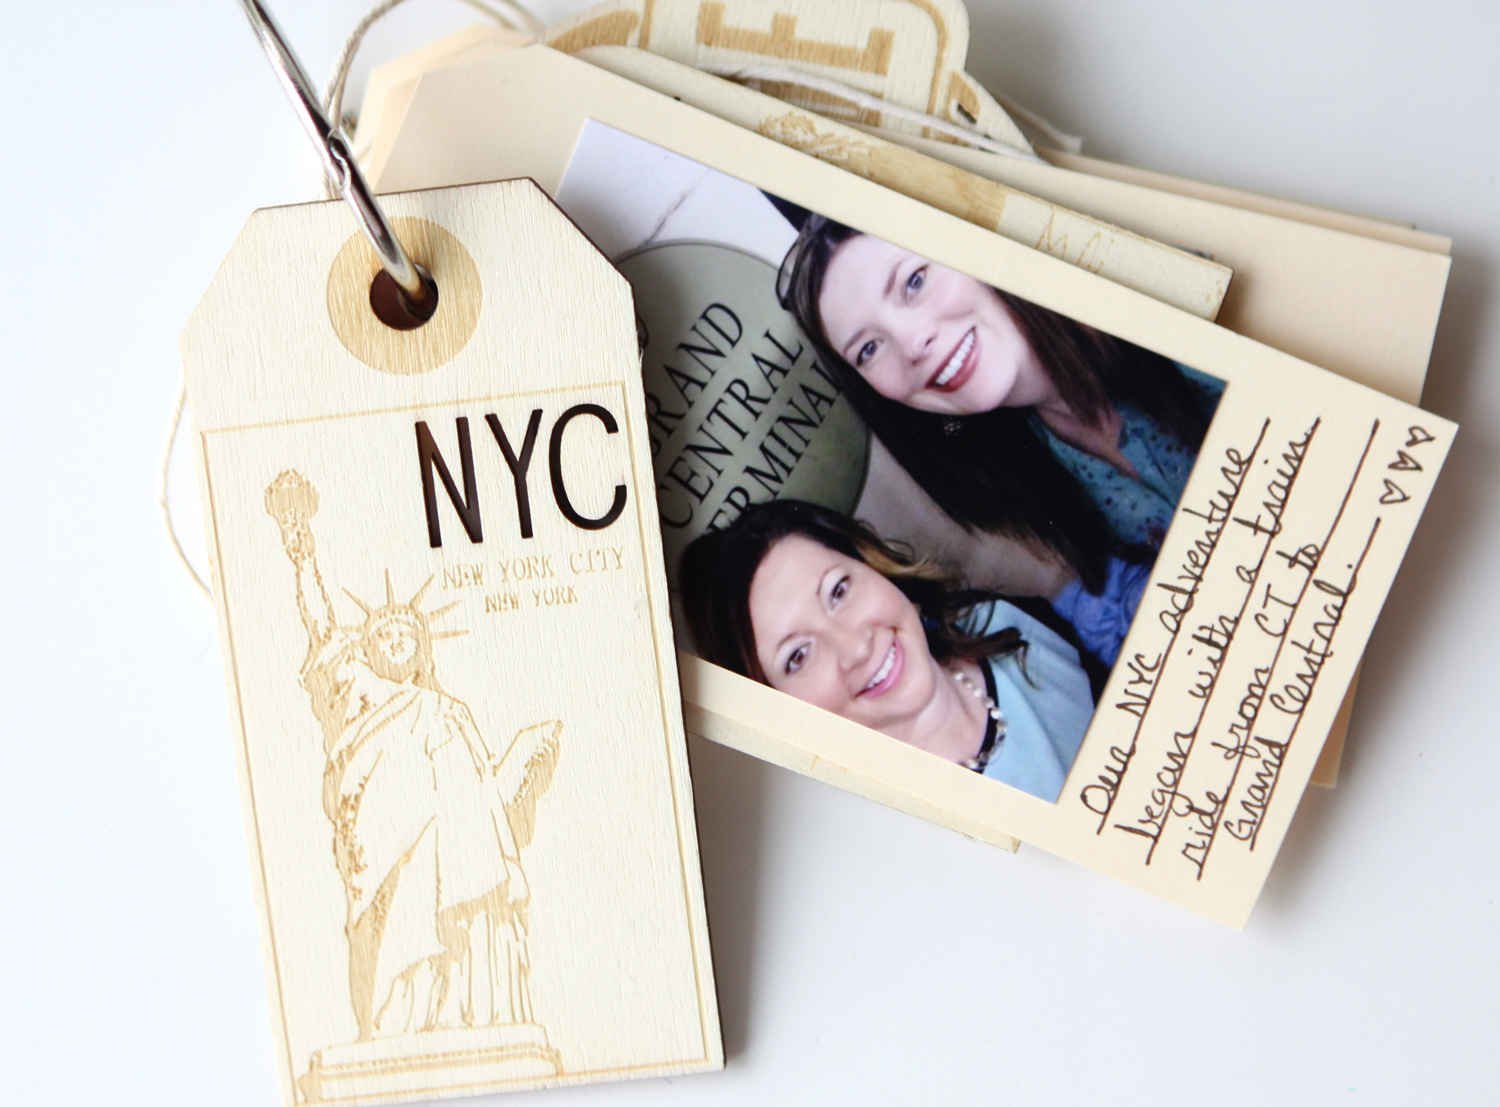
Tip: Pair the travel-themed cuts with basic manilla shipping tags for an easy approach to documented travel memories. The wood adds rigidity and structure to the book, and a jump ring binds it all together. These would be so fun as family reunion favors.
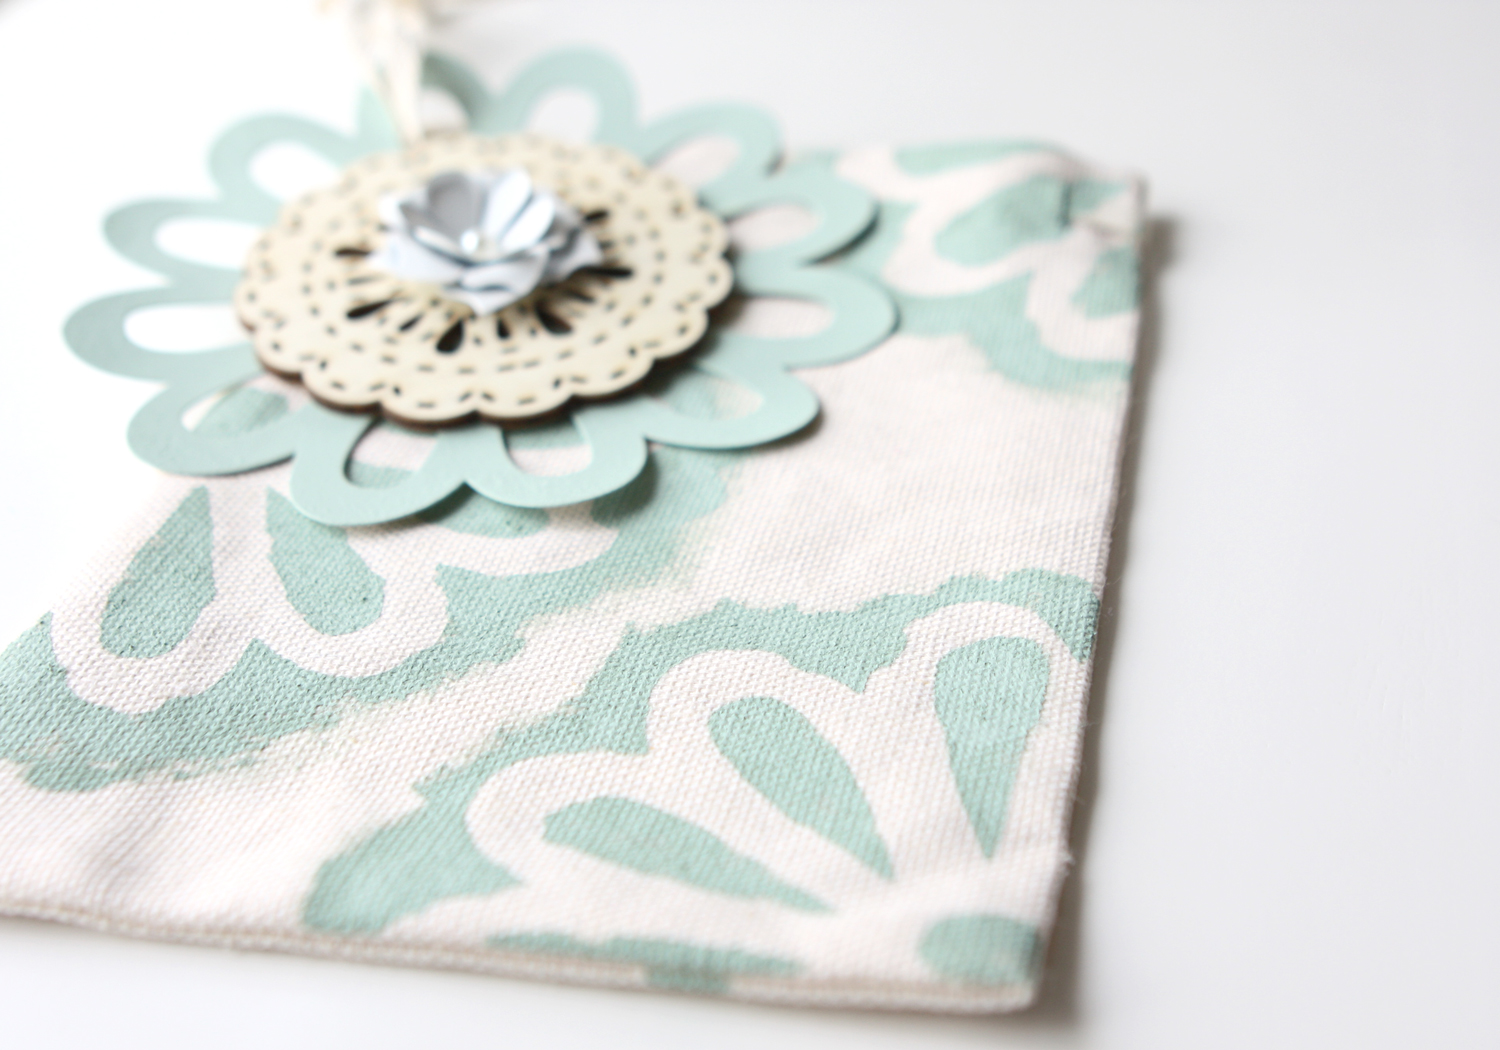
7. Handmade Gift Wrap: The laser-cut pieces make excellent stencils with their intricate cut-out designs, so I used one to dress up an ordinary canvas bag. Just use a dabbing motion and a sponge brush to apply acrylic paint.
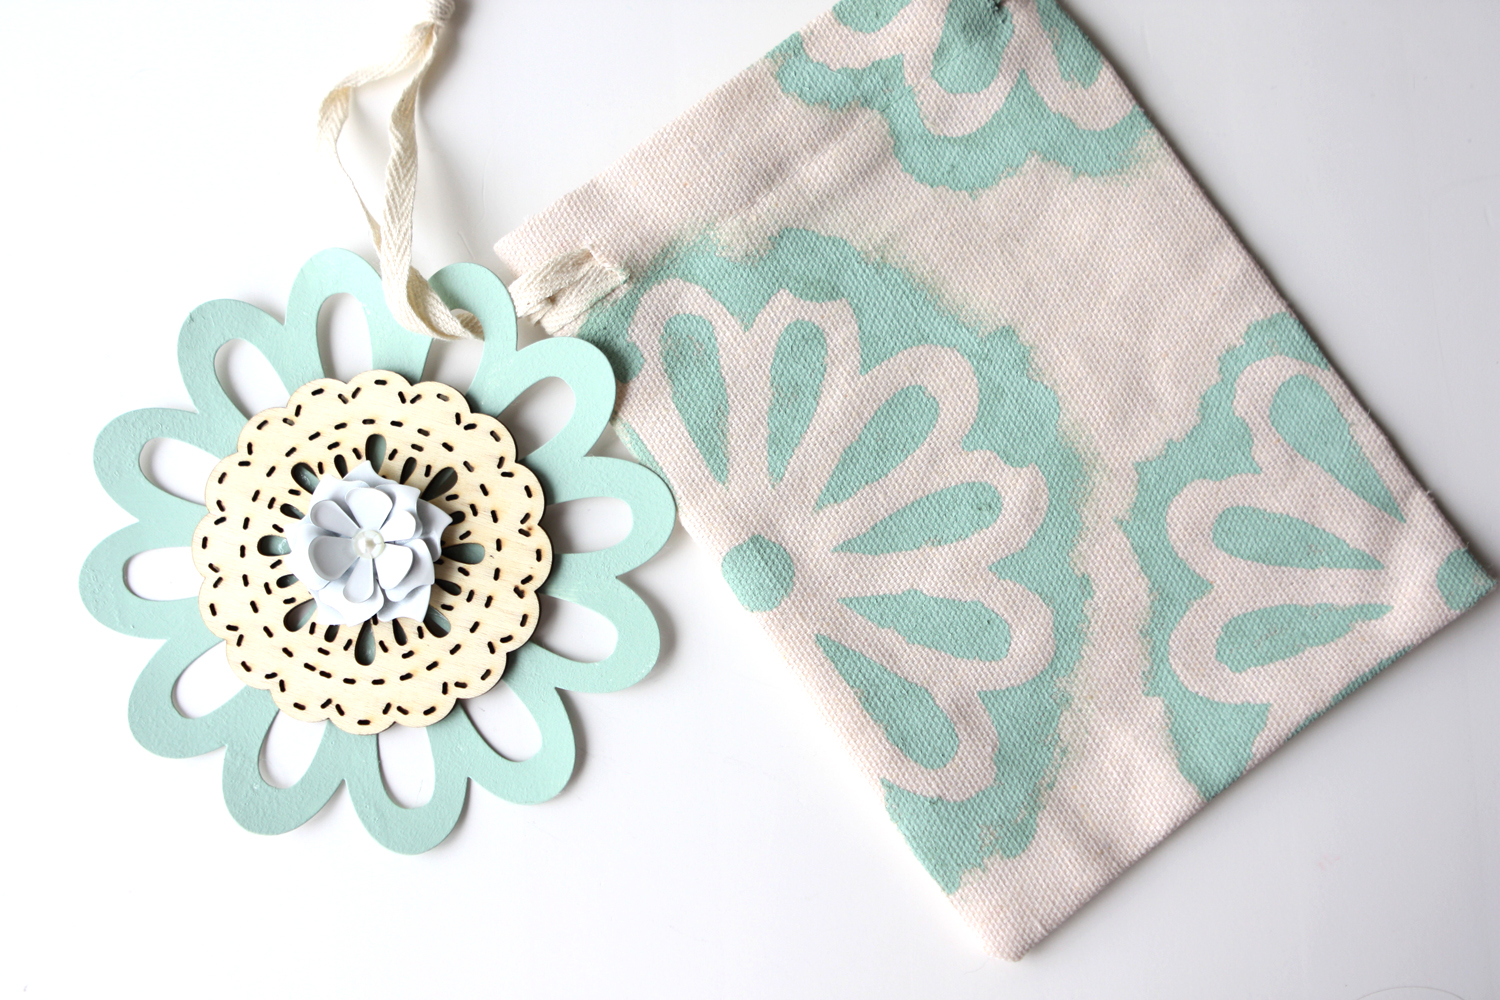
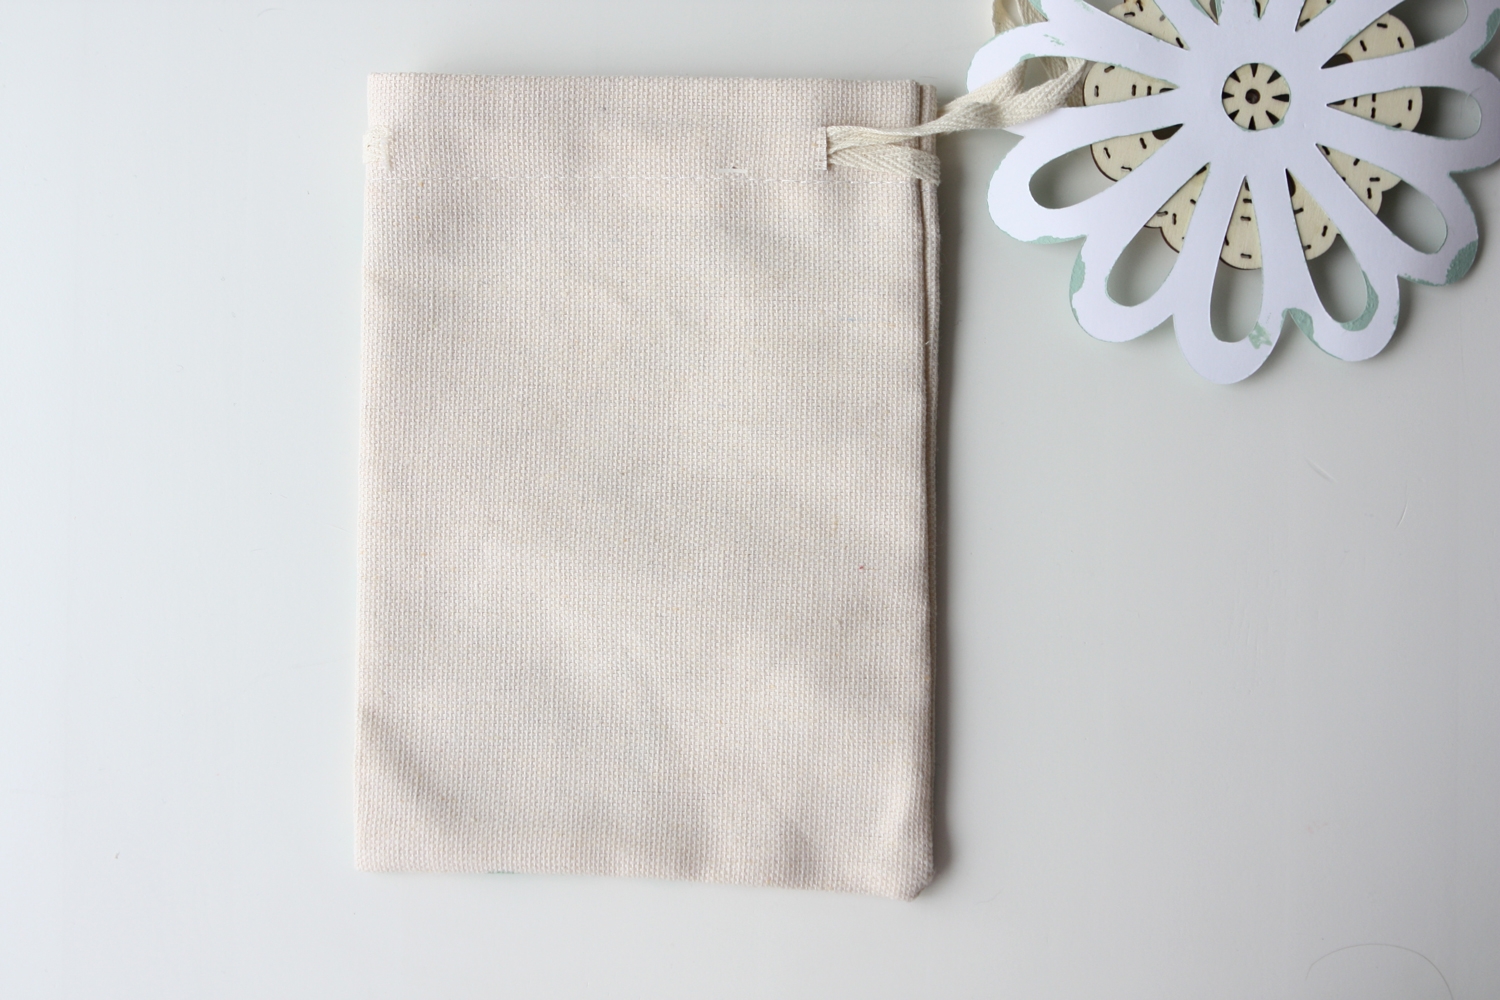
Tip: Not wanting the now painted laser-cut piece to go to waste, I added a wood piece to its center and turned it into a tag to go with the bag.
8. DIY "Laser Cuts:" Create your own laser-cut look using punches or decorative-edge scissors and crepe paper. I just adore the look of Mexican party flags and this idea by Studio DIY is a terrific way to get them in bitty size.
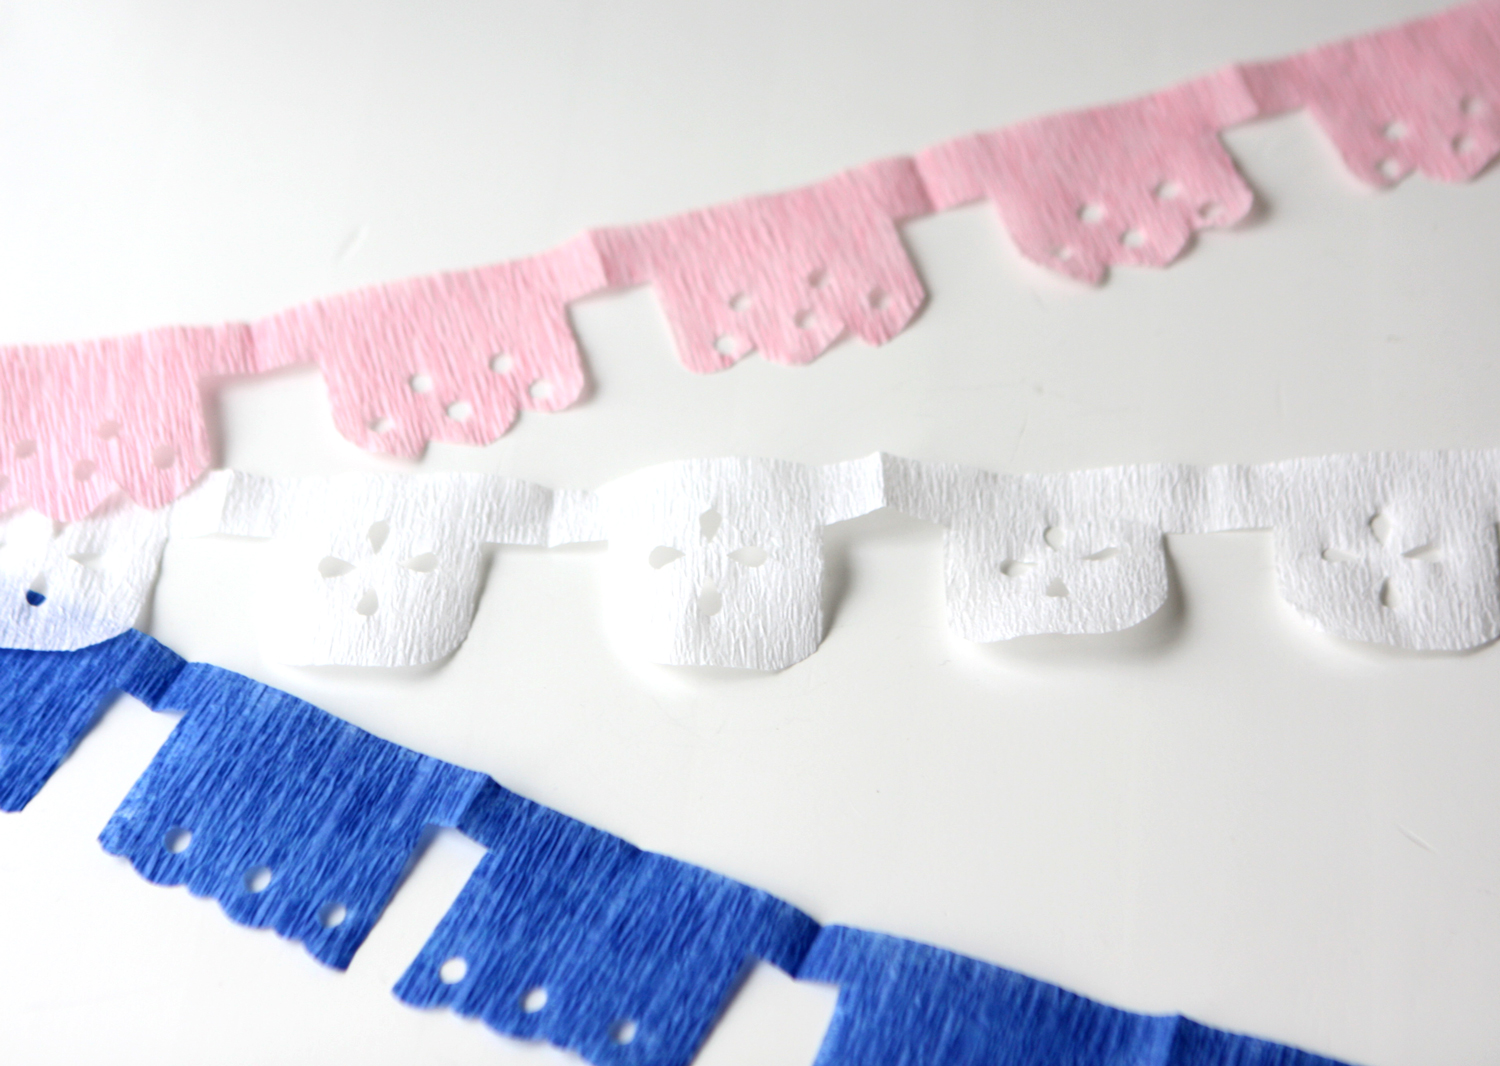
Tip: Simply fold the crepe paper accordion style, cut the bottom of the folded stack, and trim the sides to allow for tabs between each flag.
As you can see, the laser look is pretty sweet, whether you use pre-made products or create your own "cuts." I hope you'll add a little la-la-laser to your spring and summer seasons.
Cheers!
Megan